


11.6
Section 11
Reassembly
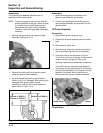
Remove the closure plate. If end play requires
adjustment, remove the original spacer and install the
appropriate size shim spacer in its place. Then follow
the procedure under “Install Closure Plate Assembly.”
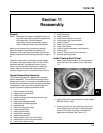
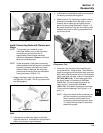
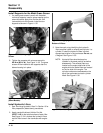
Install Closure Plate Oil Seal
1. Check to make sure that there are no nicks or
burrs in the crankshaft bore of the closure plate.
2. Apply a light coat of engine oil to the outside
diameter of the oil seal.
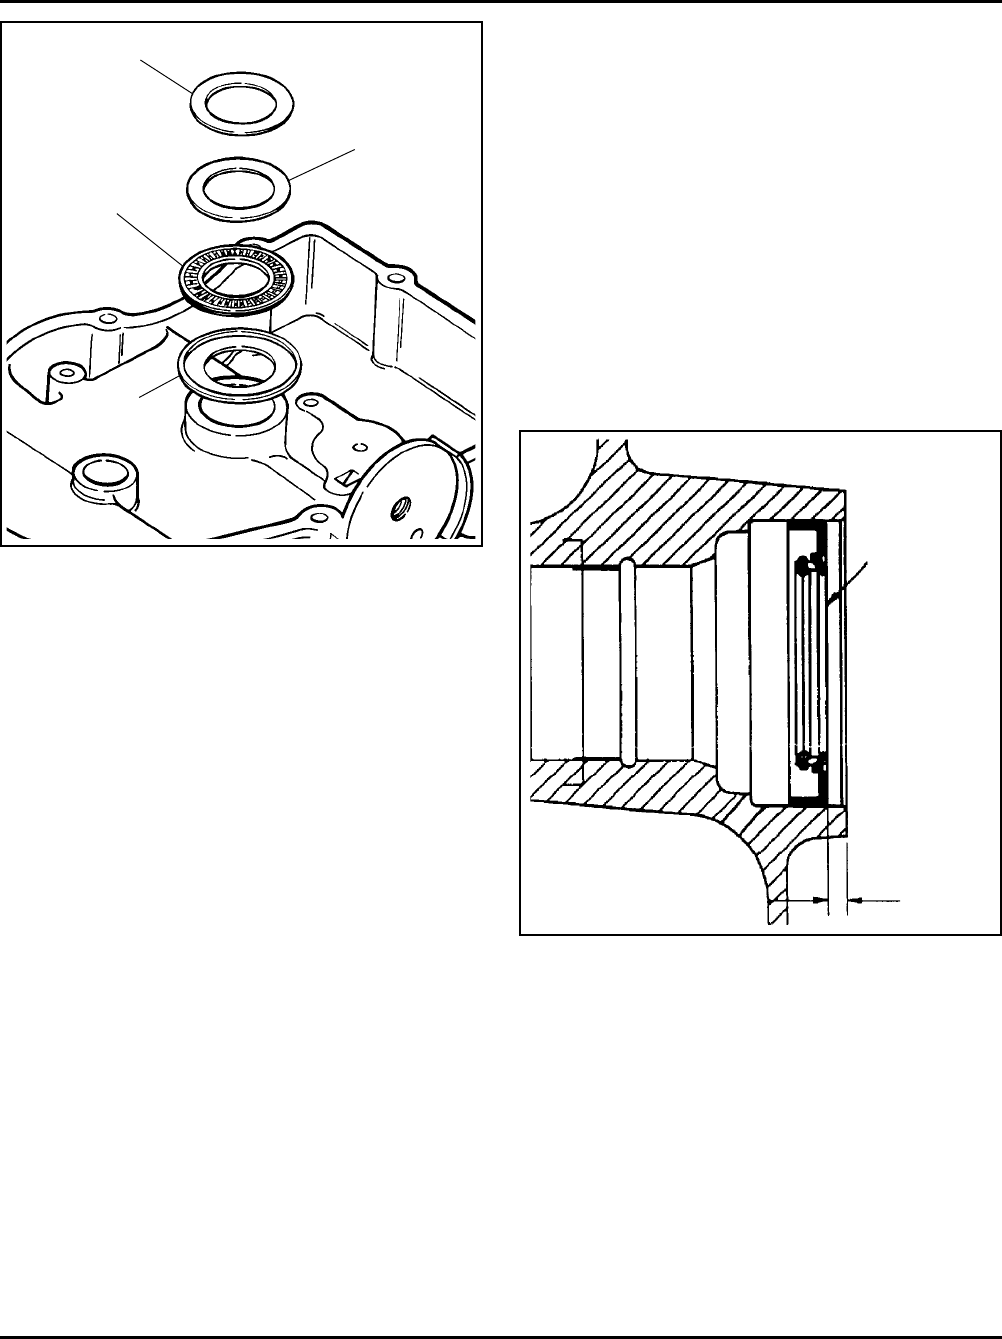
3. Drive the oil seal into the closure plate using a
seal driver. Make sure the oil seal is installed
straight and true in the bore to the depth shown in
Figure 11-18.
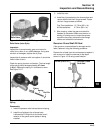
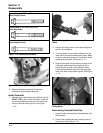
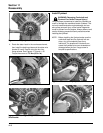
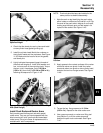
Figure 11-17. Correct Sequence of Thrust Bearing,
Washer and Shim in Closure Plate.
The race for the thrust bearing presses loosely into the
closure plate. If it is not already installed, push it into
the crankshaft bore inside the closure plate. Pack the
thrust bearing with heavy grease and stick the bearing
into the race. Wipe some grease on the face of the
thrust washer and stick it onto the thrust bearing. Wipe
some grease on the face of the original shim spacer
and stick it onto the thrust washer.
Install the closure plate onto the crankcase without
applying RTV sealant and secure it with only two or
three of the fasteners at this time. Use a dial indicator
to check the crankshaft end play. End play should be
0.05/0.50 mm (0.0020/0.0197 in.), except for CH25
engines below Serial No. 2403500008 end play should
be 0.050/0.75 mm (0.0020/0.0295 in.). Shim spacers
are available in the three color coded thicknesses
listed below if adjustment is needed.
Crankshaft End Play Shims
GREEN 0.8366-0.9127 mm
(0.8750 mm/0.034 in. Nominal)
YELLOW 1.0652-1.1414 mm
(1.1033 mm/0.043 in. Nominal)
RED 1.2938-1.3700 mm
(1.3319 mm/0.052 in. Nominal)
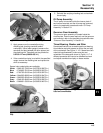
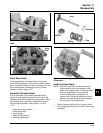
Closure
Plate
Bearing
Race
Thrust Shim
Needle Thrust
Bearing
Thrust
Washer
Oil Seal
8.0 mm
(.314 in.)
Seal Depth
Figure 11-18. Oil Seal Depth in Closure Plate.
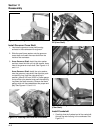
Install Closure Plate Assembly
RTV sealant is used as a gasket between the closure
plate and the crankcase. Refer to Section 2 for a listing
of approved sealants. Always use fresh sealant. Using
outdated sealant can result in leakage.
1. Be sure the sealing surfaces have been cleaned
and prepared as described at the beginning of
Section 10 or in Service Bulletin 252.
2. Check to make sure that there are no nicks or
burrs on the sealing surfaces of the closure plate
or crankcase.