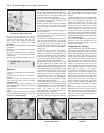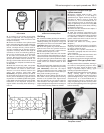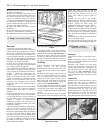
Refitting
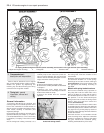
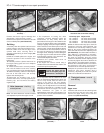
15 Refitting is a reversal of removal, but
tighten the union nuts carefully to the
specified torque while holding the connection
stubs stationary. Check and if necessary top-
up the engine oil as described in “Weekly
checks”.
12 Crankshaft oil seals -
renewal
4
Right-hand oil seal
1 Remove the crankshaft sprocket and,
where fitted, the spacer as described in
Section 5.
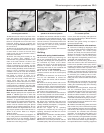
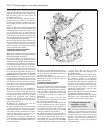
2 Punch or drill two small holes opposite each
other in the seal. Screw a self-tapping screw
into each, and pull on the screws with pliers to
extract the seal. Alternatively, the seal can be
levered out of position. Use a flat-bladed
screwdriver, and take great care not to damage
the crankshaft shoulder or seal housing.
3 Clean the seal housing, and polish off any
burrs or raised edges, which may have
caused the seal to fail in the first place.
4 Lubricate the lips of the new seal with clean
engine oil, and carefully locate the seal on the
end of crankshaft. Note that its sealing lip
must be facing inwards. Take care not to
damage the seal lips during fitting.
5 Fit the new seal using a suitable tubular
drift, such as a socket, which bears only on
the hard outer edge of the seal. Tap the seal
into position, to the same depth in the housing
as the original was prior to removal.
6 Wash off any traces of oil, then refit the
crankshaft sprocket as described in Section 5.
Left-hand oil seal
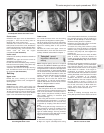
7 Remove the flywheel/driveplate as
described in Section 13. Make a note of the
correct fitted depth of the seal in its housing.
8 Punch or drill two small holes opposite
each other in the seal. Screw a self-tapping
screw into each, and pull on the screws with
pliers to extract the seal.
9 Clean the seal housing, and polish off any
burrs or raised edges, which may have
caused the seal to fail in the first place.
10 Lubricate the lips of the new seal with
clean engine oil, and carefully locate the seal
on the end of the crankshaft.
11 Fit the new seal using a suitable tubular
drift, which bears only on the hard outer edge
of the seal. Drive the seal into position, to the
same depth in the housing as the original was
prior to removal.
12 Wash off any traces of oil, then refit the
flywheel/driveplate as described in Section 13.
13 Flywheel/driveplate -
removal, inspection and
refitting
4
Removal
Flywheel (models with manual
transmission)
1 Remove the transmission as described in
Chapter 7A, then remove the clutch assembly
as described in Chapter 6.
2 Prevent the flywheel from turning by locking
the ring gear teeth with a screwdriver or
similar tool.
3 Slacken and remove the flywheel retaining
bolts, and remove the flywheel from the end
of the crankshaft. Be careful not to drop it; it is
heavy. If the flywheel locating dowel is a loose
fit in the crankshaft end, remove it and store it
with the flywheel for safe-keeping. Discard the
flywheel bolts; new ones must be used on
refitting.
Driveplate (models with automatic
transmission)
4 Remove the transmission as described in
Chapter 7B. Lock the driveplate as described
in paragraph 2. Mark the relationship between
the torque converter plate and the driveplate,
and slacken all the driveplate retaining bolts.
5 Remove the retaining bolts, along with the
torque converter plate and the two shims
(where fitted). Note that the shims are of
different thickness, the thicker one being on
the outside of the torque converter plate.
Discard the driveplate retaining bolts; new
ones must be used on refitting.
6 Remove the driveplate from the end of the
crankshaft. If the locating dowel is a loose fit
in the crankshaft end, remove it and store it
with the driveplate for safe-keeping.
Inspection
7 On models with manual transmission,
examine the flywheel for scoring of the clutch
face, and for wear or chipping of the ring gear
teeth. If the clutch face is scored, the flywheel
may be surface-ground, but renewal is
preferable. Seek the advice of a Peugeot
dealer or engine reconditioning specialist to
see if machining is possible. If the ring gear is
worn or damaged, the flywheel must be
renewed, as it is not possible to renew the
ring gear separately.
8 On models with automatic transmission,
check the torque converter driveplate
carefully for signs of distortion. Look for any
hairline cracks around the bolt holes or
radiating outwards from the centre, and
inspect the ring gear teeth for signs of wear or
chipping. If any sign of wear or damage is
found, the driveplate must be renewed.
Refitting
Flywheel - models with manual
transmission
9 Clean the mating surfaces of the flywheel
and crankshaft. Remove any remaining
locking compound from the threads of the
crankshaft holes, using the correct-size tap, if
available.
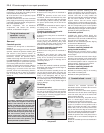
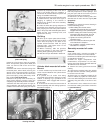
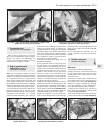
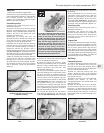
10 If the new flywheel retaining bolts are not
supplied with their threads already pre-
coated, apply a suitable thread-locking
compound to the threads of each bolt (see
illustration).
11 Ensure that the locating dowel is in
position. Offer up the flywheel, locating it on
the dowel, and fit the new retaining bolts.
12 Lock the flywheel using the method
employed on dismantling, and tighten the
retaining bolts to the specified torque.
13 Refit the clutch as described in Chapter 6,
and refit the transmission as described in
Chapter 7A.
Driveplate - models with automatic
transmission
14 Carry out the operations described above
in paragraphs 9 and 10, substituting
“driveplate” for all references to the flywheel.
15 Locate the driveplate on its locating
dowel.
16 Offer up the torque converter plate, with
the thinner shim positioned behind the plate
and the thicker shim on the outside, and align
the marks made prior to removal.
17 Fit the new retaining bolts, then lock the
driveplate using the method employed on
dismantling. Tighten the retaining bolts to the
specified torque wrench setting.
18 Refit the transmission as described in
Chapter 7B.
14 Engine/transmission
mountings - inspection and
renewal
3
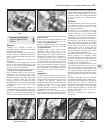
Refer to Part A, Section 10 but note that on
early models, shims are fitted between the
right-hand mounting rubber buffers and the
mounting top plate. These should be added or
removed as necessary to provide a clearance
of 1.0 mm between the buffers and top plate.
On later models, the shims have been deleted
and the rubber buffers are increased in
thickness to compensate. To prevent scuffing
noises from the buffers, it is recommended
that the inner surfaces which contact the
engine bracket are lubricated with rubber
grease.
2B•12 XU series engine in-car repair procedures
13.10 Apply thread locking compound to
the flywheel bolts if not already pre-coated


