


5.27
Section 5
Fuel System and Governor
5
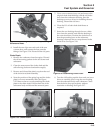
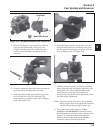
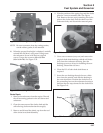
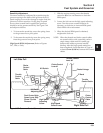
Figure 5-58. Checking Float Height.
NOTE: Be sure to measure from the casting surface,
not the rubber gasket, if still attached.
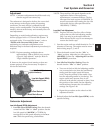
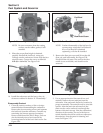
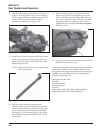
16. When the proper float height is obtained, carefully
reinstall the fuel bowl, using new O-Rings onto
the carburetor. Secure with the four original
screws. Torque the screws to 2.5 ± 0.3 N·m
(23 ± 2.6 in. lb.). See Figure 5-59.
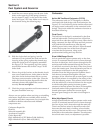
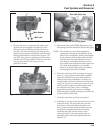
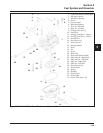
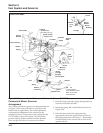
Figure 5-60. Choke Details.
5. Use a screw extractor (easy-out) and remove the
original choke shaft bushing with the old choke
lever from the carburetor housing. Save the
bushing to use as a driver for installing the new
bushing. Discard the old lever.
6. Clean the I.D. of both choke shaft bores as
required.
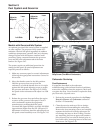
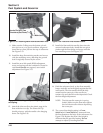
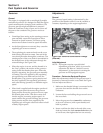
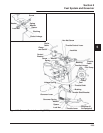
7. Insert the new bushing through the new choke
lever from the outside, and start the bushing in
the outer shaft bore. Position the choke lever so
the protruding boss on the carburetor housing is
between the two stops formed in the choke lever.
See Figure 5-61.
Figure 5-59. Installing Fuel Bowl.
Choke Repair
1. Remove the carburetor from the engine. Discard
the old mounting gaskets for the air cleaner and
carburetor.
2. Clean the areas around the choke shaft and the
self-relieving choke mechanism thoroughly.
3. Remove and discard the plastic cap from the end
of the choke lever/shaft assembly.
4. Note the position of the spring legs and the choke
plate for correct reassembly later. See Figure
5-60. Remove the two screws attaching the choke
plate to the choke shaft. Pull the shaft out of the
carburetor body and discard the removed parts.
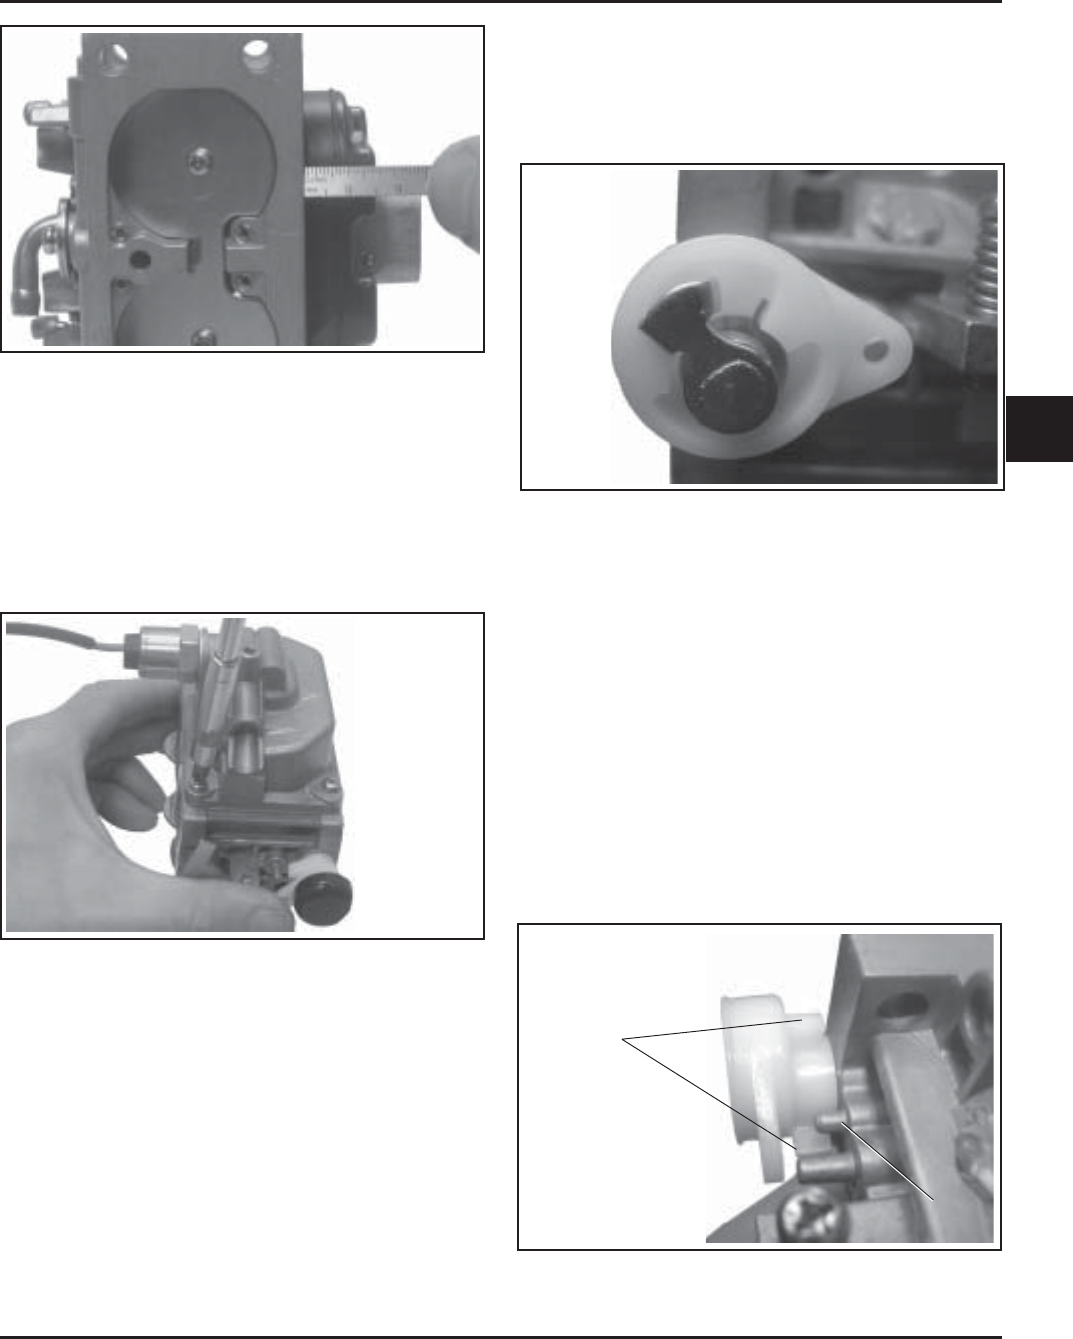
Figure 5-61. Assembling Choke Lever.
Stops
Boss