


5.11
Section 5
Fuel System and Governor
5
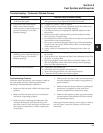
Disassembly
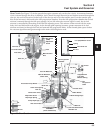
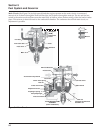
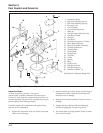
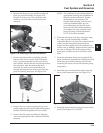
Use the carburetor repair kit (and the float repair kit if
float components are to be replaced). Refer to Figure
5-10 for parts identification. The Kohler part number
and the Nikki lot number are stamped on the choke
side flange on top of the carburetor body. Refer to the
parts manual for the carburetor involved to ensure the
correct repair kits and replacement parts are used.
Disassemble carburetor as follows after removal from
the engine. See Figure 5-10.
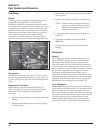
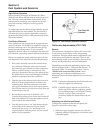
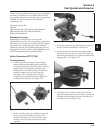
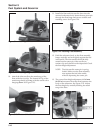
1. Remove the fuel bowl retaining screw or solenoid
assembly, then remove the bowl and bowl gasket.
On solenoid-equipped carburetors, the main jet is
mounted in the tip of the solenoid pin. Be careful
that it does not get damaged while the solenoid is
separated from the carburetor.
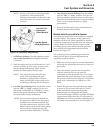
2. Pull the float hinge pin, and remove the float with
the inlet needle attached.
3. Remove the vent plug from the column on fuel
solenoid-equipped carburetors.
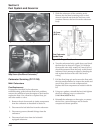
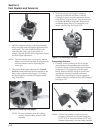
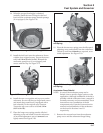
4. Remove the screws holding the throttle plate to
the throttle shaft, pull the throttle shaft from the
carburetor body.
5. Remove the screws securing the choke plate to
the choke shaft assembly and pull the choke shaft
assembly out of the carburetor body. Disassemble
the self-relieving parts from shaft as needed.
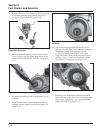
6. Remove the three screws holding the passage
cover to the body, remove the cover gasket.
7. Remove the idle fuel adjusting needle and spring
if it does not have a limiter. Remove the idle
speed screw and spring. Except for the slow jet
nozzle, main jet, and emulsion tubes, which are
considered non-serviceable, the carburetor is now
completely disassembled and ready for thorough
inspection and cleaning.