


Chapter 1 ATCA-C110/1G Baseboard Preparation and Installation
ATCA-C110/1G Installation and Use Manual
21
REVIEW COPY
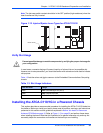
Note If a Rear Transition Module (RTM) is already installed in the same slot, be careful not to
bend any pins of the RTM connectors.
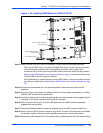
Step 4:Wait until the blue LED is illuminated. The blue LED indicates that the blade announces its
presence to the Shelf Management Controller.
Step 5:If the levers do not completely latch, remove the carrier board from the shelf and visually inspect
the slot to ensure there are no bent pins.
Step 6:When the carrier board you are installing is completely seated, release the handles to activate
the switch (Stage 3 in Figure 1-13). Wait for the blue LED to switch off. This indicates the board
is active. Secure it by tightening the captive screws at both ends of the face plate.
Note If a (RTM) is connected to the front blade, make sure that the handles of both the RTM
and the front blade are closed in order to power up the blade‘s payload.
Step 7:Connect cables to face plate, if applicable.
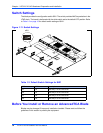
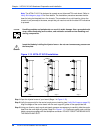
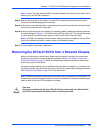
Removing the ATCA-C110/1G from a Powered Chassis
Before you remove your carrier board, please read all cautions, warnings, and instructions
presented in this section and the guidelines explained in Before You Install or Remove an
AdvancedTCA Blade on page 16. Refer to the following illustration and perform these steps
when removing the carrier board.
Hot swap compliant boards may be installed while the system is powered on. If a board is not
hot swap compliant, you should remove power to the slot or system before installing the board.
See Understand Hot Swap on page 18 for more information.
Note The removal procedure assumes that the board is being removed from a live chassis. The
procedure for removing the board when the chassis is not powered is the same, except that you
need not wait for the blue LED indications to proceed.
!
Caution
Data loss
Removing the blade with the blue LED still blinking causes data loss. Wait until the
blue LED is permanently illuminated, before removing the blade.