


5 - 71
ENG
CONNECTING RODS AND PISTONS
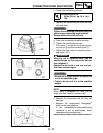
e. Tighten the connecting rod nuts.
f. Replace the connecting rod bolts and nuts
with new ones.
CAUTION:
Tighten the connecting rod bolts using the
plastic-region tightening angle method.
Always install new bolts and nuts.
g. Clean the connecting rod bolts and nuts.
h. Tighten the connecting rod nuts.
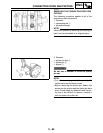
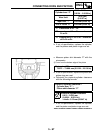
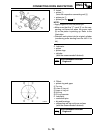
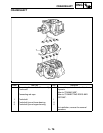
i. Put a mark 1 on the corner of the connect-
ing rod nut 2 and the connecting rod 3.
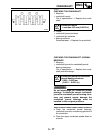
j. Tighten the nuts further to reach the speci-
fied angle (120°).
WARNING
When the nut is tightened more than the
specified angle, do not loosen the nut and
then retighten it.
Replace the bolt with a new one and per-
form the procedure again.
CAUTION:
• Do not use a torque wrench to tighten the
nut to the specified angle.
• Tighten the nut until it is at the specified
angles.
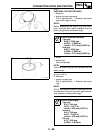
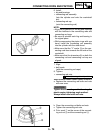
NOTE:
When using a hexagonal nut, note that the
angle from one corner to another is 60°
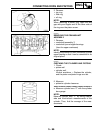
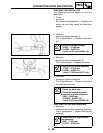
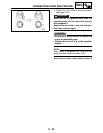
k. Remove the connecting rod and big end
bearings.
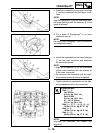
l. Measure the compressed Plastigauge
®
width on the crankshaft pin.
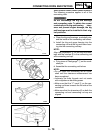
If the crankshaft-pin-to-big-end-bearing
clearance is out of specification, select
replacement big end bearings.
▲▲▲▲ ▲ ▲▲▲▲▲▲▲▲▲ ▲ ▲▲▲▲ ▲ ▲▲▲▲ ▲ ▲▲▲▲ ▲▲▲
T
R
.
.
Connecting rod nut
20 Nm (2.0 m · kg, 14 ft · lb) +
120°