Page 106
Cleaning and Maintaining Submerged Area/Velocity Sensors
Section 5
Note: Applying O-ring grease
(beryllium grease) to new or dry O-
rings improves the ease of insertion,
sealing, and life span of the O-ring.
6. Hold the canister up to the light and inspect the hydrophobic filter for
tearing or obstruction.
• If you see a small, dim light spot while looking through the hole, the
filter is in good condition. If you see a bright light spot, the filter if
probably torn. Replace the filter.
• If the desiccant beads were completely saturated with water or the
filter may have been saturated with water or grease, replace the filter.
If you need to replace the filter, complete the Hydrophobic Filter
Replacement Procedure on page 107, then continue with step 8.
7. Refill the canister tube with blue desiccant beads (Cat. No. 3624). Inspect
the O-ring (Cat. No. 5252) on the bottom cap for cracking, pits, or
evidence of leakage. Replace if necessary.
8. Make sure that the O-ring is clean and free of dirt or debris before
replacing the end cap.
9. Reinstall the end cap and check to make sure that the vinyl tubing is
securely fastened at each fitting.
5.6.4 Hydrophobic Filter Description
A single Teflon
®
hydrophobic filter (Cat. No. 3390) is installed in the top of the
canister to prevent liquid from entering the vent tube. This filter is very reliable.
For best performance and to avoid grease buildup on the filter during
submergence or surcharge conditions, hang the canister vertically so that the
end facing the sensor points downward.
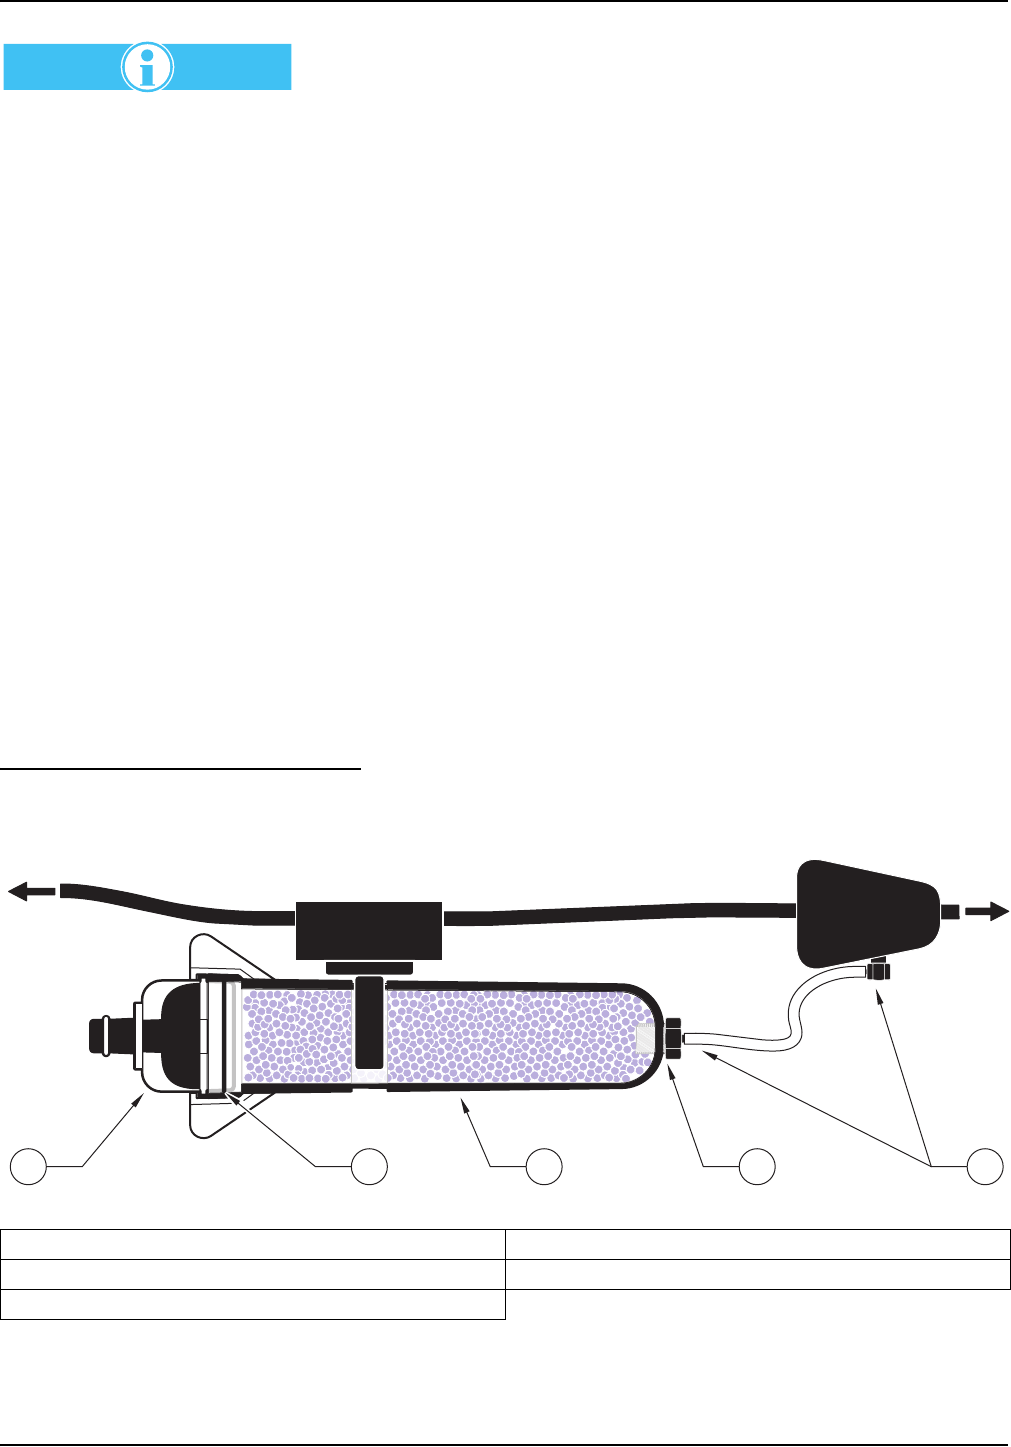
Figure 48 Removing the Tubing
1. End Cap 4. Teflon® Hydrophobic Filter (Cat. No. 3390)
2. O-ring 5. Vinyl Tubing
3. Desiccant Container
To Meter
To Sensor
54312