


64
Service Manual
Third edition, June 1997
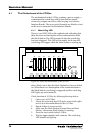
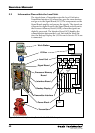
5.7.2 Replacing the LCI
Note: In order to avoid ESD-damages (electrostatic discharge), do
not touch the components or the pins in the connector at the back of
the board.
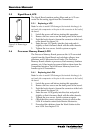
1. Switch the power off before starting this operation.
2. Remove the two screws on the front panel of the board.
Remove the four screws of the Backup Display.
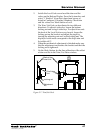
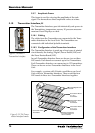
3. Push the knob down to loosen the connector at the back
of the board. See figure 5-4.
4. Pull the both the LCI and the Backup Display out
slightly so that you can remove the connectors on the
flat cables from the Backup Display.
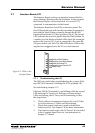
5. Enter the new LCI gently into the slot.
6. Connect connectors to the Backup Display.
7. Push LCI slightly so that it becomes flush with the other
boards.
8. Tighten the screws of LCI and Backup Display. Switch
system on again.
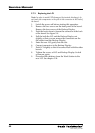
9. Download the database from the Work Station to the
new LCI. See chapter 3.24.