


17
Service Manual
Third edition, June 1997
5. Connect all connectors (that were previously connected
to the master) to the new master Work Station.
6. Start the new master Work Station.
7. Install program according to the instructions in chapter
3.6. During the installation, select this Work Station as
the master.
8. Install database according instructions in chapter 3.32.
9. Restart the Work Station by pressing the Reset-button
on the front.
If you have made a slave Work Station become a master,
follow the steps below to configure it as a master Work Sta-
tion.
10. Open the Work Stations-window in the Configure part
of the Work Station software. Make a note of the
ethernet addresses.
11. Exchange the ethernet addresses between the master
and the slave Work Stations. Check that the address
corresponds with the note you made in step 3 above.
12. Restart the Work Station by pressing the Reset-button
on the front.
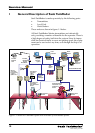
3.4 Replacing a Board in the Work Station
There are one or more boards, such as Light Pen Interface
Board, Serial Interface Board, Network Board, placed in the
Work Station. If you need to replace any of these boards,
follow the instructions below.
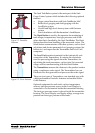
1. Remove the Work Station from its ruggedizing kit. For
opening the Work Station PC, follow the instructions in
the maker’s manual (Hewlett-Packard) enclosed in the
Saab TankRadar G3 manual binder.
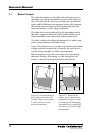
2. Remove the faulty board’s connectors at the back of the
Work Station. Remove the faulty board. In some cases it
might be necessary to remove more than one board to
reach the faulty board.
3. Replace it with a new board. Connect cables to the
boards. If you are replacing a Network Board, make a
note of the ethernet address printed on it.
4. Mount cover of the Work Station.
5. Mount the Work Station on its ruggedizing kit and
connect monitor and other peripheral units.
6. If you have replaced a Network Board, open the Work
Stations-window in the Configure part of the Work
Station software.
7. Enter the ethernet address of the new board.
8. Restart the Work Station by pressing the Reset-button
on the front.