Chapter 7: Working with waypoints 61
To manually empty the recycle bin:
1. Select Waypoints/Empty Waypoint Recycle Bin. A dialog box is
displayed asking you to confirm this action.
2. Click
OK
. The recycle bin will be emptied.
Note:
It is important to remember that each time RayTech is closed, the
recycle bin is emptied automatically, permanently deleting all the waypoints it
contains.
7.12 Transferring route and waypoint data
Route and waypoint data can be transferred both to and from RayTech.
There are several methods that you can use to transfer route and waypoint
data. The method that you use will depend on the links that are available,
these can be:
• Network - enables the transfer of data using any of the following
protocols:
• SeaTalk
hs
.
•hsb
2
.
•NMEA.
Note:
If you want to transfer data using hsb
2
or NMEA protocols, your
chartplotter should be configured to receive this data. For full
details of configuring your display refer to the relevant manufac-
turer’s handbook.
• Removable card - enables the transfer of data using any of the
following card types:
• C/E-Series or A65 via CompactFlash card.
• Pathfinder Plus (RL, RC, SL) displays via C-Map User Card.
• RC400 or RC435 via CompactFlash card.
• File - enables the transfer of data using any of the following file types:
• Excel file.
• Comma delimited file.
• Raymarine Waypoint file.
• C/E-Series file format.
• e-mail - enables the transfer of data using your e-mail client.
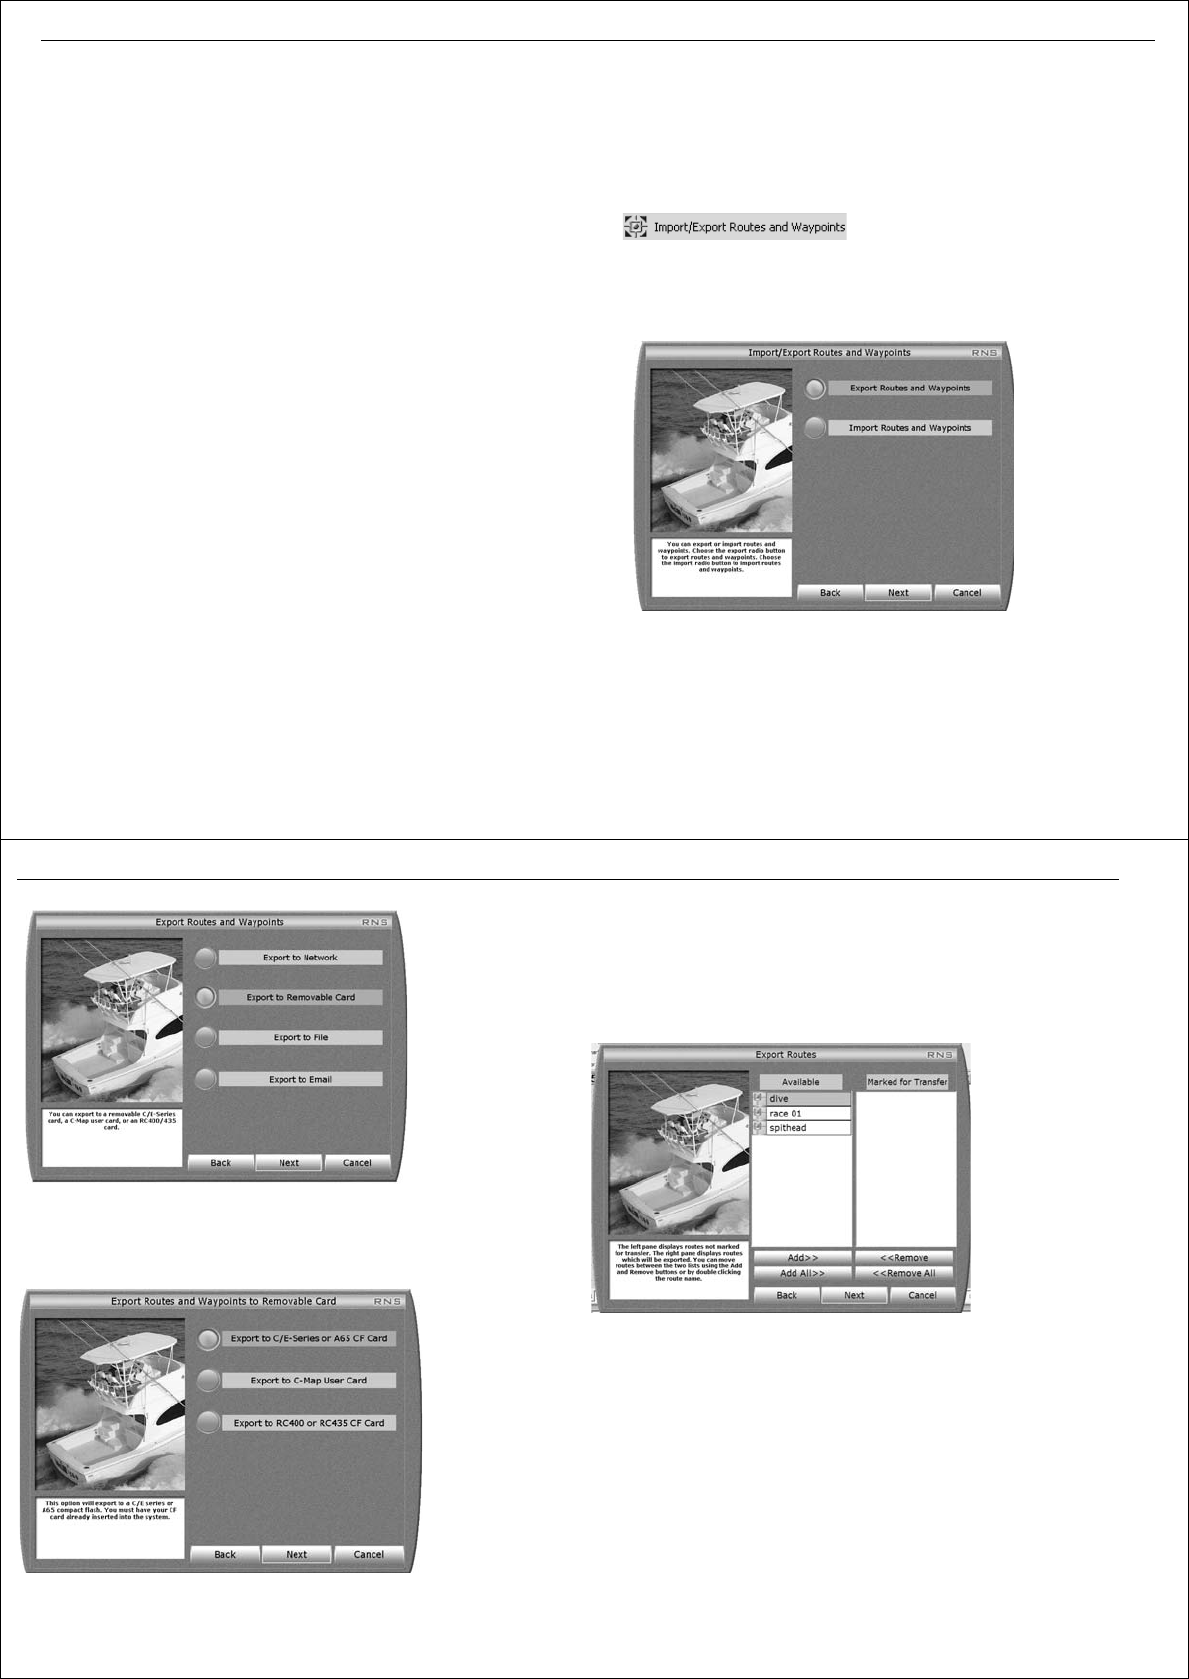
To transfer route and waypoint data:
1. Click
Import/Export Routes and Waypoints
. The import/export dialog
box appears.
2. Click the relevant button for the function you want to complete.
The method of importing or exporting data follows the same proce-
dures, the difference is in the dialog box wording. For ease of explana-
tion the following examples show the export dialog boxes.
3. Click
Next.
The Export Routes and Waypoints dialog box appears.
D8769_1
D
8766_1
62 RayTech RNS V6.0 - Users Guide
4. Click the button for the required method of data transfer.
5. Click
Next
. The method selection dialog box appears.
6. Click the required option for transferring all or selected routes and
waypoints. If you choose to transfer selected data only, the Export
Routes dialog box appears.
The left hand pane displays routes not marked for transfer. The right
hand pane displays routes which will be exported.
Routes can be moved between the two lists by using the
Add
or
Remove
buttons, or by double-clicking the route name.
7. Click
Next
. The Export Waypoint Folders dialog box is displayed.
The left pane displays waypoint folders not marked for transfer, the
right pane displays waypoint folders which will be exported. You can
move waypoint folders between the two lists using the
Add
or
Remove
buttons, or by double-clicking the waypoint folder.
D
8767_1
D
8768_1
D
8770_1


