


came with the card reader.
Refer to your GPS unit's manual for instructions on inserting the MMC.
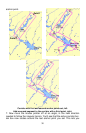
When the GPS unit is turned on, it will automatically display your MapCre-
ate custom map. Now you're ready to hit the road, but if you'd like to add a
little GPS navigation information to your unit, read the following lessons.
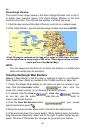
Creating a Waypoint
Waypoints are the building blocks of GPS navigation. A waypoint is simply
an electronic "address," based on the latitude and longitude of a position
on the earth. MapCreate lets you set a waypoint and mark it with a symbol,
name or number. This appears on the Master Map and eventually on the
map displayed on your GPS unit's screen.
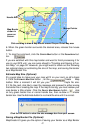
With your GPS, you can navigate to a waypoint. Waypoints can be used to
mark a favored spot or to mark something to avoid such as a dead-end
road or a boating hazard on a lake. Waypoints linked together in a se-
quence allow you to navigate along a pre-planned route. In the field, your
GPS unit can also be used to set waypoints. You can bring these field-
generated waypoints into MapCreate for storage and use on later trips.
Creating a waypoint on the Master Map is easy. Here's how: (Refer as
needed to the "Toolbars" section, beginning on page 35.)
54
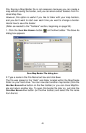
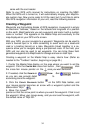
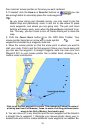
1. Center the Master Map display on the area where you want to set the
waypoint. Click the
CENTER MAP cross-hair button , then click
the cross-hair mouse pointer on the area you want centered.
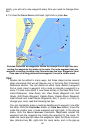
2. If needed, click the
ZOOM IN or ZOOM OUT buttons
so you can see enough detail to
accurately place the waypoint.
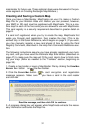
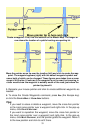
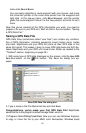
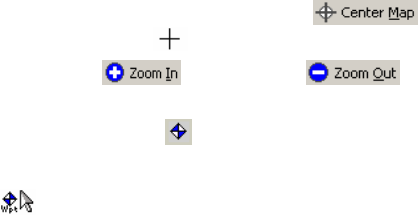
3. Click the
CREATE WAYPOINTS button on the GPS Data toolbar, and
your mouse pointer becomes an arrow with a waypoint symbol and the
abbreviation "Wpt."
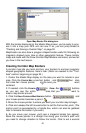
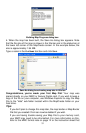
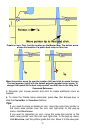
4. Move the mouse
pointer so that the arrow point is where you want the waypoint. Click to set
the waypoint. Move your mouse away, and you can see the waypoint, with
the default name of "Wpt 001."