


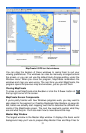
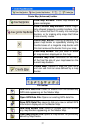


Move Down: click this to see additional area at the
bottom of the map (i.e., a given point will shift up,
bringing into view an area that was previously off
the map at the bottom.)
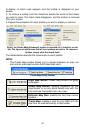
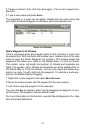
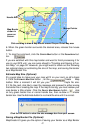
Map Category Options Window
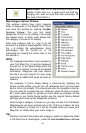
This window controls how much mapping
detail is displayed in the Master Map. Open
and close the window by clicking VIEW|MAP
CATEGORY OPTIONS. You can turn detail
categories off and on by clicking in the check
box beside them. A check mark shows that
the category is turned on for display.
Each map category with a + sign to its left
consists of a group of subcategories. Click on
the + to display the subcategories. Each
subcategory can be turned on or off
individually by clicking the check mark in the
box beside it.
40
Map Category Options.
NOTE:
For mapping information to be included in
your final Map File, it must be displayed
(turned on) in the Master Map when the
Map File is created. Turning off unneeded
information categories can help reduce
file size if you are trying to fit a very large
map onto an MMC with small amounts of
memory.
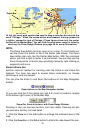
For example, if you're simply taking a cross-country highway trip
across several states, you can turn off categories such as rural roads
and/or minor city streets. This should give you the navigation informa-
tion you need at a smaller file size. However, when file size is no prob-
lem, most users prefer to include as much detail as possible. All the
examples in our User's Guide section use the original factory default
settings, which have all the categories turned on.
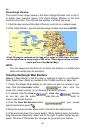
Even though a category is turned on, you may not see it on the Master
Map because you have zoomed out too far. That's no problem. As long
as the category is turned on, it will be included when you make your
Map File, no matter what your zoom range is.
Tip:
Another command that works with category options to determine detail
is the Detail Level Used option, under the
VIEW|VIEW MAP DISPLAY OPTIONS