


5.34
BODY / STEERING / SUSPENSION
9923142 - 2011 RANGER RZR / RZR S / RZR 4 Service Manual
© Copyright 2010 Polaris Sales Inc.
Installation
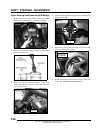
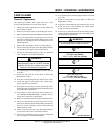
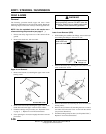
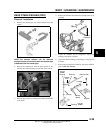
1. Place the A-arm in the correct position for ball joint
installation. Face the A-arm end flat on top of the driver.
Carefully drive the ball joint into place until the ball joint
is properly seated.
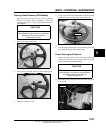
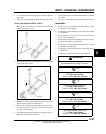
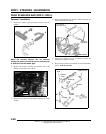
2. After the new ball joint is installed into the A-arm, install
a NEW retaining ring.
3. Reinstall the A-arm (see “FRONT A-ARMS - Removal /
Replacement”).
4. Repeat the ball joint service procedure for any additional
A-arm ball joint replacements.
FRONT STABILIZER BAR
(RZR / RZR S INT’L)
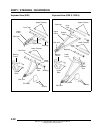
Sway Bar Linkage Removal
1. Elevate and safely support the front of the vehicle.
2. Remove the lower shock mounting fasteners and spacers
from both upper A-arms on each side of the vehicle (see
“Exploded View”).
3. Remove the bolts that attach the upper portion of the
linkages to the sway bar clamps and remove the linkages
from the vehicle (see “Exploded View”).
4. Inspect the linkage assemblies for signs of excessive wear
or damage. Replace linkage assembly if damaged.
5. Reverse the procedure for installation. Torque the linkage
fasteners to specification (see “Exploded View”).
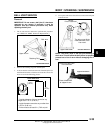
Stabilizer Bar Removal
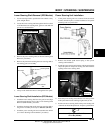
1. If stabilizer bar linkages are installed, remove the bolts that
attach the upper portion of the linkages to the sway bar
clamps (see “Exploded View”).
2. Remove the front bumper (see “BODY COMPONENT
REMOVAL - Front Bumper”).
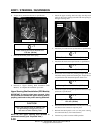
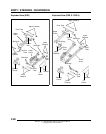
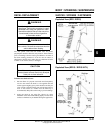
3. Remove the (4) T30 Torx fasteners retaining the front
bumper support to the frame.
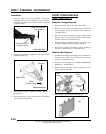
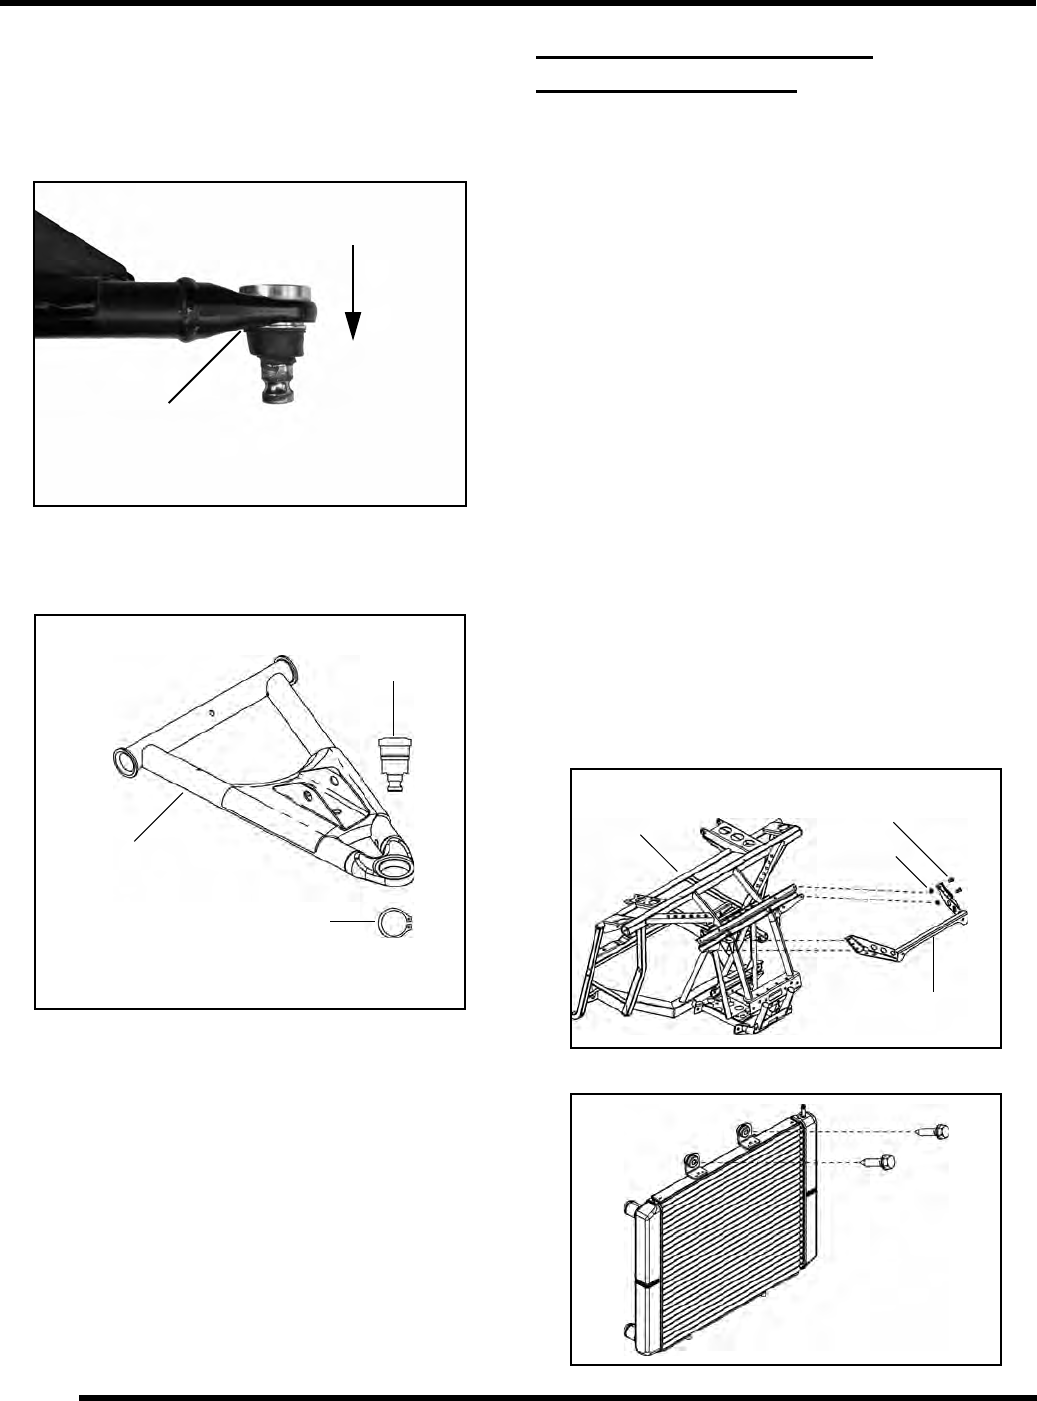
4. Remove the (2) upper radiator retaining bolts.
Press into the A-arm
in this direction
Place driver HERE
to support A-arm
Upper A-Arm Shown
Ball Joint
Upper A-arm
NEW
Retaining Ring
Standard RZR Shown
Main
Frame
Bumper
Support
T30
Screws
Nuts