


5.5
BODY / STEERING / SUSPENSION
5
9923142 - 2011 RANGER RZR / RZR S / RZR 4 Service Manual
© Copyright 2010 Polaris Sales Inc.
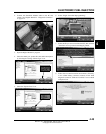
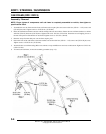
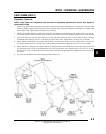
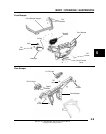
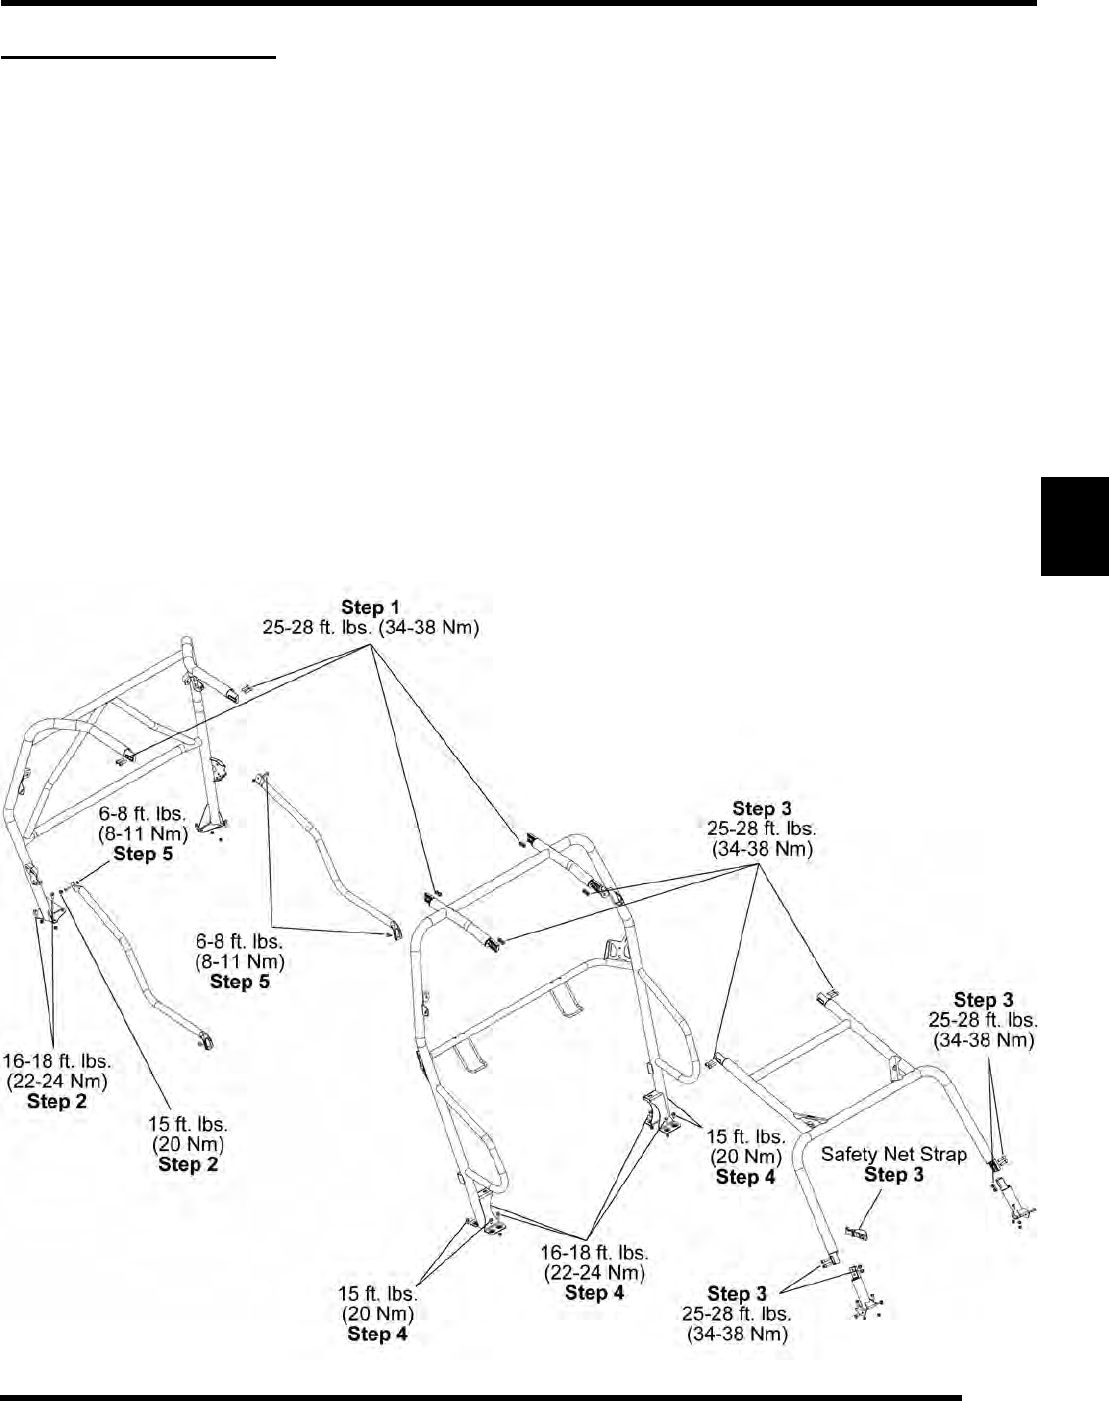
CAB FRAME (RZR 4)
Assembly / Removal
NOTE: Finger tighten all components until cab frame is completely assembled on vehicle, then tighten to
specifications listed.
1. Place rear cab frame and mid cab frame in the vehicle so they line up with the mounting holes. You may have to pull the rocker
panels out slightly to get the mid cab frame into place. Assemble at the coupler joint and secure with (3/8-16 x 1 1/4) bolts and
(3/8-16 Nyloc) nuts. Tighten bolts to 25-28 ft. lbs. (34-38 Nm).
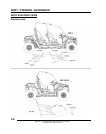
2. Fasten rear cab frame brackets to vehicle with (5/16-18 x 3/4) bolts and (5/16-18 Nyloc) nuts. Tighten bolts to 16-18 ft. lbs.
(22-24 Nm). Fasten a (5/16-18 x 3/4) tap screw to the rear of the bracket on each side. Tighten tap screws to 15 ft. lbs. (20 Nm).
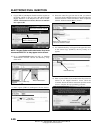
3. Insert strap from safety net over front coupler post on front cab frame. Fasten the front of the cab frame to the base brackets
and mid cab frame using the (3/8-16 x 1 1/4) bolts and (3/8-16 Nyloc) nuts. Tighten bolts to 25-28 ft. lbs. (34-38 Nm).
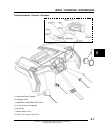
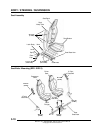
4. Fasten mid cab frame brackets to the vehicle with (5/16-18 x 1) bolts and (5/16-18 Nyloc) nuts. Tighten bolts to 16-18 ft. lbs.
(22-24 Nm). Fasten (5/16-18 x 3/4) tap screws to the outsides of each bracket. Tighten tap screws to 15 ft. lbs. (20 Nm).
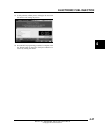
5. Fasten side bars by sliding the lower portion into the U-shaped bracket on the mid cab frame. Fasten the upper portion to the
rear cab frame using (1/4-20 x 3/4) Phillips-head screws and (1/4-20 Nyloc) nuts. Tighten screws to 6-8 ft. lbs. (8-11 Nm).
Fasten (1/4-20 x 3/4) Torx-head screws into lower portion of side bars through bracket slot. Tighten tap screws to 6-8 ft. lbs.
(8-11 Nm).
6. To remove the cab frame, reverse the assembly procedure (steps 1-5).