


Mapping datacards are available for use with your GPSMAP 195 system
to provide additional geographic detail in selected areas—including Canada
and Alaska. GARMIN data-cards are inserted in the card slot located on the
right side of the unit, and may be installed or removed at any time, whether
the unit is on or off.
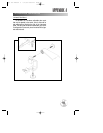
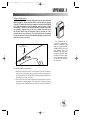
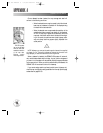
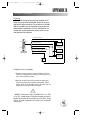
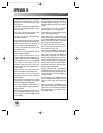
To install a datacard:
1. Open the cartridge door.
2. Insert the card into the slot. (Label should face up, toward the unit.)
3. Use your thumb to firmly push the card into place (until the
card will not go any further into the unit). If your GPSMAP 195 is on, a con-
firmation tone will sound when the card has been properly installed and
accepted.
4. Close the door.
NOTE: If you insert a datacard and get a ‘card format not recognized’ message, try
removing the card and reinserting it. If the card is still not recognized, contact the
dealer you purchased it from for assistance. Datacards are not waterproof, should not
be exposed to moisture or excessive static charges, and should be stored in the package
supplied with the card.
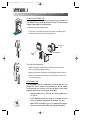
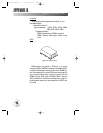
To remove a datacard:
1. Open the cartridge door.
2. Using the cartridge removal tool supplied with the unit, grasp the card
along the groove and pull outward.
3. If your unit is on, a confirmation tone will sound as the card is removed.
4. Close the door.
APPENDIX A
95
INSTALLING/REMOVING DATACARDS
?
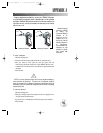
Installing a Datacard Removing a Datacard
Worldwide mapping
coverage is available
by adding the
International Mapping
Datacard to an
Americas-version
GPSMAP 195, or by
adding the Americas
Mapping Datacard to
an International-
version GPSMAP 195.
Datacards are also
available for Canada
East, Canada West
and Alaska.
gps 195 manual C 7/1/99 4:49 PM Page 95