


cGPSmapper Manual Creating custom type file
http://cgpsmapper.com/ 57 of 100
5.3 Putting it all together
If you are serious about creating custom types, I recommend that you prepare a small Polish
format test file so that you can quickly check your work. Once you have things the way
you want them, then you should apply your TYP file to your larger maps.
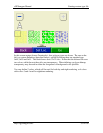
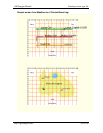
I use MapSource to test my work in progress, as it is much quicker than making a
GMAPSUPP.IMG file and downloading it to the unit. Once I’m satisfied with the
appearance in MapSource, then I proceed to do the download and inspect the results on the
GPSr. Working with small files makes this process much, much easier.
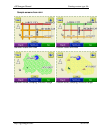
I’ve also created a template .MP file formatted to fill the nuvi screen exactly. This makes it
easy to compose test images that won’t be blocked by the menu and on-screen zoom
buttons. It’s fairly simple to create such a template for your specific unit, and it will save
you a lot of time in the long run. I recommend it.
Workflow
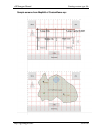
• Create a .MP file with the object types you are customizing. See CustomDemo.mp
for an example. Select all of the objects in the file and drag them a location near
where your GPSr thinks it is. When you look at your files on the GPSr, you’ll only
have to drag the map a little bit to see the results. Compile your .MP file.
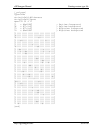
• Create a .TXT file with your custom type definitions. Use CustomTypesDemo.txt
as a starting point to create your own variations.
• Compile your custom type file with cGPSmapper, using the typ switch:
cGPSmapper typ CustomTypesDemo.txt
• Use Sendmap 2.0 v 3.3 to assemble your .img file and your .typ file into a single
GMAPSUPP.IMG.
• Download GMAPSUPP.IMG into your GPSr. Turn off any loaded mapsets other
than your .IMG file to make it easier to find and view your work.
• Repeat.