Server Utilities
Upgrading the BIOS
Follow the instructions in the readme file that came with the BIOS upgrade. When the
update completes, remove the bootable media from which you performed the upgrade.
NOTES
Do not power down the system during the BIOS update process! The
system will reset automatically when the BIOS update process is
completed.
You may encounter a CMOS Checksum error or other problem after
reboot. If this happens, shut down the system and boot it again. CMOS
checksum errors require that you enter Setup, check your settings, save
your settings, and exit Setup.
Clearing the Password
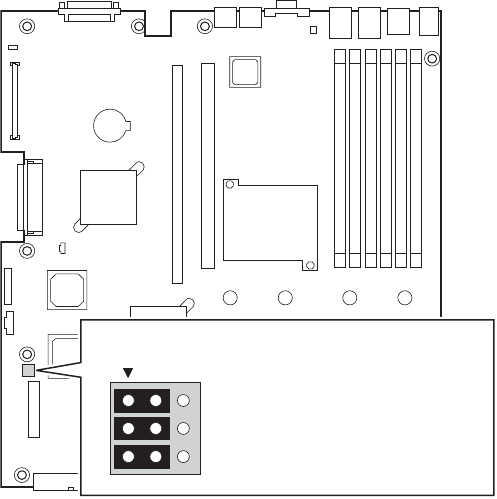
If the user or administrator password(s) is lost or forgotten, moving the password clear
jumper into the “clear” position clears both passwords. The password clear jumper must
be restored to its original position before a new password(s) can be set. The password
clear jumper is shown on the line labeled “A” in the figure below.
1. Power down the system and disconnect the AC power or DC mains.
2. Open the server chassis.
3. Move the jumper from the normal operation position, Password Clear Protect, at pins 1
and 2 to the Password Clear Erase position, covering pins 2 and 3 as indicated in the
following diagram.
TP01652
J1H2
32
A1-A2: CMOS Clear by BMC
1-2: Default
A2-A3: CMOS Clear Force Erase
B1-B2: Recovery Boot Disable (Normal Boot)
B2-B3: Recovery Boot Enable
C1-C2: Password Clear Protect
C2-C3: Password Clear Erase
C
B
A
Figure 57. Password Recovery Jumper
Intel
®
Carrier Grade Server TIGI2U User Guide 85
