


Platform Installations and Upgrades
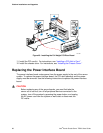
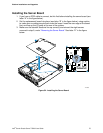
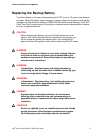
Installing the Power Interface Board
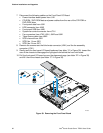
1. Press down on the power interface retention lever (see letter “A”) and lower the
replacement power interface board into place (see letter “B”).
2. Make sure that the power interface board is placed over the placement pegs and
gently push down (see letter “C”).
TP01702
A
C
B
Figure 48. Installing the Power Interface Board
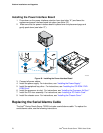
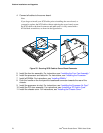
3. Connect all power cables.
4. Install the power supply. For instructions, see “
Installing the Power Supply.”
5. Install the peripheral bay drive. For instructions, see “
Installing the CD-ROM / DVD-
ROM Drive
.”
6. Install the processor air duct. For instructions, see “
Installing the Processor Air Duct.”
7. Install the PCI riser assembly. For instructions, see “
Installing a PCI Add-in Card.”
8. Install the chassis cover. For instructions, see “
Installing the Chassis Cover.”
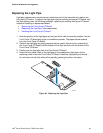
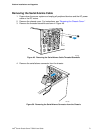
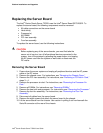
Replacing the Serial/Alarms Cable
The Intel
®
Carrier Grade Server TIGI2U includes a serial/alarms cable. To replace the
serial/alarms cable, use the following instructions.
Intel
®
Carrier Grade Server TIGI2U User Guide
70