


Platform Installations and Upgrades
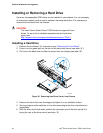
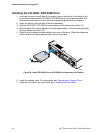
Installing the CD-ROM / DVD-ROM Drive
1. Lining up the pins on each side of the bracket (two on each side) to the holes in the
drive, set the replacement CD-ROM or DVD-ROM drive into the drive bracket. You
may need to push gently on one side of the bracket to push the pins into place.
2. Install the screw at the left side of the drive assembly.
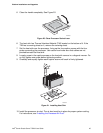
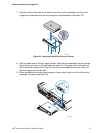
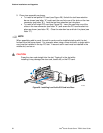
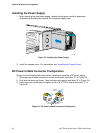
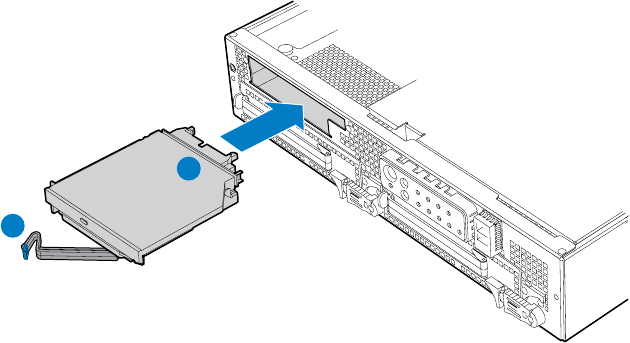
3. Slide the CD-ROM / DVD-ROM drive assembly into the chassis (see letter “A”).
4. With the black drive carrier handle in the fully open position, slide the drive assembly
into the chassis (see letter “B”).
5. Attach the drive power and data cables at the rear of the drive. When the cables are
firmly installed, the cable retention clips will lock into place.
TP01666
B
A
Figure 26. Install CD-ROM Drive or DVD-ROM Drive Assembly into Chassis
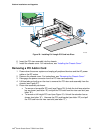
6. Install the chassis cover. For instructions, see “
Removing the Chassis Cover.”
7. Install the front bezel. For instructions, see “
Installing the Front Bezel.”
Intel
®
Carrier Grade Server TIGI2U User Guide
50