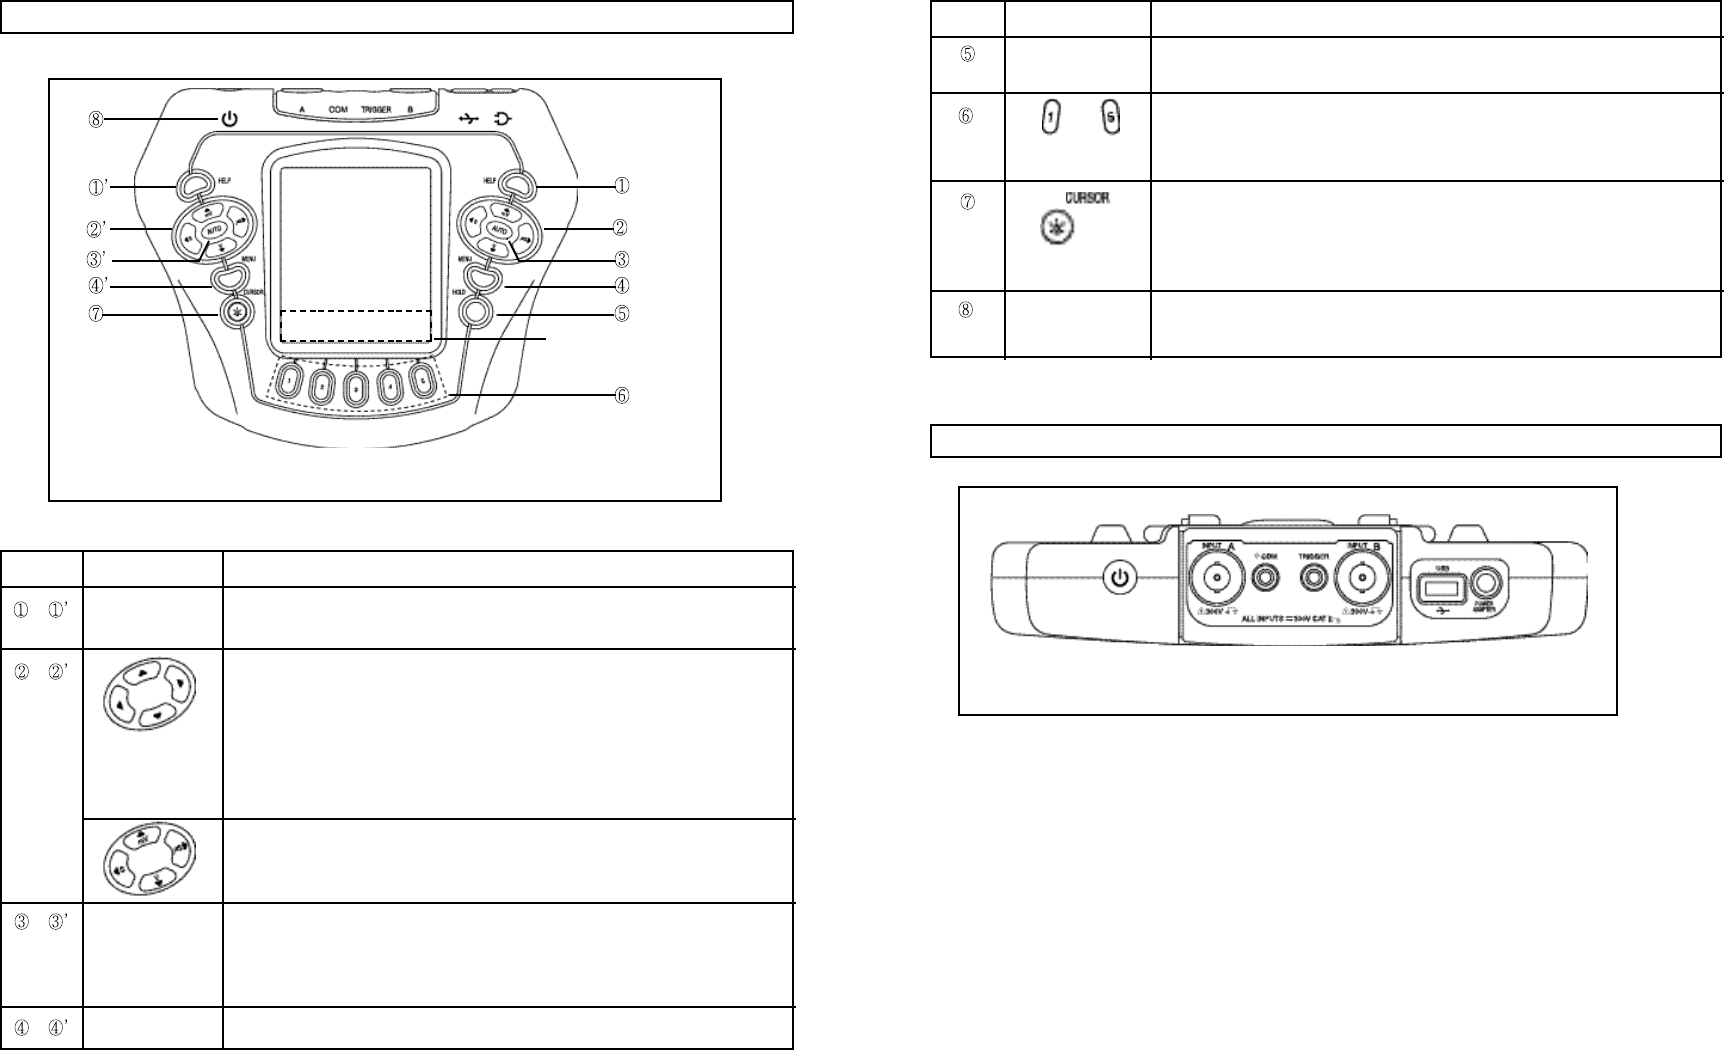
4.4 MEASUREMENT CONNECTIONS
INPUT A (Red)
INPUT A is used for all single channel measurements, sometimes combined with use of the other inputs, Various
test leads and adapters are required depending on the type of measurement selected.
INPUT B (Yellow)
INPUT B is used in conjunction with INPUT A.
• In COMPONENT TEST mode,
for DUAL 02 SENSOR measurements.
for PIP/SPOUT measurements.
for ADVANCE measurements.
• In SCOPE mode you can use the instrument as a dual trace oscilloscope with INPUT A and INPUT B connected.
4-7
4.3 FRONT PANEL CONTROLS
Key Control Overview
Key Descriptions
4-6
Figure 5. Measurement Connections
Figure 4. Key Control Overview
Display area for the
Function Key Labels
ITEM KEYS
DESCRIPTION
& HELP Displays information about the highlighted menu choice during menu selection.
Displays information about the function keys when a selected test is running.
& Performs one of the following actions:
• Moves up and down through menu choices.
• Moves a waveform up and down.
• Moves a voltage cursor up and down.
• Adjusts the trigger level when you are in the SCOPE mode.
• Moves a waveform right and left.
• Moves a time cursor left and right.
Ranges amplitude up and down for both channels (CH A & CH B).
Ranges Time Bass up and down for both channels (CH A & CH B).
& AUTO Sets automatic ranging on and off (toggle).
When on, the top right display shows AUTO. When this func
t
ion is
set on
,
it
searches for the best range and time base settings and once found it tracks the
signal. When this function is off, you should manually control ranging.
& MENU Takes you back to the main navigation menu.
ITEM KEYS DESCRIPTION
HOLD
Freezes the display (HOLD is displayed at the top right). Also displays a menu to
save or recall screens or to clear the memory.
to These are the Function keys.
The
f
unction assigned to eac h key is indicated by the Function Key Label
displayed above the key on the bottom display.
Cursor (Short) key allows you to use cursors for measurements on waveforms.
A cursor is a vertical or a horizontal line that you can move over the waveform
like a ruler to measure values at specific points.
Light (Long) key turns the LCD Backlight on and off.
POWER Turns
the power on and off (toggle)
.
When you turn
the power on, previous
settings are activated.


