


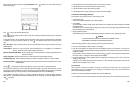
• Press the SAVE key to save the present screen in the next memory location.
• Press the RECALL key to recall the screen last saved in memory.
• Press the CLEAR key to clear all the memory locations.
• Press the BACK key to resume measuring or to return to the previous display.
Power Sources and Charging the Battery
The instrument can be powered from any of the following sources:
• Internal Battery Pack
This is a rechargeable Ni-MH Battery Pack already installed.
• Power Adapter
The Power Adapter / Battery Charger powers the instrument from a standard AC outlet and charges the installed
Ni-MH Battery Pack.
The instrument can be used during battery charging. Verify that your local line voltage is appropriate before using
the Power Adapter to power the instrument.
• Charging Adapter (Optional)
This adapter charges the instrument’s Ni-MH Battery Pack from a standard 12 V DC cigarette lighter outlet
WARNING
TO AVOID ELECTRICAL SHOCK, USE A BATTERY CHARGER THAT IS
AUTHORIZED FOR USE WITH THE AUTOMOTIVE SCOPE.
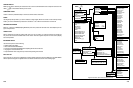
USE the following procedure to charge the battery pack and to power the instrument:
1. Connect the Power Adapter / Battery Charger to line voltage.
2. Insert the Power Adapter’s low voltage plug into the Power Adapter connector of the instrument. You can now use
the instrument while the Ni-MH batteries are being charged slowly. If the instrument is turned off, the batteries are
charged more quickly.
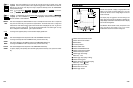
During operation, when the batteries are low, a battery symbol appears on the top right of the display. When
this occurs, replace or recharge the internal battery pack immediately.
3. The Power Adapter uses a trickle charging method for the batteries, so no damage can occur even if you leave it
charging for long periods.
Typically a 8 hour recharge during instrument working and a 4 hour recharge during instrument off provides the
instrument with the maximum use of 4 hours.
Auto-Power-Off
When operated on batteries (no adapter connec ted), the instrument conserves power by turning
itself off
automatically, if you have not pressed a key for 30 minutes or if the battery level is too low. The instrument turns
back on if the POWER key is pressed.
The Auto-Power-Off will be disabled automatically when enters the GMM mode.
You can adjust the Auto-Power-Off time between 5 minutes and 120 minutes to use “Instrument Setup” menu option.
4-5
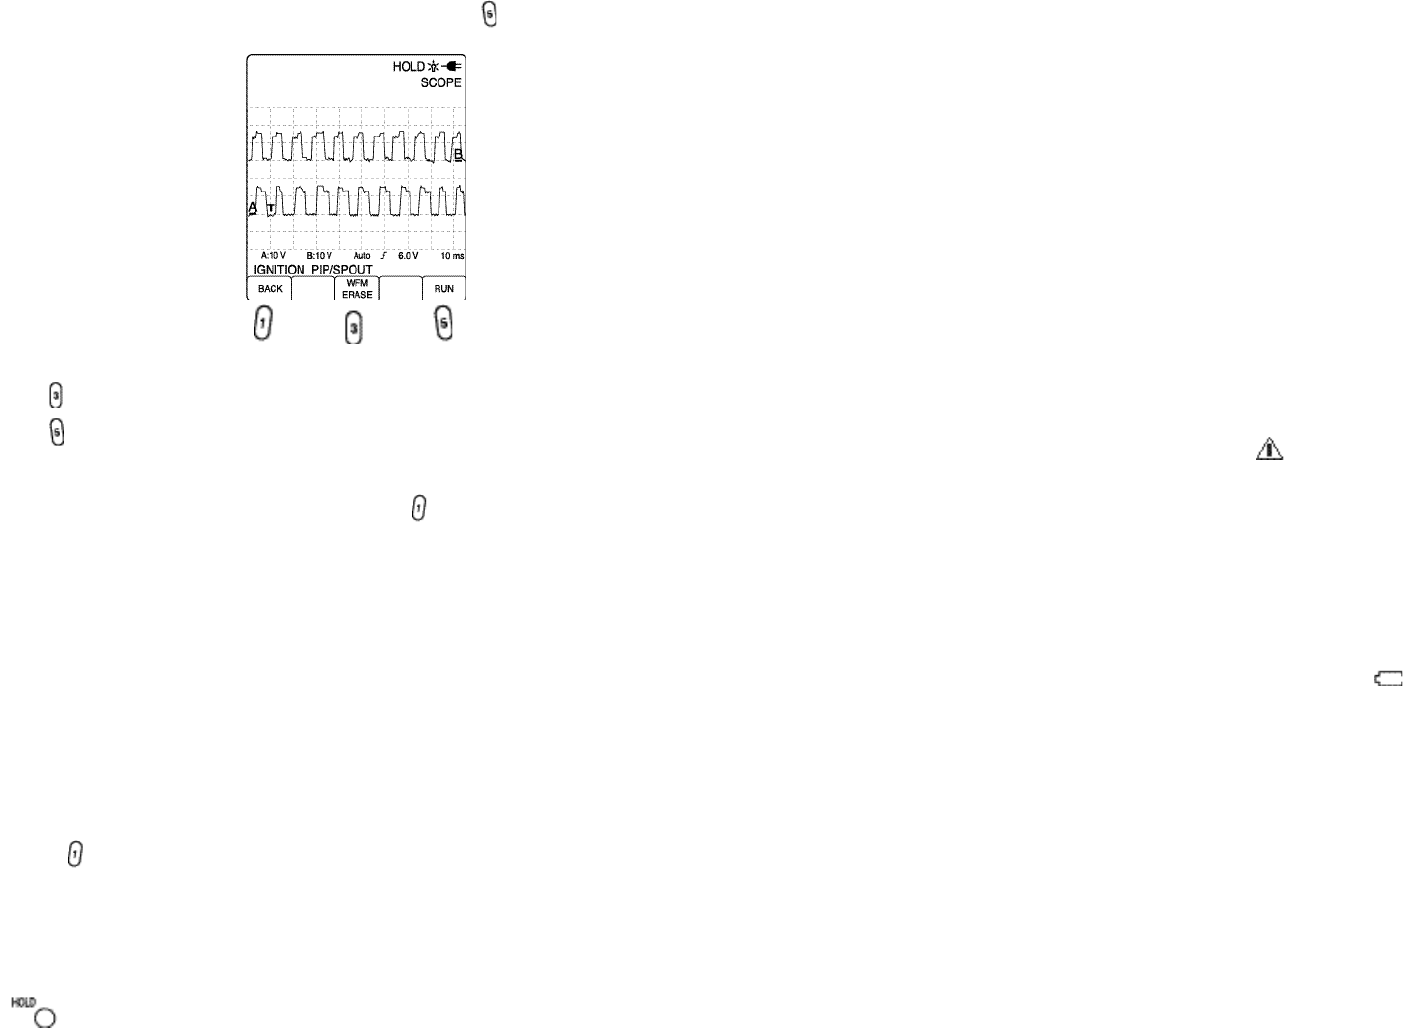
Next, press the Four Way arrow keys to highlight PIP/SPOUT. Press to select. Now, the instrument is ready to
test the input signal(s).
Press to remove the Reference Waveform(s).
Press to enter the scope into the test mode and continue to display the Reference Waveform(s) for comparison
to a live waveform(s).
For this demonstration, view the following reference information specific to the test selected. Reference information
is available at any time by pressing the HELP key. Press when finished viewing each area under the HELP
menu.
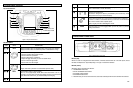
Pin # / Wire Color - Tells pin numbers and wire colors for both PCM and the other component connector for certain
COMPONENTS.
Test Procedure - Tells how to hook up the scope, and what accessories to use. Describes how to stimulate the
sensor or operate the circuit to obtain a diagnostic waveform.
Reference Waveform (REF WFM) - Shows a typical good or normal signal pattern. Describes significant waveform
features or variations.
Theory of Operation - Explains what the sensor or circuit does and the important signals involved.
Troubleshooting Tips - Tells the symptoms caused by the defective component and how to fix up the problems.
Function Information - Explains about the particular function keys that can be used for the selected test for certain
COMPONENTS.
Pressing moves back through the previous displays to return to active tests or to test selected menus.
After you choose a preset test, you may change most instrument settings to get a better look at the signal. You can
even change to different display modes, moving between Scope mode and GMM mode as needed, by pressing the
GMM MODE
function key in the Scope display or the SCOPE MODE
function key in the GMM display.
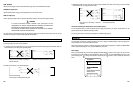
You can
hold the informa
t
ion in memory at any time by
pressing
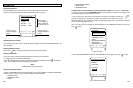
the HOLD key to freeze the display.
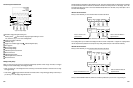
Notice
t
hat
SAV
E
, RECALL, and CLEAR
f
unction key label is displayed above the Function key on the
bottom display af
t
er
HOLD
(
) is pressed.
4-4
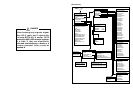
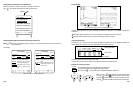
Figure 3. Example of Result Display