


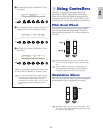
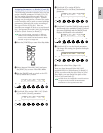

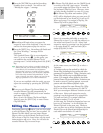

Control Sets and External MIDI Control
In a Control Set, the controllers are assigned to the
internal parameters of the synthesizer. However,
some controllers were originally designed for a
particular purpose, and send pre-defined MIDI
Control Change messages when used, regardless of
their Control Set allocations within the
synthesizer.
For example, the Pitch Bend Wheel, Modulation
Wheel and keyboard aftertouch were originally
designed to control pitch bend, modulation and
aftertouch. Therefore, when you use these
controllers, pitch bend, modulation and aftertouch
information is always sent to the MIDI Out.
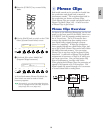
Let’s say the Pan parameter is assigned to the
Pitch Bend Wheel in a Control Set. Now,
when you move the Pitch Bend Wheel, the
internal tone generator of the synthesizer will
pan the sound but at the same time, the
original pre-defined Pitch Bend messages will
still be sent to the MIDI Out.
The controllers can also send MIDI Control
Change messages to control the parameters of
external MIDI devices. These assignments are
found in the VOICE (Vce) CTRL Assign1/2
screen of Utility Mode.
As Pitch Bend Wheel, Modulation Wheel and
keyboard aftertouch is pre-defined with specific
MIDI controls, you cannot assign MIDI
Control Changes.
You can also set up a controller such that it
sends one kind of Control message to the
synthesizer’s internal tone generator yet
another kind to the MIDI Out.
For example, in a Control Set you could assign
resonance to Assignable Knob [1]. Then, in the
VOICE CTRL Assign2 screen of Utility Mode,
you could assign Control Change Number 1
(Modulation) to the same knob. Now, when
you turn the knob, resonance will be applied to
the sound of the internal tone generator but at
the same time, modulation information will be
sent to the external MIDI device connected to
the MIDI Out.
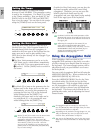
This aspect of the synthesizer makes it ideal for
use as a master controller for controlling external
MIDI devices. Add an optional Foot Controller
or Breath Controller for even more control.
50
Basics
Section
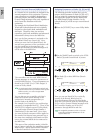
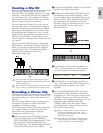
Assigning Parameters to Knobs [A], [B] and [C]
The following procedure explains how you can
assign a desired parameter to Knob [A], [B] or [C].
You can assign any parameters that are common
throughout the system (for all Play Modes) and
any MIDI Control Change Numbers. In the
example, Knob [A] will be set up to control Reverb
Return.
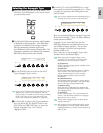
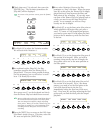
1 Press the [UTILITY] key to enter Utility Mode.
2 Use the [PAGE] knob to switch to the CTRL
KnobA (System Control Knob A) screen.
3Use Knob [2] to select REV-Rtn (Reverb
Return).
Now you can use Knob [A] for on-the-fly
control of the Reverb Return level in
Voice/Performance/Phrase Clip Play Mode.
Note that you can also send (by turning Knob
[A]) or receive Control Change messages with
the Controller Number set in the CC#
parameter through MIDI In and Out.
For assignable parameters, refer to “System
Controller Destination Parameters” in the
separate Data List.
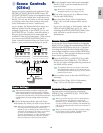
SHIFT PAGE
PART
ELEMENT
DATAA B C 1 2
CTRL KnobA) CC# Dest
Sys 01[ModWheel] REV-Rtn
SHIFT PAGE
PART
ELEMENT
DATAA B C 1 2
CTRL KnobA) CC# Dest
Sys 01[ModWheel] EQLow-G
VOICE PERFORM
UTILITY CARD
EDIT
COMPARE
JOB
STORE
MODE