149
Phrase Clip Mode
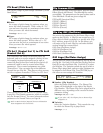
CTL Bend (Pitch Bend)
You can set a range of pitch change controlled by Pitch
Bend Wheel.
■ Lower
Set a range of pitch change by semitone when you
move the wheel downward. With a value of “-12,”
you can lower the pitch at a maximum of one octave
when you move the wheel downward.
❏ Settings: -48~0~+24
■ Upper
Set a range of pitch change by semitone when you
move the wheel upward. With a value of “+12,”
you can raise the pitch at a maximum of one octave
when you move the wheel upward.
❏ Settings: -48~0~+24
CTL Set1 (Control Set 1) to CTL Set4
(Control Set 4)
The controllers and knobs on the front panel, the
keyboard, and so on can be assigned a variety of uses.
For example, keyboard aftertouch can be used to
control the Reverb Send level and the Foot Switch (if
connected) could be used to control other Effect
parameters. These control assignments are called
“Control Sets.” You can assign up to four different
Control Sets per Clip Kit. Thus there are four screens,
each for a separate controller: CTL Set1 to CTL Set4.
These parameters are the same as for Normal Voices
(except for The ElemSw parameter, which is available
only for Normal Voices). For more information about
parameters of a Normal Voices, see Page 84.
Refer to Basics Section (Page 49) for more information
about assignment of a Control Set.
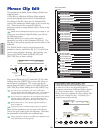
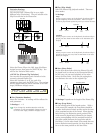
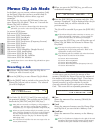
Control Set 1~4
Modulation Wheel
Knob
etc.
Controller
Set 1
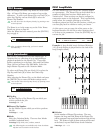
CTLíSet1) Src Dest Depth
Common FC(04) amp +63
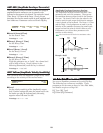
CTLíPitchBend) Lower Upper
C 1234 -12 +12
Clip Common Effect
You can set two types of Insertion Effects, plus two System
Effects (Reverb and Chorus). The following five screens
are available. The parameters are the same as those used in
Voice Edit Mode. Details are given on Page 88.
EFF InsEF (Insertion Effect)
EFF EF1 (Effect1)
EFF EF2 (Effect2)
EFF Rev (Reverb)
EFF Cho (Chorus)
Clip Key OSC (Oscillator)
You can set the parameters for the Phrase Clips which
make up the Clip Kit. A Clip Kit can contain up to 73
Clips, each of which is assigned to a specific note (Clip
Key) within a range of C0 to C6. In this Menu, you
can assign a Clip to each Clip Key and make detailed
settings using four screens below.
OSC Asgn (Oscillator Assign)
OSC Out (Oscillator Out)
OSC Pan (Oscillator Pan)
OSC Other (Oscillator Other)
OSC Asgn (Oscillator Assign)
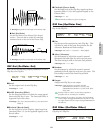
You can select the Phrase Clips assigned to the Clip Keys in
the Clip Kit. Use Knob [A] to select the Clip Key, then use
Knob [B] to select the Phrase Clip. Use Knob [1] to select
the Variation. The Variation controls the way in which a
Phrase Clip is played back, and up to eight Variations can
be assigned to each Phrase Clip. Press [ENTER] key at
this screen to enter settings for Variations.
■ Number (Clip Number)
Select the Phrase Clip Number. The Phrase Clip
Name will be displayed to the right of the Phrase
Clip Number. The Phrase Clip can be played back in
different ways, depending on the current Variation
parameter setting.
❏ Settings: 000 (off) ~ 256
If you select “off,” the Clip Key has no Phrase Clips
assigned to it.
■ Variation
Select the Variation Number. This controls the way
in which the Phrase Clip is played back.
❏ Settings: 1 ~ 8
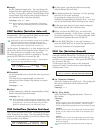
OSC Asgn) Number Variation [ENTER]
Key=C 3 001[InitSmpl] 1 to Edit


