


169
Utility Mode
Details about Controller Assign settings in Performance
mode are given on Page 126.
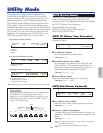
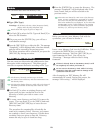
CTRL Assign1 (Controller Assign 1)
Use Knobs [C], [1] and [2] to assign Control Change
Numbers to the Breath Controller, Knob [1] and Knob
[2], respectively. The selected Control Change Name is
shown on the left of the display.
■ BC (Breath Controller)
Assign Control Change Number to the Breath
Controller. The Breath Controller is connected to
the BREATH connector (Page 18) on the rear panel.
When the Breath Controller is used, this Control
Change Number is transmitted. Also, if this Control
Change Number is received, the destination
parameter of the Breath Controller is controlled.
❏ Settings: 00 ~ 95 (see the separate Data List for details)
■ Knob1/2 (Knob [1]/[2])
Assign Control Change Numbers to Knobs [1] and
[2] on the front panel.
❏ Settings: 00 ~ 95 (see the separate Data List for details)
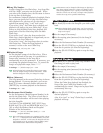
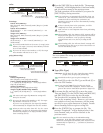
CTRL Assign2 (Controller Assign 2)
Use Knobs [C] and [1] to assign Control Change
Numbers to the Foot Controller and Ribbon Controller,
respectively. The selected function is shown on the left
of the display. Use Knob [2] to select the Ribbon
Controller Mode.
■ FC (Foot Controller)
Assign a Control Change Number to the Foot Controller.
The Foot Controller is connected to the FOOT
CONTROLLER connector on the rear panel (Page 18).
❏ Settings: 00 ~ 95 (see the separate Data List for details)
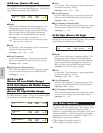
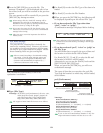
CTRL Assign2) FC RB----Mode
Vce [--------] 04 22 reset
Control Change
Number
ModeControl Change Name
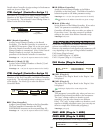
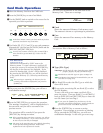
CTRL Assign1) BC Knob1 Knob2
Vce [FootCtrl] 02 16 17
Control
Change Number
Control Change Name
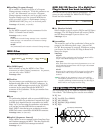
■ RB (Ribbon Controller)
Assign a Control Change Number to the Ribbon
Controller on the front panel. The Ribbon Controller’s
behavior depends on the Mode parameter setting.
❏ Settings: 00 ~ 95 (see the separate Data List for details)
Details about the Ribbon Controller are given on Page
48.
■ Mode (CS6x only)
Set the behavior of the Ribbon Controller. If you select
“hold,” the parameter controlled by the Ribbon
Controller will hold its value even after you release it.
If you select “reset,” the value returns to its default
setting at the center of the Ribbon Controller strip.
❏ Settings: hold, reset
PLG (Plug-in) (if a Plug-in Board has been installed)
If you have a Plug-in Board installed, the following three
screens are available for setting its parameters.
However, the number of sub-screens and parameters will
vary depending on the type of Plug-in Board installed.
PLG Status (Plug-in Status)
PLG1/2 MIDI (Plug-in 1/2 MIDI)
PLG1/2 System (Plug-in 1/2 System)
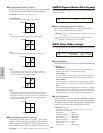
PLG Status (Plug-in Status)
The name of the Plug-in Board is displayed.
■ PLG1 (Plug-in 1)
The name of the Plug-in Board in the Plug-in 1 slot
is displayed.
■ PLG2 (Plug-in 2)
The name of the Plug-in Board in the Plug-in 2 slot
is displayed.
Nothing is displayed for vacant Plug-in slots.
■ Expand
This parameter is accessible only when you have two
identical Plug-in boards installed on the instrument.
The “part” setting enables two boards to work
separately (you can select them in two different
Parts). The “poly” setting enables two boards to work
together to double polyphonic notes (you can only use
them in a single Part with double polyphony).
❏ Settings: part, poly
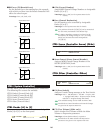
PLG1 MIDI (Plug-in 1 MIDI)
PLG2 MIDI (Plug-in 2 MIDI)
Set the MIDI parameters of the Plug-in Board.
PLG2 MIDI) Clock DevNo
PLG150-AN on all
PLG Status) PLG1:PLG100-VH Expand
Plugin PLG2:PLG150-AN ----