Projecting a Waypoint
Projecting a waypoint from any map item (another
waypoint, etc.) allows you to establish a new waypoint on a
bearing and distance projected from that map item.
To project a waypoint:
1. Select a map item from the Find ‘N Go Menu.
2. Highlight the Option Menu on-screen button at
the top of the Information Page and press the
CLICK STICK IN to display the options. Highlight
‘Project Waypoint’ and press IN.
3. Highlight either the bearing or distance field, then
press the CLICK STICK IN to display the numerical
keyboard. Move from numeral to numeral pressing the
CLICK STICK to enter numbers, then highlight ‘OK’
and press IN to finish.
Editing a Waypoint
A waypoint or contact can be edited to change the map
symbol, name, coordinates, elevation or add notes. It can
also be deleted.
To edit a waypoint:
1. Use the Find ‘N Go Menu to display the waypoint/
contact or highlight it on the Map Page and press IN.
2. To view the details, highlight the details field and
press LEFT or RIGHT on the CLICK STICK to change
to the next data field. To make changes to the
waypoint map symbol, name, location coordinates,
elevation fields and notes, highlight the desired
field and press the CLICK STICK IN to display the
keyboard. (For Notes, highlight ‘Edit’ and press IN to
start entering data, up to 30 characters.) Highlight
the desired characters on the keyboard to enter new
data and then select ‘
OK
’ and press IN to close the
keyboard.
3. Highlight the ‘
OK
’ button the press the CLICK STICK
to save the changes.
To delete a waypoint or contact:
1. Use the Find ‘N Go feature to display the point.
2. From the Highlight the ‘Delete’ button and then press
the CLICK STICK. Confirm the deletion.
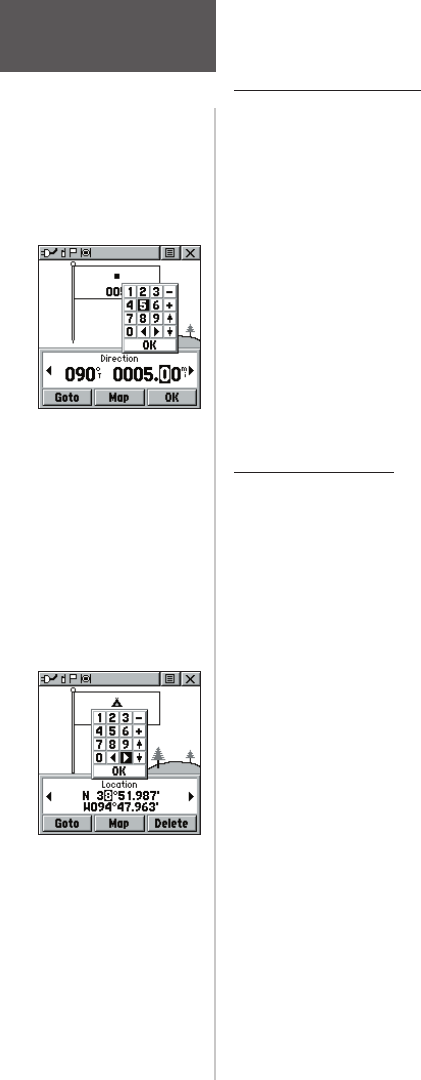
Enter Distance and
Bearing to project.
Using the keyboard to edit.
Main Menu Page
Waypoints
30
rino120_10.indd 30 9/13/2002, 3:27:50 PM


