


97
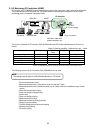
3.13.4.2 Interlock control settings on DIDO Controllers
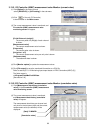
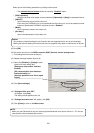
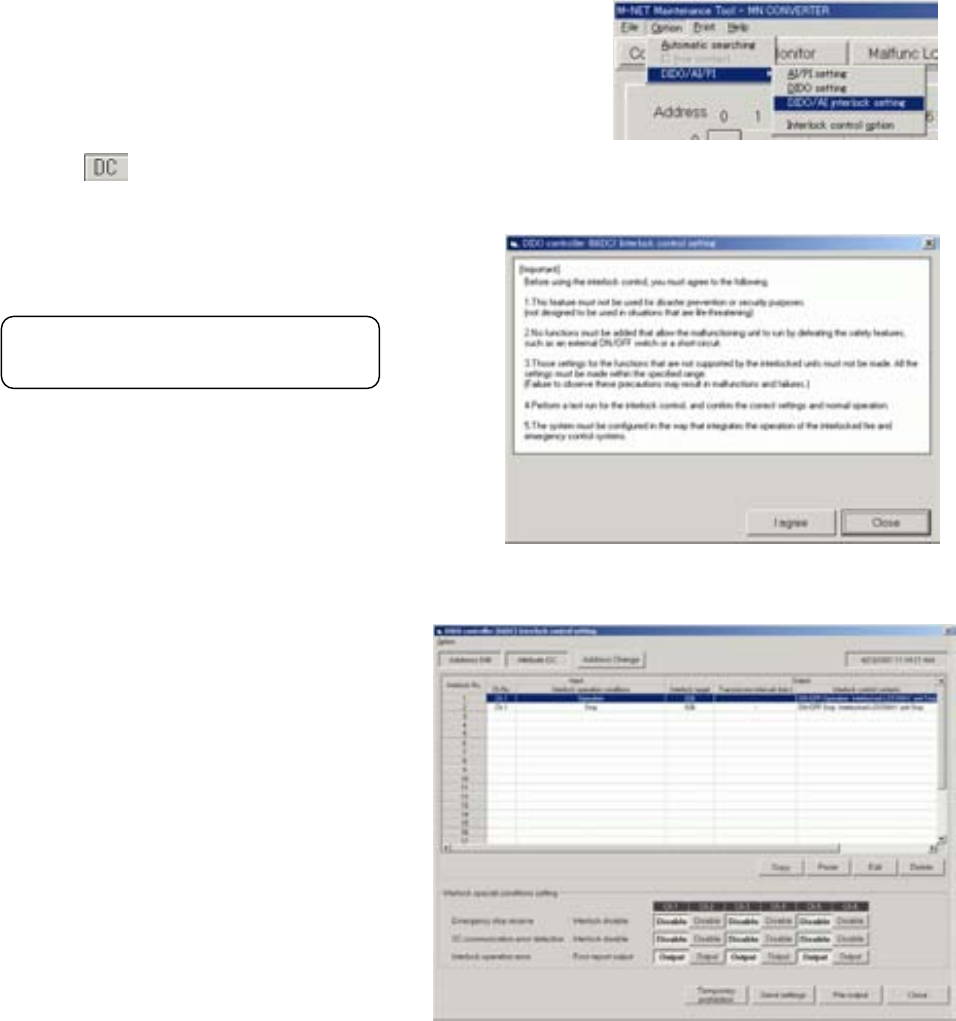
(1) Click [Option] in the menu bar and
select [DIDO/AI/PI] -> [DIDO/AI interlock setting] in
the sub-menu.
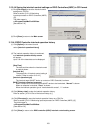
(2) Click of the unit (DIDO Controller)
to be monitored on the Main screen.
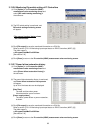
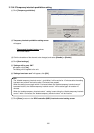
(3)DIDO controller (66DC) Interlock control setting
screen will appear.
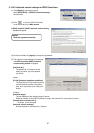
(4) Click the checkbox of [I agree] to accept the agreement.
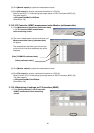
(5) The interlock control settings
is monitored,
and DIDO controller (66DC) Interlock
control setting screen will appear.
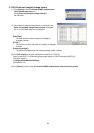
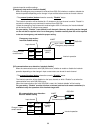
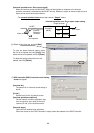
[Interlock No.]
The pattern No. of interlock control
setting is shown. Up to 24 patterns
can be set.
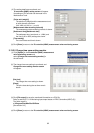
<Input>
[Ch No.][Interlock operation conditions]
The input Ch No. of the interlock source
and the interlock condition (operation,
stop, error occurrence, error reset) are
shown.
<Output>
[Interlock target]
The unit address of the interlock target is shown.
When the contact on the DIDO Controller is output, the channel No. to be output is shown.
[Transmission intervals (min.)]
“-“ is shown. (not to be used)
[Interlock control contents]
Interlock operation (start/stop etc.) is shown.
Caution:
Read the agreement carefully.