


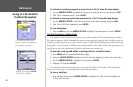
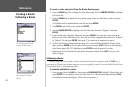

To create a route using text from the Route Review page:
1. Press the MENU key twice to display the Main Menu page. Use the ARROW KEYPAD to highlight
the ‘Route’ tab.
2. Press the
MENU key to display the route options page. Select the ‘New Route’ option and press
ENTER.
Or, highlight the first available blank route slot and press
ENTER.
3. Press
MENU, select ‘Edit as text’ and press ENTER.
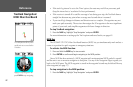
4. Use the ARROW KEYPAD to highlight the first field under the word “Waypoint” and press
ENTER.
5. From the Find menu, highlight ‘Waypoints’ and press
ENTER. (You may also choose from other
points, such as Cities, Tide Stations, etc. from this list.) Select a waypoint from either the “By Name”
or “Nearest” list and press
ENTER. (See page 37 for searching for waypoints by name.)
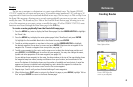
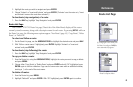
6. On the Point Review or Waypoint Review page, ‘OK’ is automatically highlighted. Choose ‘Show
Map’ and press ENTER to view the point on the map, then press QUIT to return to the Waypoint/
Point Review page. With ‘OK’ highlighted, press
ENTER to add the point to the route.
7. Repeat steps 4-6 until the desired route points have been entered. Press
QUIT to return to the
Route List page.
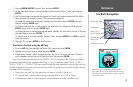
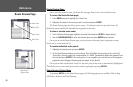
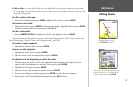
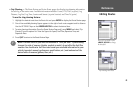
Following a Route
Once a route has been created, it can be activated and used for navigation with the NAV key. A
route may be followed in the same sequence as it was originally created, or inverted and followed from
the end point back to the beginning point.
To activate and follow a route:
1. From any page, press the NAV key, then using the ARROW KEYPAD, highlight ‘Follow Route’ and
press ENTER. (If you highlight a route from the Route List or Route Review page and press NAV,
the window automatically displays, ‘Follow <the route name>’.)
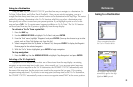
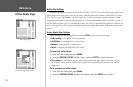
Choose the type of point you
want to add to the route.
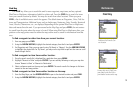
Choose a waypoint from either
the ‘By Name’ or ‘Nearest’
tab list.
44
Reference
Creating a Route/
Following a Route