


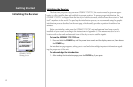


To activate the practice route stored in memory for navigation:
1. Press NAV. The option list page appears. (If you were selecting a single waypoint to navigate
to rather than a route, you could highlight the waypoint on the map, press NAV
and then press
ENTER.)
2. Use the ARROW KEYPAD to highlight the ‘Follow Route’ option. Press
ENTER to confirm.
3. The Select Route page appears, with the ‘GPSMAP TOUR’ route highlighted.
4. Press
ENTER then highlight ‘Activate’ and press ENTER again.
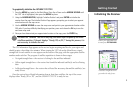
To zoom in to a closer map scale:
1. Repeatedly press the IN key until the 3 nm scale displays.
You may also hold the IN or OUT keys down to quickly scroll through the map scales. The Map
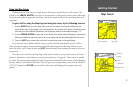
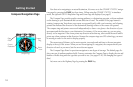
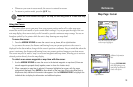
Page should now display five waypoints chained together in a simple route, with your boat at the first
route waypoint.
A data field at the top of the page now displays the speed, distance to the second route waypoint,
and a compass ribbon which shows you which way to go. To get started, let’s enter a speed for our
vessel, which we can do from the Main Menu Page.
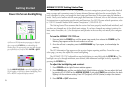
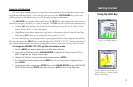
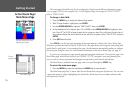
To enter a boat speed:
1. Press the MENU key twice to display the Main Menu Page.
2. Use the ARROW KEYPAD to highlight the ‘Setup’ tab, then press RIGHT then DOWN until the field
below the word ‘Speed’ is highlighted on the ‘System’ submenu tab and press
ENTER.
3. Use the ARROW KEYPAD to enter a speed of 40 knots.
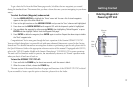
4. Press
ENTER to finish, and PAGE until you return to the Map Page.
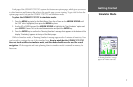
Once a speed has been entered, you’ll notice that the map automatically begins to move slowly,
keeping your boat centered on the display. The direction of movement, also called ‘track’, is controlled
by the simulator.
The Set Position, Track Control, Track
and Speed fields only show while in
simulator mode.
You can also Invert a route to
follow it in reverse.
12
Getting Started
Simulated Tour