


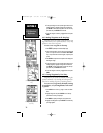


6.11 Route Navigation
Route navigation allows you to manually create a
sequence of intermediate waypoints which lead you to
your final destination.
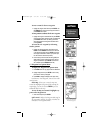
The NavTalk will store up to 20 reversible routes,
with up to 30 waypoints in each route. Routes can be
created and modified by text entry (using the ARROW
Rocker Pad to enter waypoint names) or directly from
the map display.
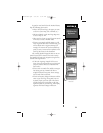
Using the map display allows you to see each route
graphically on-screen as you create, review, modify or
navigate the route. All of the route functions are
accessed through the Main Menu.
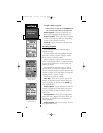
To create a new route by entering the name of
each waypoint:
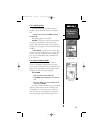
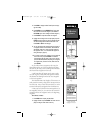
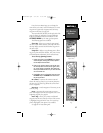
1. Press MENU twice to display the Main Menu.
2. Highlight Routes and press ENTER. The Route List is dis-
played, showing all routes stored in memory.
3. Press MENU to display the Route Options.
4. Highlight New Route and press ENTER. The NavTalk cre-
ates a route called EMPTY- 1. (The name changes as you
add waypoints to the route, so make note of the route
name for future reference.)
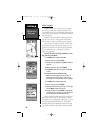
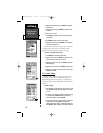
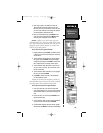
5. Highlight the first waypoint name field and press ENTER to
begin entering the name of an existing waypoint in memory.
6. Use the ARROW Rocker Pad to enter the name of the
route waypoint.
7. Press ENTER to accept the selected route waypoint.
8. Highlight the next waypoint name field, press ENTER and
repeat steps 6 & 7 until all the waypoints have been added
to the route.
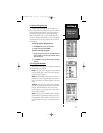
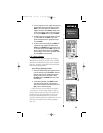
To create a route from the map display:
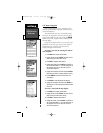
1. Press MENU twice to display the Main Menu.
2. Highlight Routes and press ENTER. The Route List is dis-
played, showing all routes stored in memory.
3. Press MENU to display the Route Options.
4. Highlight New Route and press ENTER. The NavTalk cre-
ates a route called EMPTY- 1. (The name changes as you
add waypoints to the route, so make note of the route
name for future reference.)
SECTION 6
GPS Receiver
Reference
82
Routes List
Routes Menu
Route Creation
NvTlkGPS.qxd 2/1/00 4:13 PM Page 22