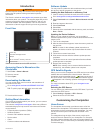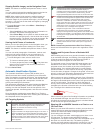
All of the options along the bottom of the home screen are
visible on all other screens, except for the Settings button. The
Settings button is accessible only from the home screen.
When viewing another screen, you can return to the home
screen by selecting Home.
When multiple displays are installed on the Garmin Marine
Network, you can group them together into a station. A station
enables the displays to work together, instead of as several
separate displays. When you select Home on one display, each
display in the station returns to the home screen. You can
customize the layout of the pages on each display, making each
page different on each display. When you change the layout of a
page in one display, the changes appear on only that display.
When you change the name and symbol of the layout, those
changes appear on all displays in the station, to maintain a
consistent appearance.
The SmartMode
™
items are geared toward an activity, such as
cruising or docking. When a SmartMode button is selected from
the home screen, each display in the station can show unique
information. For example, when Cruising is selected from the
home screen, one display can show the navigation chart and
another display can show the radar screen.
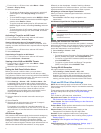
Adding an Item to Favorites
1
From the home screen, select a category from the right.
2
Hold a button.
The item is added to the Favorites home screen category.
Customizing the Layout of a SmartMode or
Combination Page
You can customize the layout and data shown in the
combination pages and SmartMode layouts. When you change
the layout of a page in a display you are interacting with, the
change appears only on that display, except for the SmartMode
name and symbol. When you change the SmartMode name or
symbol for the layout, the new name or symbol appears on all
displays in the station.
1
Open a page to customize.
2
Select Menu.
3
Select Edit Layout or Edit Combo.
4
Select an option:
• To change the name, select Name or Name & Symbol >
Name, enter a new name, and select Done.
• To change the SmartMode symbol, select Name &
Symbol > Symbol, and select a new symbol.
• To change the number of functions shown, select
Functions, and select a number.
• To change the function of the portion of the screen, select
the area to change, and select a function from the list on
the right.
• To change the vertical or horizontal split orientation of a
multi-function display, select Split, and select an option.
• To change how data appears on the page, select
Overlays, and select an option.
• To change the type of data shown, select Overlays, select
a data field, and select the new data type.
Adding a SmartMode Layout
You can add SmartMode layouts to suit your needs. Each
customization made to one SmartMode layout for the home
screen in a station appears on all displays in the station.
1
From the home screen, select SmartMode™ > Menu > Add
Layout.
2
Select an option:
• To change the name, select Name & Symbol > Name,
enter a new name, and select Done.
• To change the symbol, select Name & Symbol > Symbol,
and select a new symbol.
• To change the number of functions shown, select
Functions, and select a number.
• To change the function of the portion of the screen, select
the area to change, and select a function from the list on
the right.
• To change the vertical or horizontal split orientation of a
multi-function display, select Split, and select an option.
• To change how data appears on the page, select
Overlays, and select an option.
• To change the type of data shown, select Overlays, select
a data field, and select the new data type.
Adding a Custom Combination Screen
You can create a custom combination screen to suit your needs.
1
Select Combos > Menu > Add Combo.
2
Select an option:
• To change the name, select Name, enter a new name,
and select Done.
• To change the number of functions shown, select
Functions, and select a number.
• To change the function of the portion of the screen, select
the area to change, and select a function from the list on
the right.
• To change the vertical or horizontal split orientation of a
multi-function display, select Split, and select an option.
• To change how data appears on the page, select
Overlays, and select an option.
• To change the type of data shown, select Overlays, select
a data field, and select the new data type.
Resetting the Station Layouts
You can restore the factory default layouts for all stations.
Select Settings > System > Station Information > Reset
Stations.
Setting the Vessel Type
You can select your boat type to configure the chartplotter
settings and to use features customized for your boat type.
1
Select Settings > My Vessel > Vessel Type.
2
Select Powerboat or Sailboat.
Adjusting the Backlight
1
Select Settings > System > Beeper and Display >
Backlight.
TIP: Press from any screen to open the backlight settings.
2
Select an option:
• Adjust the backlight level.
• Select Auto.
Adjusting the Color Mode
1
Select Settings > System > Beeper and Display > Color
Mode.
TIP: Press from any screen to access the color settings.
2
Select an option.
Charts and 3D Chart Views
The charts and 3D chart views that are available depend on the
map data and accessories used.
You can access the charts and 3D chart views by selecting
Charts.
2 Charts and 3D Chart Views


