2
Select GPS Hdg. or Magnetic.
NOTE: When moving at low speeds or when stationary, the
magnetic compass source is more accurate than the GPS
source.
Customizing the Close-Hauled Wind Gauge
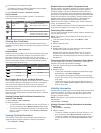
You can specify the range of the close-hauled wind gauge for
both the upwind scale and the downwind scale.
1
From the wind gauge, select Menu > Compass Gauge >
Gauge Type > Close Hauled Gauge.
2
Select an option:
• To set the maximum and minimum values that appear
when the upwind close-hauled wind gauge appears, select
Change Upwind Scale, and set the angles.
• To set the maximum and minimum values that appear
when the downwind close-hauled wind gauge appears,
select Change Downwind Scale, and set the angles.
• To view true or apparent wind, select Wind, and select an
option.
Viewing Trip Gauges
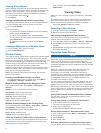
Trip gauges show information for odometer, speed, time, and
fuel for your present trip.
Select Info > Trip & Graphs > Trip.
Resetting Trip Gauges
1
Select Info > Trip & Graphs > Trip.
2
Select an option:
• To set all the readings for the present trip to zero, select
Reset Trip.
• To set the maximum speed reading to zero, select Reset
Maximum Speed.
• To set the odometer reading to zero, select Reset
Odometer.
• To set all the readings to zero, select Reset All.
Viewing Graphs
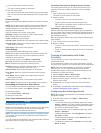
Before you can view graphs of various environmental changes,
such as temperature, depth, and wind, you must have an
appropriate transducer or sensor connected to the network.
Select Info > Trip & Graphs > Graphs.
Setting the Graph Range and Time Scales
You can indicate the amount of time and the range of depth that
appear in the depth and water temperature graphs.
1
From a graph, select Graph Setup.
2
Select an option:
• To set a time-elapsed scale, select Duration. The default
setting is 10 minutes. Increasing the time-elapsed scale
allows you to view variations over a longer period of time.
Decreasing the time-elapsed scale allows you to view
more detail over a shorter period of time.
• To set the graph scale, select Scale. Increasing the scale
allows you to view more variation in readings. Decreasing
the scale allows you to view more detail in the variation.
Tide, Current, and Celestial
Information
Tide Station Information
You can view information about a tide station for a specific date
and time, including the tide height, and when the next high and
low tides will occur. By default, the chartplotter shows tide
information for the most recently viewed tide station and for the
present date and time.
Select Info > Tides & Currents > Tides.
Current Station Information
NOTE: Current station information is available with certain
detailed maps.
You can view information about a current station for a specific
date and time, including the current speed and level of the
current. By default, the chartplotter shows current information for
the most recently viewed current station and for the present date
and time.
Select Info > Tides & Currents > Currents.
Celestial Information
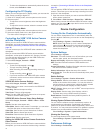
You can view information about sunrise, sunset, moonrise,
moonset, moon phase, and the approximate sky view location of
the sun and moon. The center of the screen represents the sky
overhead, and the outermost rings represent the horizon. By
default, the chartplotter shows celestial information for the
present date and time.
Select Info > Tides & Currents > Celestial.
Viewing Tide Station, Current Station, or
Celestial Information for a Different Date
1
Select Info > Tides & Currents.
2
Select Tides, Currents, or Celestial.
3
Select an option.
• To view information for a different date, select Change
Date > Manual, and enter a date.
• To view information for today, select Change Date >
Current.
• If available, to view information for the day after the date
shown, select Next Day.
• If available, to view information for the day before the date
shown, select Previous Day.
Viewing Information for a Different Tide or
Current Station
1
Select Info > Tides & Currents.
2
Select Tides or Currents.
3
Select Nearby Stations.
4
Select a station.
Viewing Almanac Information from the
Navigation Chart
1
From a chart or 3D chart view, select a location.
2
Select Information.
3
Select Tides, Currents, or Celestial.
Warning Manager
Viewing Messages
1
Select Info > Warning Manager.
2
Select a message.
3
Select Review.
Sorting and Filtering Messages
1
Select Info > Warning Manager > Sort/Filter.
2
Select an option to sort or filter the message list.
Saving Messages to a Memory Card
1
Insert a memory card into the card slot.
Tide, Current, and Celestial Information 29


