


68
69
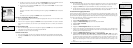
• Spring(green)
• Summer(yellow)
• Autumn(orange)
• Winter(blue)
• Midnight(highcontrast—black/gray/darkblue;helpfulfornighttimeuse)
3. To modify the backlight intensity, highlight the Backlight Intensity slider and press the arrow
keypad to the right to increase the intensity level or to the left to decrease the intensity.
4. To modify the backlight timer, highlight the Backlight Timer drop-down list and press ENTER.
Highlight the time interval you want and press ENTER.
Note: Decreasing the Backlight Timer helps conserve battery life.
5. Press QUIT to return to the Device Setup Page.
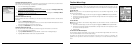
To Modify the Interface Settings
Use the following steps to change the serial port and USB settings on the device. The setting you
choose will depend on the type of cable you use to connect the device to your computer, your com-
puter’s operating system, and if you are trying to access information on a removable media (SD)
card.
1. From the Device Setup Page, highlight the Interface option and press ENTER.
2. If you are connecting the device to your computer via a serial cable, highlight Enable Serial
Port and press ENTER to select the check box. If the Enable Serial Port check box is selected,
it indicates that the serial port connection is activated.
To clear the check box if it is selected, highlight Enable Serial Port and press ENTER.
OR
If you are connecting the device to your computer via a USB cable, highlight the USB Setting
drop-down list and press ENTER. Then, highlight DeLorme or one of the Mass Storage options
and press ENTER.
Notes:
• MacandLinuxusersshouldalwaysselectoneoftheMassStorageoptionsfortheUSB
setting (depending on if you are saving data on internal or removable memory).
• IfyouwanttoaccessthelesonyourSDcardandyoudonothaveanSDcardreader,select
Mass Storage: SD/MMC Card as the USB setting.
• SelectDeLorme if you are using the device with compatible DeLorme mapping software.
3. Press QUIT to return to the Device Setup Page.
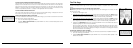
To Modify the Sound Settings
Use the following instructions to modify the device’s button press sound, message sound, power
sound, turn alert sound, and/or the volume of all sounds.
1. From the Device Setup Page, highlight the Sound option and press ENTER.
2. To modify the button press sound, highlight the Button Press drop-down list and press
ENTER. Highlight the sound type you want and press ENTER.
3. To modify the message sound, highlight the Message drop-down list and press ENTER. Then,
highlight the sound type you want and press ENTER.
4. To modify the Power sound, highlight the Power drop-down list and press ENTER. Then,
highlight the sound type you want and press ENTER.
5. To modify the turn alert sound, highlight the Turn Alert drop-down list and press ENTER.
Then, highlight the sound type you want and press ENTER.
6. To modify the volume of all sounds, highlight the Volume slider control and press the arrow
keypad to the right to increase the volume (or to the left to decrease the volume).
7. To mute the sound, highlight the Mute field and press ENTER. Note: This does not mute
the warning sound when power is critically low. To enable sound again when the check box is
selected, highlight the Mute field and press ENTER to clear the check box.
8. Press QUIT to return to the Device Setup Page.
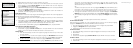
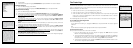
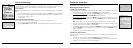
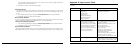
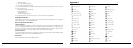
The Device Setup Page
Sound menu options
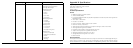
Display menu options