


2
3
Getting Started
Thank you for purchasing the DeLorme Earthmate GPS PN-20. This versatile and compact GPS re-
ceiver lets you create tracks of your travels, create routes so you never get lost, find points of interest,
and more!
This manual provides instructions for using all of the functionality available on the Earthmate GPS
PN-20. Most of the chapters are based on pages, which are the main screens on the Earthmate GPS
PN-20. Each chapter describes the features of that particular page and the menu options that are
available from that page. In addition, this manual also discusses basic functions (such as map pan-
ning, battery information, map data information, and more), as well as frequently asked questions,
warranty information, and so on.
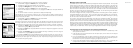
Step 1 — Installing the Batteries
The Earthmate GPS PN-20 is a battery-powered device. It can be powered by one rechargeable
Lithium-ion (Li-ion) battery or two AA batteries (NiCd, NiMH, alkaline, or lithium).
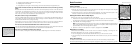
To install the batteries, unscrew the D-rings on the back of the Earthmate GPS PN-20 until you can
remove the battery cover. Then, insert the batteries according to the polarity symbols found inside
the battery compartment. Position the battery cover on the Earthmate GPS PN-20 and re-screw the
D-rings into the Earthmate GPS PN-20.
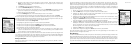
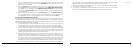
Step 2 — Turning On the Earthmate GPS PN-20
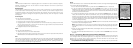
The Power button is located at the bottom-right corner of the button area. To turn on the Earthmate
GPS PN-20, press and hold the Power button for 1.5 seconds. The first page that displays on the
screen after you turn on the Earthmate GPS PN-20 is the Satellites Page. Your GPS status displays in
the upper-left corner of the Satellites Page. If you press the PAGE button, the Map Page displays on
the screen. The map will not center on your current location until you have achieved a 2-D or 3-D fix.
The default view when a GPS fix cannot be obtained is your last GPS position.
If it is taking a long time for the device to obtain a 2-D or 3-D fix, verify it has a clear view of the sky.
Be sure that trees, buildings, and other obstacles are not blocking the Earthmate GPS PN-20. If the
device still cannot obtain a 2-D or 3-D fix, press the QUIT button to return to the Satellites Page, press
the MENU button, highlight the Set Current Location option, and then press ENTER. The Map Page
automatically displays. Pan the map to your current location and press ENTER.
To turn off the Earthmate GPS PN-20, press the Power button and then press the ENTER button to
confirm you want to turn the Earthmate GPS PN-20 off.
Step 3 — Using the Buttons on the Earthmate GPS PN-20
The buttons on the Earthmate GPS PN-20 give you access to all of the functions on the device. Each
button has a unique purpose:
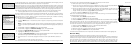
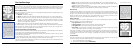
In/Out
Use the IN and OUT button to zoom in or zoom out on the map.
• PresstheIN(left)sideofthebuttononcetozoomthemapinonelevelandshowmoredetail.
• PressandholdtheINsideofthebuttontozoomthemapintoitsmaximumlevel.
• PresstheOUT(right)sideofthebuttononcetozoomthemapoutonelevelandshowlessdetail.
• PressandholdtheOUTsideofthebuttontozoomthemapouttoitsmaximumlevel.
• PressINandOUTtoscrollthroughalistonepageatatime.
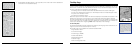
Page
Use the PAGE button to scroll through the enabled pages on the Earthmate GPS PN-20. The default
page button sequence is:
• Satellites
• Map
• Compass
• TripInfo
• RouteDirections(availablewhennavigating)
For an overview of what you can view and do on each page, as well as each page’s menu functions,
see Appendix A on page 73.
Menu
The MENU button provides access to many functions. Some menus are divided into top and bottom
sections that are separated by a line. The items in the top section are specific to the active page. The
items in the bottom section are standard menu options that are available from any page.
Tip: Use the Device Setup/
Page Order settings to add,
remove, or reorder the pages
that display when you press the
Page button. For more infor-
mation, see the To Modify the
Page Order Settings section on
page 70.
Getting Started
Tips:
•Setting the correct battery
type will optimize the bat-
tery’s performance. For more
information on selecting bat-
tery type, see To Modify the
System Settings on page 67.
•BecausetheEarthmateGPS
PN-20 has a real-time clock
that requires power even
when the device is powered
off, your batteries are con-
stantly in use. If you use your
Earthmate GPS PN-20spo-
radically (for example, more
than a month between uses),
remove the batteries for
long-term storage and then
reinsert them when you want
to use the device.
Tip: IftheEarthmateGPSPN-
20 does not turn on, ensure
that the batteries are inserted
into the device properly and
that they are mostly or fully
charged.