


60
61
4. To add a comment to your track, highlight the Comments field and press ENTER. Use the
keyboard to enter the comment text. Then, highlight OK and press ENTER.
5. To view the track, highlight the View button and press ENTER. Note: The View button
toggles with the Hide button.
OR
To follow and create a direct route along the track, highlight the Follow button and press
ENTER.
OR
To delete the track, highlight the Delete button and press ENTER.
To Follow a Track Back to Where It Started
1. From the Tracks Page, use the arrow keypad to highlight the track you want to create a route
from and press ENTER.
2. Use the arrow keypad to highlight the Follow button and press ENTER. The track is reversed
and a route is created so you can follow your footsteps and return to where you started the
track.
To Clear the Active Track
1. From the Tracks Page, use the arrow keypad to highlight the Clear button and press ENTER.
The active track is cleared from the Earthmate GPS PN-20.
2. Press QUIT to return to the previous Page.
To Delete a Saved Track
1. From the Tracks Page, use the arrow keypad to highlight the track to delete and press ENTER.
2. Highlight the Delete button and press ENTER. The track is deleted from the Earthmate GPS
PN-20.
To View a Saved Track
1. From the Tracks Page, use the arrow keypad to highlight the track to view and press ENTER.
The Track Details Page displays. Track logs that display with red text are visible on the map.
2. Highlight the View button and press ENTER. The entire track displays on the map.
3. To stop viewing the track, return to the Track Details Page, use the arrow keypad to highlight
the active track, and press ENTER. Highlight the Hide button and press ENTER.
To Customize the Logging Preferences
Use the following steps to designate if you want the device to log GPS points based on time or dis-
tance intervals. Logging based on a short time interval provides the most detailed results but also
quickly adds many points. Logging based on distance takes much longer to fill the track, allowing you
to record a great distance (10 feet is the shortest distance interval available).
1. From the Tracks Page, press MENU.
2. Highlight Edit Track Settings and press ENTER.
3. Highlight the Record Points by drop-down list and press ENTER.
4. Highlight Time or Distance.
5. Press ENTER.
6. Highlight the Recording Interval field and press ENTER.
7. Use the arrow keypad to increase/decrease the recording interval value. If you selected Time
in step 4, the recording interval is expressed in seconds. If you selected Distance in step 4, the
recording interval is expressed in feet.
8. Highlight the When Track is Full drop-down list and press ENTER.
9. Highlight Overwrite Points, Stop Recording, or Start Recording New Track. This option
determines how the device reacts when the track reaches its maximum number of points. If
you select the Overwrite Points option, the oldest points in the track are replaced with new
points. If you select Stop Recording, the device stops recording points when it is full. If you
select Start Recording New Track, the device saves the track and starts recording a new
track.
10. Press QUIT to return to the Tracks Page.
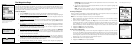
The Tracks Page
Tip: Use a small interval to re-
cord a detailed track of a new
trail. Use a large distance inter-
val to record your location dur-
ing a long trip.
Tip: Select Start Recording
New Track to save a detailed
trackofaspecicpath.Select
the Overwrite Points option if
you are interested in knowing
only where you have traveled
most recently.
Tracks menu
Tip: View a saved track when
you want a reference from a
previous trip but do not want to
create a route.
Tip: Select to enter more
than one line of text in a com-
ment.
Track Details