


Workman MDE Page 5 -- 19 Chassis
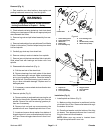
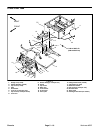
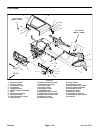
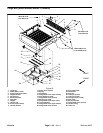
Removal (Fig. 11)
1. Park vehicle on a level surface, turn on/off switch
OFF, set parking brake and remove key from the on/off
switch.
2. Open the battery circuit by carefully removing one of
the battery cables (see Opening Battery Circuit in the
General Information section of Chapter 3 -- Electrical
System).
3. Remove seats from seat base.
4. Remove four (4) screws (item 12) thatsecure recep-
tacleplate tofrontofseatbase. Unplugchargerwirehar-
ness from vehicle wire harness and remove receptacle
plate assembly from vehicle.
5. Remove parking brake assembly from seat base
(see Parking Brake in the Service and Repairs section
of Chapter 4 -- Transaxle and Brakes).
6. Remove eight (8) flange head screws (item 10) that
secure seat base to vehicle. Locate and retrieve flat
washers (item 11) from screws that secure front of seat
base.
7. Carefully lift seat base from vehicle.
Installation (Fig. 11)
1. Position seat base to the vehicle.
NOTE: Do nottighten fasteners securing the seat base
until all fasteners are in place.
2. Install four (4) flange head screws (item 10) through
holes in front frame and into rear seat base threaded in-
serts. Install four (4) flange head screws (item 10) and
flat washers (item 11) through holes in front frame and
into front seat base threaded inserts.
3. Starting at the middle of the vehicle, tighten flange
head screws to secure seat base to vehicle.
4. Install parking brake assembly to seat base (see
Parking Brake in the Service and Repairs section of
Chapter 4 -- Transaxle and Brakes).
5. Connect charger wire harness to vehicle wire har-
ness. Secure receptacle plate to seat base with four (4)
screws (item 12).
6. Install seats to vehicle.
7. Connect removed battery cable to battery terminals.
Install lock washer and nut on battery terminals. Torque
nuts from 115 to 125 in--lb (13.0 to 14.1 N--m).
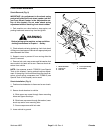
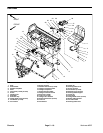
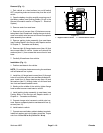
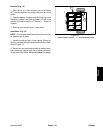
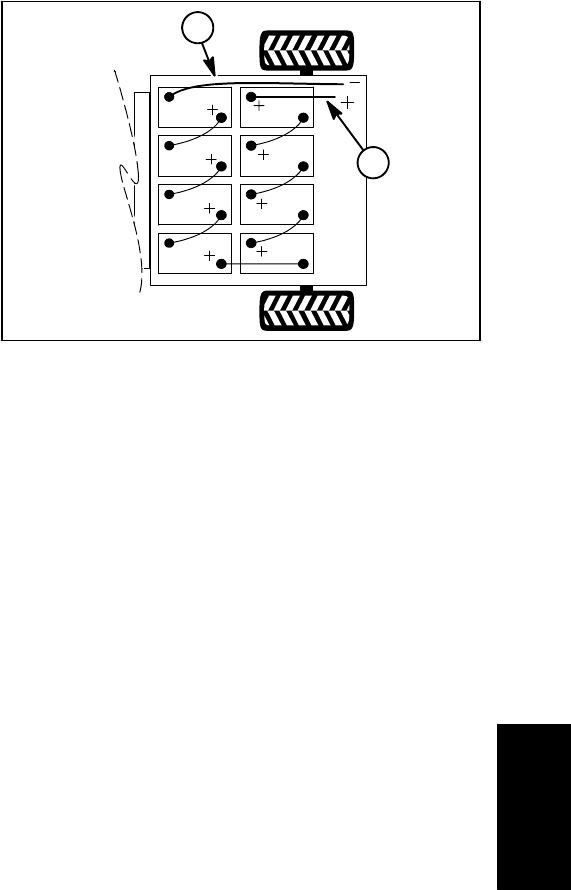
1. Negative cable to vehicle 2. Positive cable to vehicle
Figure 12
A
4
2
1
Chassis