


3-30
CHASSIS
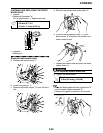
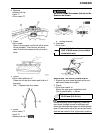
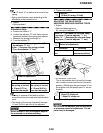
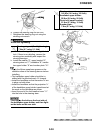
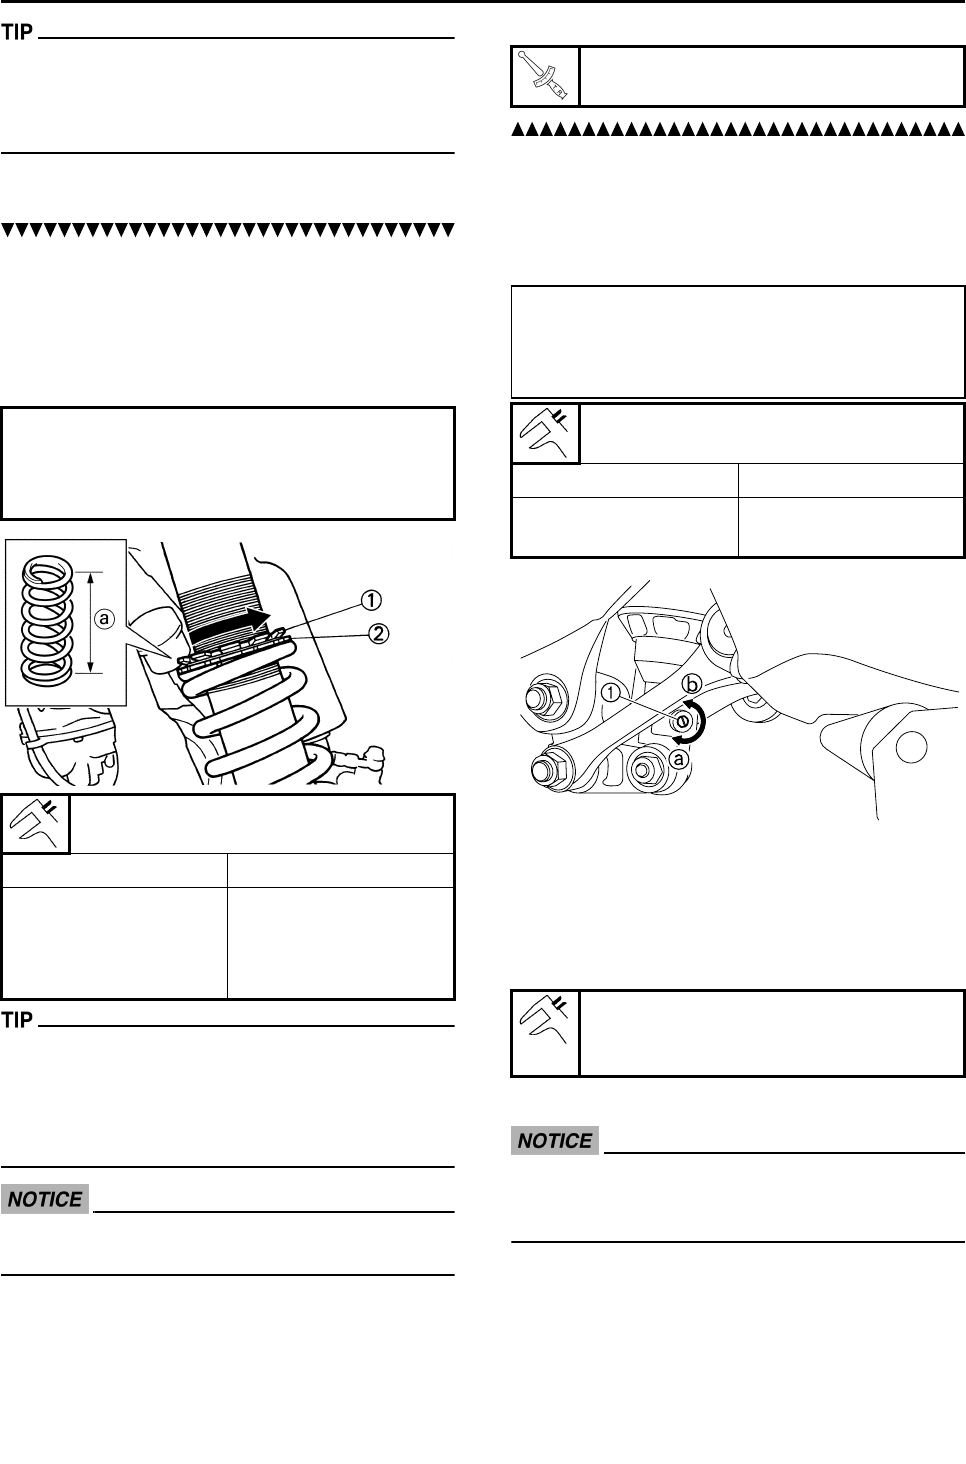
• The I.D. mark "a" is marked at the end of the
spring.
• Spring specification varies according to the
difference in the production lot.
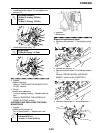
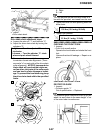
3. Adjust:
• Spring preload
Adjustment steps:
a. Loosen the locknut "1".
b. Loosen the adjuster "2" until there is some
clearance between the spring and adjuster.
c. Measure the spring free length "a".
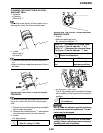
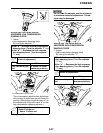
d. Turn the adjuster "2".
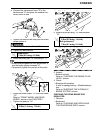
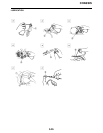
• Be sure to remove all dirt and mud from
around the locknut and adjuster before adjust-
ment.
• The length of the spring (installed) changes
1.5 mm (0.06 in) per turn of the adjuster.
Never attempt to turn the adjuster beyond
the maximum or minimum setting.
e. Tighten the locknut.
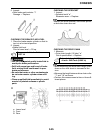
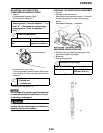
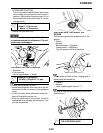
ADJUSTING THE REAR SHOCK
ABSORBER REBOUND DAMPING FORCE
1. Adjust:
• Rebound damping force
By turning the adjuster "1".
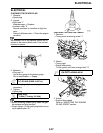
• STANDARD POSITION:
This is the position which is back by the spe-
cific number of clicks from the fully turned-in
position. (Which align the punch mark "a" on
the adjuster with the punch mark "b" on the
bracket.)
Do not force the adjuster past the minimum
or maximum extent of adjustment. The ad-
juster may be damaged.
Stiffer →Increase the spring preload. (Turn
the adjuster "2" in.)
Softer → Decrease the spring preload.
(Turn the adjuster "2" out.)
Extent of adjustment:
Maximum Minimum
Position in which
the spring is turned
in 18 mm (0.71 in)
from its free length.
Position in which
the spring is turned
in 1.5 mm (0.06 in)
from its free length.
Locknut:
30 Nm (3.0 m•kg, 22 ft•lb)
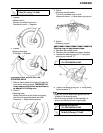
Stiffer "a" → Increase the rebound damp-
ing force. (Turn the adjuster "1" in.)
Softer "b" → Decrease the rebound damp-
ing force. (Turn the adjuster "1" out.)
Extent of adjustment:
Maximum Minimum
Fully turned in posi-
tion
30 clicks out (from
maximum position)
Standard position:
About 14 clicks out
* About 16 clicks out
* Except for USA and CDN