3.4
Section 3
Troubleshooting
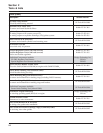
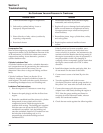
Possible Cause Solution
1. Disassemble breather, clean parts thoroughly,
reassemble, and recheck pressure.
2. Replace all worn or damaged seals and gaskets.
Make sure all fasteners are tightened securely.
Use appropriate torque values and sequences
when necessary.
3. Recondition piston, rings, cylinder bore, valves,
and valve guides.
4. Repair/replace restricted muffler/exhaust
system.
1. Crankcase breather clogged or inoperative.
2. Seals and/or gaskets leaking. Loose or
improperly torqued fasteners.
3. Piston blowby or leaky valves (confirm by
inspecting components).
4. Restricted exhaust.
No Crankcase Vacuum/Pressure in Crankcase
Compression Test
Some of these engines are equipped with an automatic
compression release (ACR) mechanism. Because of the
ACR mechanism, it is difficult to obtain an accurate
compression reading. As an alternative, perform a
cylinder leakdown test.
Cylinder Leakdown Test
A cylinder leakdown test can be a valuable alternative
to a compression test. By pressurizing the combustion
chamber from an external air source you can
determine if the valves or rings are leaking, and how
badly.
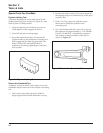
Cylinder Leakdown Tester (see Section 2) is a
relatively simple, inexpensive leakdown tester for
small engines. The tester includes a quick disconnect
for attaching the adapter hose, and a holding tool.
Leakdown Test Instructions
1. Run the engine for 3-5 minutes to warm it up.
2. Remove the spark plug(s) and the air filter from
engine.
3. Rotate the crankshaft until the piston (of cylinder
being tested) is at top dead center of the
compression stroke. Hold the engine in this
position while testing. The holding tool supplied
with the tester can be used if the PTO end of the
crankshaft is accessible. Lock the holding tool
onto the crankshaft. Install a 3/8" breaker bar into
the hole/slot of the holding tool, so it is
perpendicular to both the holding tool and
crankshaft PTO.
If the flywheel end is more accessible, use a
breaker bar and socket on the flywheel nut/
screw to hold it in position. An assistant may be
needed to hold the breaker bar during testing. If
the engine is mounted in a piece of equipment, it
may be possible to hold it by clamping or
wedging a driven component. Just be certain that
the engine cannot rotate off of TDC in either
direction.
4. Install the adapter into the spark plug hole, but
do not attach it to the tester at this time.
5. Connect an air source of at least 50 psi to the
tester.
6. Turn the regulator knob in the increase
(clockwise) direction until the gauge needle is in
the yellow “set” area at the low end of the scale.
7. Connect the tester quick-disconnect to the
adapter hose while firmly holding the engine at
TDC. Note the gauge reading and listen for
escaping air at the carburetor intake, exhaust
outlet, and crankcase breather.
8. Check the test results against the following table:


