


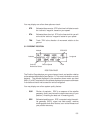
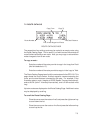

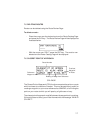
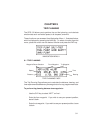
Immediately after activating a route, the Active Route Page will be displayed.
This page displays the waypoints of the “active leg” on line 1, and up to 2
waypoints on lines 2 and 3. Distance and time information is displayed to the
right of each waypoint name. You may choose to display ETA (estimated
time of arrival) or ETE (estimated time enroute) using the cyclic selection field
on line 1. (NOTE: When activating a route, check the active leg to be sure
you agree with the selection. If not, use the GOTO function to select the leg
you desire.)
Notice the arrow to the left of waypoint 2 (BIL) in the previous illustration. This
arrow indicates that BIL is the “active to” waypoint.
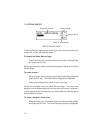
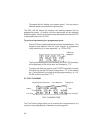
You may view additional waypoints on lines 2 and 3 by scrolling.
To scroll the active route...
· Place the cursor over the waypoint name on line 2 and press the left
arrow key to scroll up the list.
· Place the cursor over the waypoint name on line 3 and press the right
arrow key to scroll down the list.
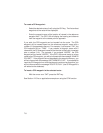
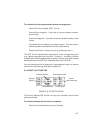
If you wish, you may edit route 0 directly from the Active Route Page.
To add a waypoint to the active route...
· Place the cursor over the position where you wish to enter the new
waypoint.
· Enter the waypoint name. The waypoints of the route will scroll down
to make room for the new waypoint.
To delete a waypoint from the active route...
· Place the cursor over the waypoint you wish to delete.
· Press the CLR key followed by the ENT key to delete the waypoint.
7-6