


4--1
62--11362
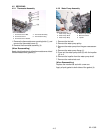
SECTION 4
COOLING SYSTEM
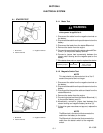
4.1 CHECKING AND ADJUSTING
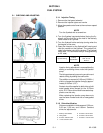
WARNING
Beware of moving V--belt and belt driven
components
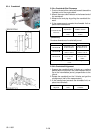
4.1.1 Notched V--Belt Service
NOTE
A frayed, cracked or worn V--belt must be re-
placed. After installing anew belt,it isadvisable
to check the adjustment after running the unit
for three or four hours. This will allow for the i ni-
tial stretch, which is common o n new belts.
Once thisinitial stretchhas takenplace, t hebelt
should be checked at regular intervals.
To replace or adjust the notched V--belt, do the
following:
a. Replacing the V--Belt
1. Loosen the idler pivot bolt.
2. Replace the belt and adjust tension in a ccordance
with the following steps.
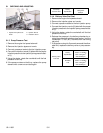
b. Adjusting Tension
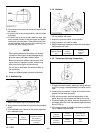
1. Measure the deflection (A), by depressing the belt
halfway between the fan drive pulley and alternator
pulley at the specified force (Refer to1.7.3).
2. Use hand force only on theidler pulley to tightenbelt.
Do not use a pry bar or excessive force as i t may
cause damage to the engine.
Use of a belt tension gauge (Carrier Part #
07--00203--00) or a belt tension tester (Carrier Part #
07--00253--00) is advised.
3. When belt is at correct tension, tighten pivot bolt.
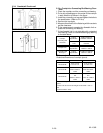
4.1.1a Poly V--Belt Service
a. Replacing the Poly--V--Belt
1. Apply the pr oper size socket to the crank pulley nut,
then s lowly rotate the crank. At the same time, use a
flat, b lunt objec t to guide t he belt of f the crank pulley
towards radiator. Be careful not to damage grooves
on the pulley.
2. Replace the Poly--V--Belt by positioning the belt on
the water pump pulley, and while r otating the engine
(as in step 1), use aflat, blunt object to guide the belt
onto the crank pulley. Be careful not to damage
grooves on the pulley or belt.
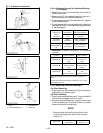
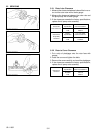
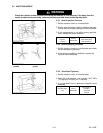
4.1.2 Fan Belt Damage and Wear
1. Check the fan belt for damage.
2. If the belt is damage in any way, replace it.
(A)
(B)
A. Good B. Bad
3. Check i fthebelt is w ornand sunkin the pulleygroove.
4. If the fan belt i s worn and deeply sunk in the pulley
groove, replace it.
A. Good B. Bad
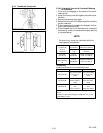
4.1.3 Checking Coolant Level
WARNING
When removing the radiator cap, wait at
least ten minutes after the engine has
stopped and cooled down. Otherwise, hot
water may discharge from the radiator,
scalding anyone nearby.
1. Remove the radiator cap and check to see that the
coolant level is just below the port.
With the r ecovery t ank: Check to s ee that the coolant
level lies between FULL and LOW.