


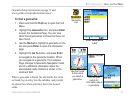
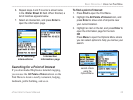
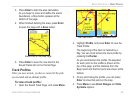

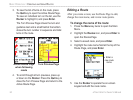

3. Press Enter to start the area calculation.
As you begin to move and define the area’s
boundaries, a Stop button appears at the
bottom of the page.
4. When finished defining the area, press Enter
to open the page with a Save button.
5. Press Enter to save the new track to the
Saved Tracks list on the Tracks Page.
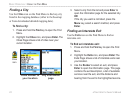
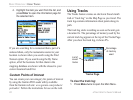
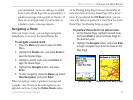
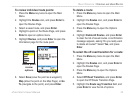
Track Profiles
After you save a track, you have a record of the path
you traveled and an altitude profile.
To view a track profile:
1. Open the Saved Track Page, and press Menu.
2. Highlight Profile
, and press Enter to view the
Track Profile.
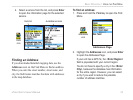
The beginning of the track is marked by a
flag. You can scroll across the track profile by
pressing the Rocker.
As you scroll across the profile, the elevation
for each point on the profile is shown at the
top of the page, and the distance from the
Begin point and the End point are shown at the
bottom.
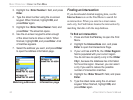
3. At any point along the profile, you can press
Enter to show that point on the map.
4. Press Menu to use Zoom Ranges and Hide
Symbols options.
Saved track on the Map Page
Start calculation Save calculated track
eTrex Vista Cx Owner’s Manual 29
BASIC OPERATION > USING TRACKS