


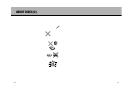
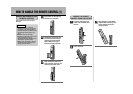
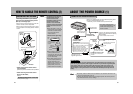


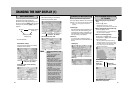
< When removing the remote control
from the holder,
pull the top of the remote control upwards.
< When returning the remote control
device to the holder,
refer to
“ ”
on the previous page.
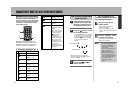
HOW TO HANDLE THE REMOTE CONTROL (2)
RETURNING THE REMOTE CONTROL TO THE HOLDER
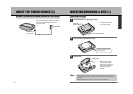
Mounting
example
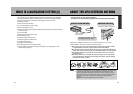
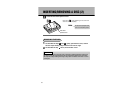
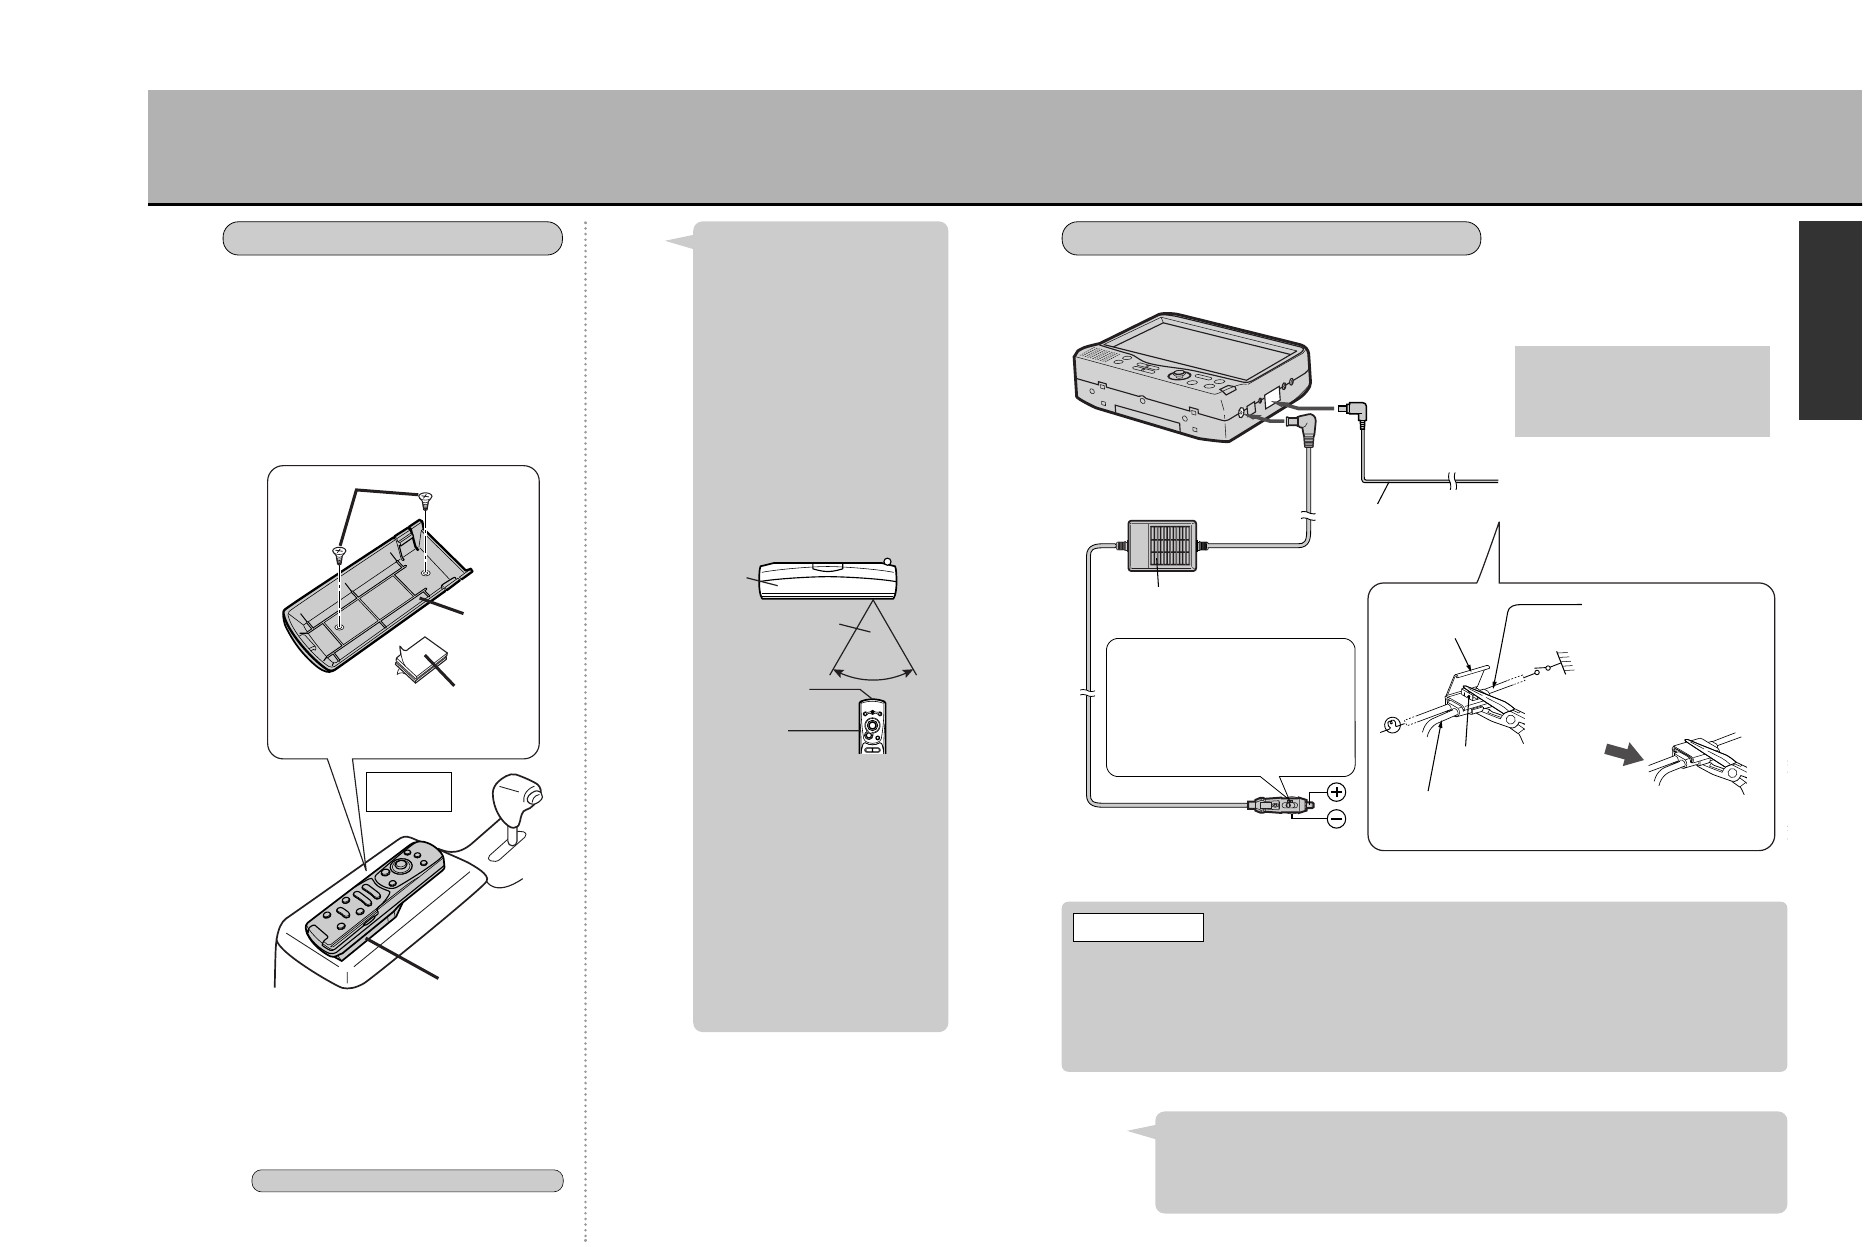
ABOUT THE POWER SOURCE (1)
Use the 12V cigarette lighter connector cable and parking brake
connector cable included with the unit.
* If necessary, use the included cord clip to affix the cord.
If mounting the holder in your vehicle,
affix using the included tapping screws
(M3 x 8) or the magic tape.
* When mounting using the magic tape, clean the
adhesion surface as much as possible.
* When mounting using the tapping screws, holes
must be made in the mounting surface. Exercise
caution.
MOUNTING THE HOLDER
Velcro tape
* Affix using tapping screws or
Velcro tape.
Holder
Holder
Tapping
screw
(M3 x 8)
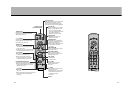
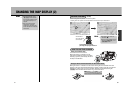
To operate the unit using the
remote control, point the
remote control infrared
transmitter towards the unit’s
remote control infrared
receiver. To use the remote
control as is from the mounted
holder, follow the instruction
below:
¡Mount the holder in a way so
that the remote control infrared
transmitter is oriented toward
the unit’s remote control
infrared receiver.
Hint
¡After confirming proper remote
control operation from the
mounting area, affix using the
included tapping screws (M3 x
8) or the Velcro tape.
¡Under direct sunlight, the unit
may not properly receive the
signals transmitted by the
remote control. In such a case,
bring the remote control in
close proximity to the unit’s
infrared receiver and operate.
Remote control signal range
Within 60° laterally
from the infrared
receiver
60°
Infrared
transmitter
Remote
control
Main
unit
When connecting the unit to the cigarette lighter, the vehicle battery will be drained of its
power as long as the lighter’s power supply is turned ON. If your vehicle’s cigarette lighter
power supply does not cut off when turning OFF the engine, make sure to pull the 12V
cigarette lighter connector cable from the vehicle’s cigarette lighter socket when turning
OFF the engine. Leaving the connector in the socket for extended periods may drain the
battery.
tCAUTION
¡For safety, videos or DVDs cannot be watched nor can selections be made on the
menu if the parking brake is not set.
¡If turning ON the engine while using the navigation system, the unit may return to
the initial screen due to a drop in voltage.
Hint
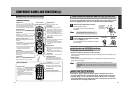
USING A 12V VEHICLE BATTERY
Connect to the DC
input 9V terminal
Connect to the
brake terminal
Parking brake
connector cable
* The parking brake signal line
position varies depending on the
vehicle model. Ask your auto
dealer for details.
Connect to the vehicle’s parking brake
signal line (grounded when the parking
brake is pulled)
* Use the included self-lock connector.
12V cigarette lighter
connector cable
Connect to the 12V
cigarette lighter socket
Self-lock
connector
Parking
brake
lamp
Parking brake
switch
Push in the metal part
to anchor the 2 wires.
Parking brake connector cable
Insert the end into the self-lock
connector.
Auto parking brake signal
line
Insert from the cut end of the
self-lock connector
Close the self-lock
connector securely.
Slide switch:
The slide switch is set on the N side
at our factory. The cable can be used
on the N side for most vehicle
models, however, for European
models and other vehicles with large
socket diameters, the slide switch
should be switched to the W side.
49 50
I
N
T
R
O
D
U
C
T
I
O
N