


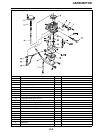
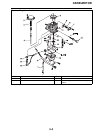


CARBURETOR
6-7
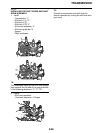
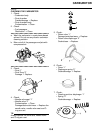
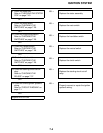
8. Check:
• Jet needle “1”
Bends/wear/damage → Replace.
• Clip groove
Free play/wear → Replace.
9. Check:
• Main jet “1”
• Pilot jet “2”
• Needle jet “3”
• Needle jet holder “4”
• Starter jet “5”
• Coasting enricher jet (P. A. J. 2) “6”
Bends/damage/wear → Replace.
Obstruction → Clean.
Blow out the jets with compressed air.
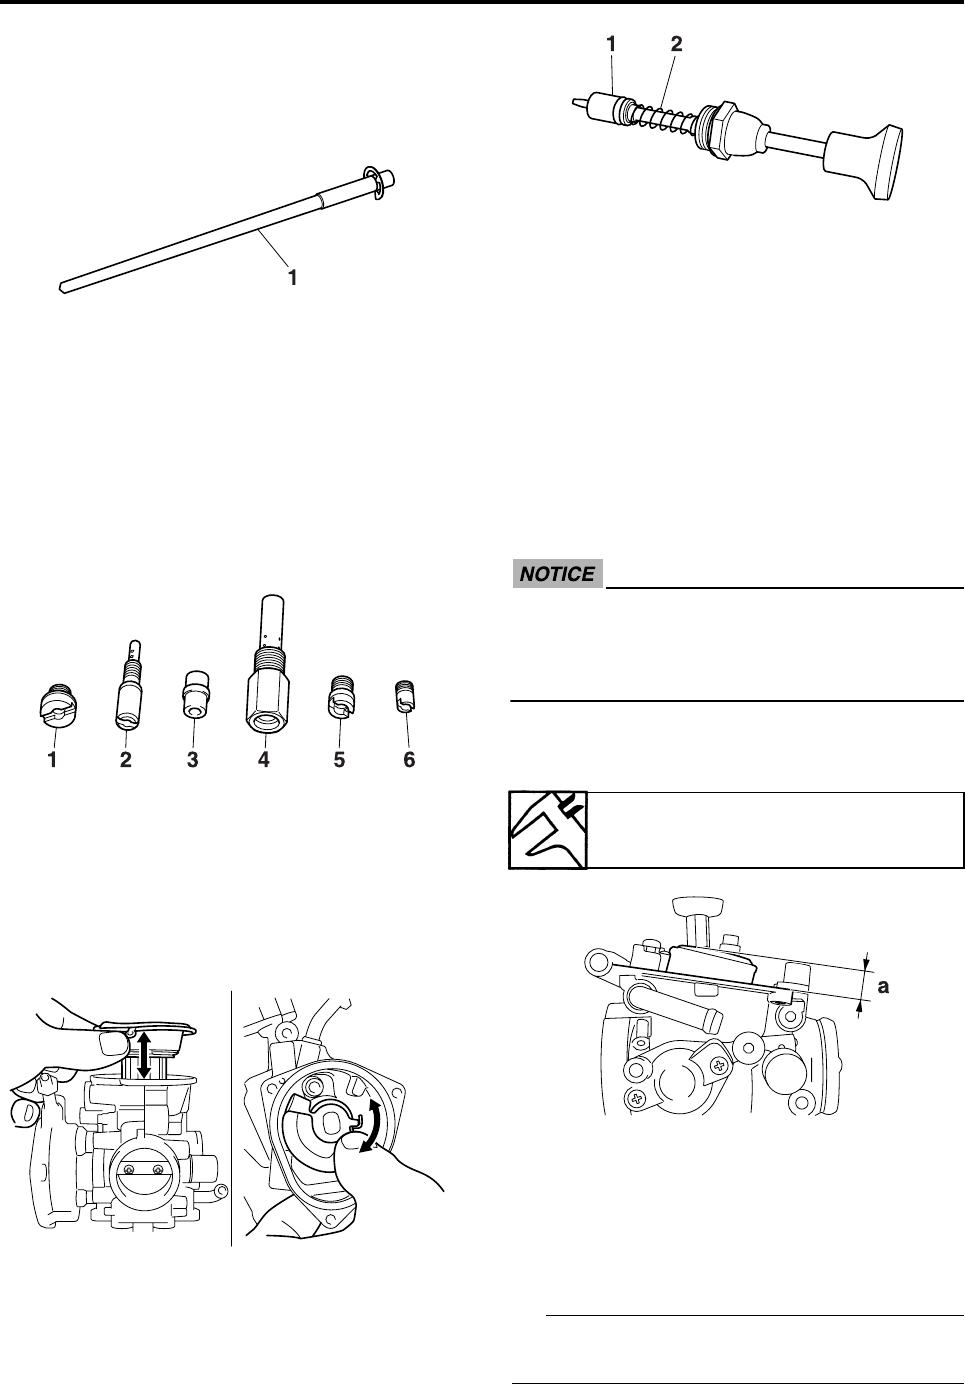
10.Check:
• Piston valve movement
Insert the piston valve into the carburetor
body and move it up and down.
Tightness → Replace the piston valve.
• Throttle valve movement
Sticks → Replace.
11.Check:
• Starter plunger
• Starter plunger spring
Bends/cracks/damage → Replace.
12.Check:
•Hose joints
Cracks/damage → Replace.
13.Check:
• Air vent hose
• Fuel hose
• Drain hose
Cracks/damage/wear → Replace.
Obstruction → Clean.
Blow out the hoses with compressed air.
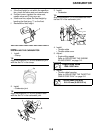
EAS26800
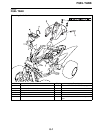
ASSEMBLING THE CARBURETOR
ECA14110
• Before assembling the carburetor, wash
all of the parts in a petroleum-based sol-
vent.
• Always use a new gasket.
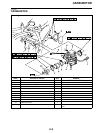
1. Measure:
• Float height “a”
Out of specification → Adjust.
▼▼▼▼▼▼▼▼▼▼▼▼▼▼▼▼▼▼▼▼▼▼▼▼▼▼▼▼▼▼
a. Hold the carburetor in an upside down
position.
b. Measure the distance from the front mating
surface of the float chamber (gasket
removed) to the top of the float.
TIP
The float arm should be resting on the needle
valve, but not compressing it.
Float height
13.0 mm (0.51 in)