


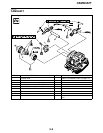

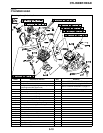

CYLINDER HEAD
5-14
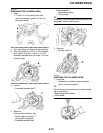
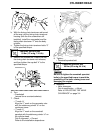
3. Check:
• Cap bolt
•Spring
•One-way cam
• Timing chain tensioner rod
Damage/wear → Replace the timing
chain tensioner.
EAS24230
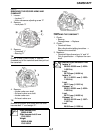
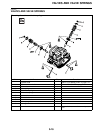
INSTALLING THE CYLINDER HEAD
1. Install:
• Cylinder head gasket
• Dowel pins
2. Install:
• Cylinder head
• Copper washers
• Cylinder head bolts
3. Tighten:
• Cylinder head bolts
TIP
• Apply oil to the bearing surface of (upper)
cylinder head bolt.
Further, apply molybdenum disulfide grease
to thread part.
• Tighten the cylinder head bolts in the proper
tightening sequence as shown.
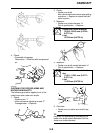
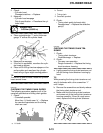
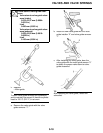
4. Install:
• Camshaft sprocket
• Dowel pin
• Timing chain
▼▼▼▼▼▼▼▼▼▼▼▼▼▼▼▼▼▼▼▼▼▼▼▼▼▼▼▼▼▼
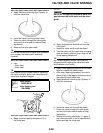
a. Turn the Pickup coil rotor counterclockwise.
b. Align the “I” mark “a” on the Pickup coil
rotor with the stationary pointer “b” on the
crankcase cover.
c. Remove the wire from the timing chain.
d. Install the timing chain onto the camshaft
sprocket, and then install the camshaft
sprocket onto the camshaft.
TIP
• When installing the camshaft sprocket, be
sure to keep the timing chain as tight as pos-
sible on the exhaust side.
• Align the pin on the camshaft with the slot in
the camshaft sprocket.
ECA13740
Do not turn the crankshaft when installing
the camshaft(s) to avoid damage or
improper valve timing.
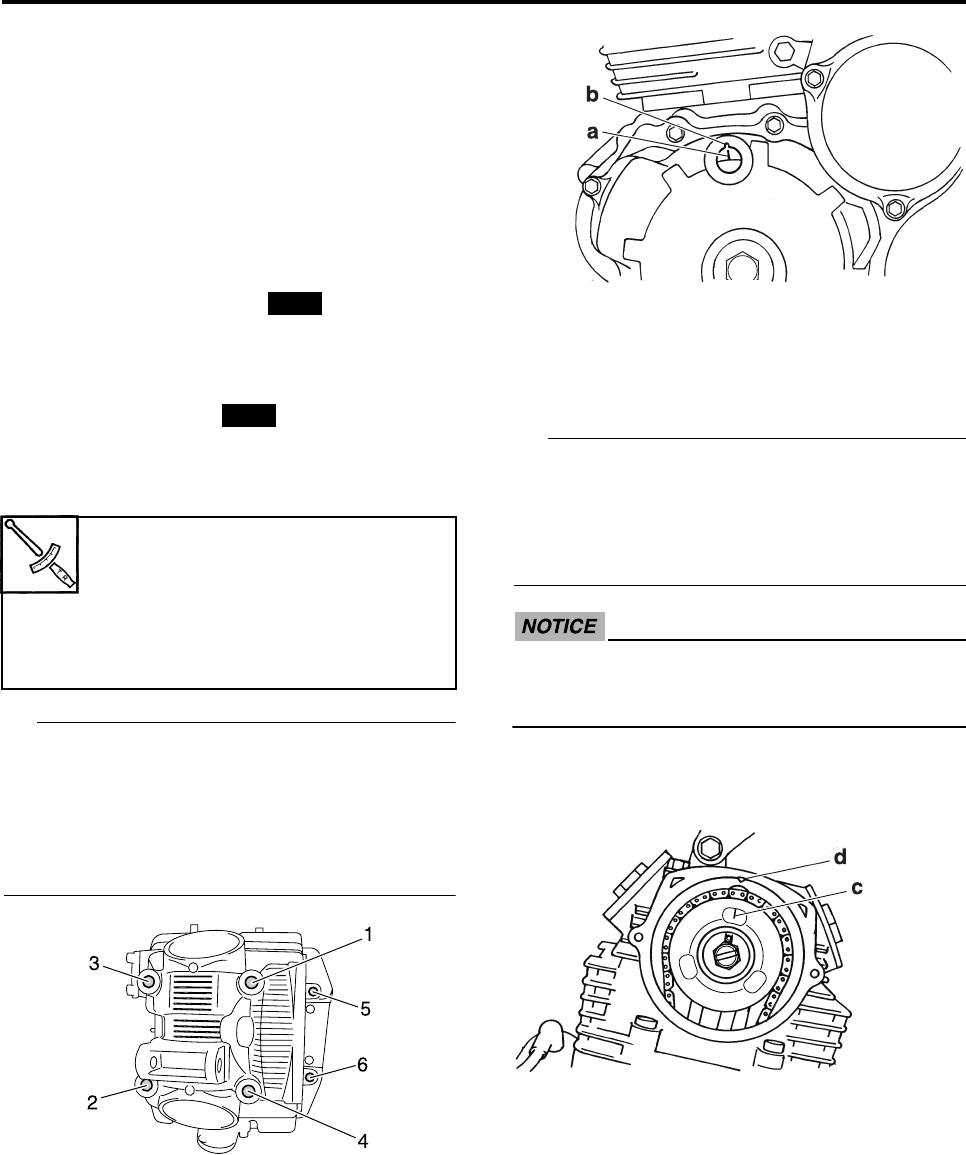
e. Align the “I” mark “c” on the camshaft
sprocket with the stationary pointer “d” on
the cylinder head.
f. While holding the camshaft, temporarily
tighten the camshaft sprocket bolts.
▲▲▲▲▲▲▲▲▲▲▲▲▲▲▲▲▲▲▲▲▲▲▲▲▲▲▲▲▲▲
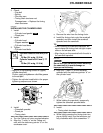
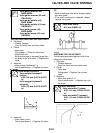
5. Install:
• Timing chain tensioner
▼▼▼▼▼▼▼▼▼▼▼▼▼▼▼▼▼▼▼▼▼▼▼▼▼▼▼▼▼▼
a. While lightly pressing the timing chain ten-
sioner rod by hand, turn the tensioner rod
fully clockwise with a thin screwdriver “1”.
Cylinder head bolt 226 mm (8.90
in)
24 Nm (2.4 m·kg, 18 ft·lb)
Cylinder head bolt 45 mm (1.77
in)
20 Nm (2.0 m·kg, 15 ft·lb)
New
New