64 CLCH-IM-16A
1 Disconnect all electrical power to the unit.
2 Don the appropriate personal protective
equipment (PPE).
3 Gain access to the coil section of the unit (both
sides).
4 Use a soft brush to remove loose debris from both
sides of the coil.
5 Use a steam cleaning machine, starting from the
top of the coil and working downward. Clean the
leaving air side of the coil first, then the entering
air side. Use a block-off to prevent steam from
blowing through the coil and into a dry section of
the unit.
6 Repeat step 5 as necessary.
7 Confirm that the drain line is open following the
cleaning.
8 Allow the unit to dry thoroughly before putting the
system back in service.
9 Straighten any coil fins that may have been
damaged during the cleaning process with a fin
rake.
10 Replace all panels and parts and restore electrical
power to the unit.
11 Use caution to assure that any contaminated
material does not contact other areas of the unit
or building. Properly dispose of all
contaminated materials and cleaning solution.
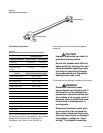
Type K cooling coils
Type K cooling coils have removable headers for
cleaning. A small nylon or fiber brush may be used to
clean the tubes. After cleaning, flush with water.
When removing any header, replace the rubber
sealing gasket and be sure that it seats properly
when header is installed. If necessary, pull out
turbulators, clean the tubes and replace turbulators.
When header covers are replaced, apply washers
under the bolt heads. Bolts should be evenly
tightened to 50 pound-feet of torque.
Refrigerant coils
Refrigerant coils should be kept clean to maintain
maximum performance. If fins become dirty, clean
with cold water and detergent, or one of the
commercially available chemical coil cleaners. Rinse
coils thoroughly after cleaning.
CAUTION
Follow directions provided with
the cleaner to avoid coil damage.
WARNING
Never use steam or hot water to
clean a refrigerant coil. Dangerous
pressures may be built up by the
improper application of heat
resulting in equipment damage or
personal injury.
1 Follow steps 1-4 from Steam and Water Coil
Cleaning procedure preceding.
2 Mix a high quality coil cleaning detergent with
water according to the manufacturers instructions.
If the detergent is strongly alkaline after mixing
(PH 8.5 or higher), it must contain an inhibitor.
Carefully follow the detergent manufacturers
instructions on the use of the product.
3 Place the mixed solution in a garden pump-up
sprayer or high pressure sprayer. If a high
pressure sprayer is used, note the following:
q Maintain a minimum nozzle spray angle of 15
degrees.
q Spray perpendicular to the coil face.
q Protect other areas of the air handler and internal
controls from contact with moisture or the
cleaning solution.
q Keep the nozzle at least 6 inches from the coil.
q Do not
exceed 600 psi.
4 Spray the leaving air side of the coil first, then the
entering air side. Use a block-off to prevent spray
from going through the coil and into a dry section
of the unit and/or system ductwork. Carefully
follow the cleaning solution manufactures usage
instructions.
5 Thoroughly rinse both sides of the coil and the
drain pan with cool, clean water.
6 Repeat steps 4 and 5 as necessary.
7 Straighten any coil fins that may have been
damaged during the cleaning process with a fin
rake.
8 Confirm that the drain line remains open following
the cleaning process.


