


Installation and Maintenance 19
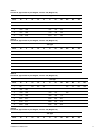
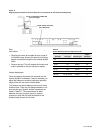
Figure 11
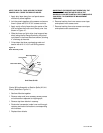
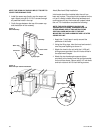
Control Wiring Assembly
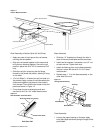
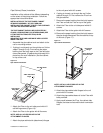
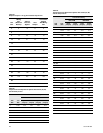
Roof Assembly at Section Splits (All Unit Sizes)
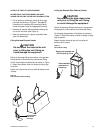
1 Apply two rows of butyl tape at the roof seams,
covering the hole pattern.
2 Align the roof panels together at the seams and
bring the two sections together. Secure the roof
panels in place with 5/16 X 3/4” screws and 5/16”
nuts.
3 Slide the roof joint strip along the flat flange
formed by the joined roof panels, allowing 4”hang
on the ends.
4
(For Unit Sizes 3 - 40 when the roof joint strip is in
two pieces):
Apply a piece of butyl tape where the
strips come together and place a cover directly
over the tape. Then slide the two strips on the roof
panels as shown in
Figure 12
.
5 Crimp down the two overhanging ends and
secure with #10-16 x 3/4” sheet metal screws.
Figure 12
Roof Assembly at Section Splits
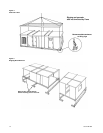
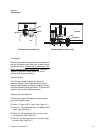
Base Assembly
1 Slide the 1/2” threaded rod through the hole in
each of the two joined base sections as shown.
2 Install two flat washers, lockwasher, and 1/2” nut
at each rod end. Tighten both nuts.
3 Install the flashing piece on the base assembly.
Secure in place with two #10-16 x 3/4” sheet
metal screws.
4 Repeat steps 1 - 3 for the base assembly on the
other side of the unit.
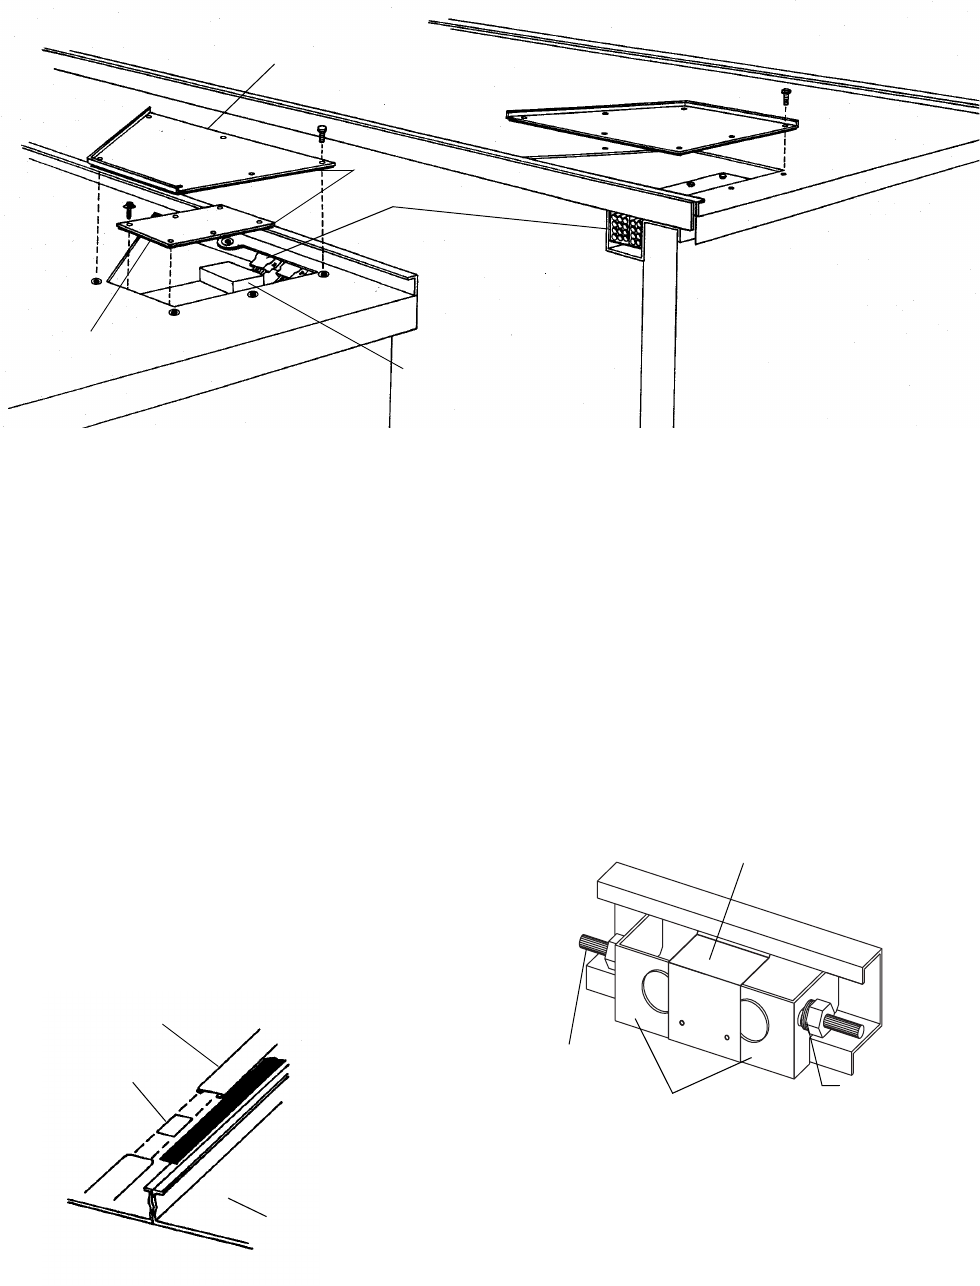
Figure 13
Joining Base Assembly
Panel Assembly
1 Leaving the paper backing on the tape, apply
butyl tape (tape side down) along the length of the
panel seam.
Inner Access Cover
Outer Access Cover
Foam Block
Wire Harness
Tape
Outer Roof Panel
Cover
Roof Joint Strip (in 2 Pieces)
Unit Sizes 3-40
Base Sections
Flashing
Threaded Rod
Flat Washers,
and 1/2” Nut
Lockwasher