


5.8
Section 5
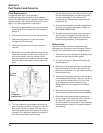
Fuel System and Governor
Float Replacement
If symptoms described in the carburetor
troubleshooting guide indicate float level problems,
remove the carburetor from the engine to check and/or
replace the float. Use a Carburetor Overhaul Kit (see
page 5.10) if float replacement is necessary.
1. Remove the upper blower housing and air intake
components from the carburetor, as described in
Section 4.
2. Disconnect the fuel inlet line from the carburetor.
3. Disconnect the governor, choke and throttle
linkages from the carburetor.
4. Disconnect the lead wires from the carburetor
solenoid.
5. Gently lift up on the lower blower housing directly
above the carburetor and slide the carburetor off
the mounting studs. Remove the fuel shut-off
solenoid and drain any remaining fuel into a safe
container. Remove the bowl from the carburetor
body.
7. Pull the float hinge pin and remove the float, with
the inlet needle attached, to inspect these parts
and the needle seat. If dirty, blow out with
compressed air. Replace float components as
needed with kit.
8. Using new bowl gaskets, reinstall and tighten the
bowl with the fuel shut-off solenoid. Tighten to
5.1-6.2 N·m (45-55 in. lb.).
9. Reinstall carburetor to engine, reconnecting the
fuel line, control linkages and solenoid leads.
Reinstall the air intake components, and upper
blower housing assembly. Retest operation.
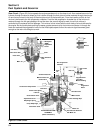
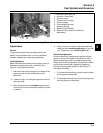
Disassembly
Use the following procedure to disassemble the
carburetor after removing it from the engine. Refer to
Figure 5-6 for identification of the component parts.
1. Remove the fuel shut-off solenoid assembly, then
remove the fuel bowl and bowl gasket.
2. Pull the float hinge pin. Remove float with inlet
needle attached.
3. Remove the set screws holding the throttle plate
to the throttle shaft. Check for any burrs on the
shaft and remove them. Pull the throttle shaft from
the carburetor body.
5. Remove the set screws securing the choke plate
to the choke shaft assembly. Check for any burrs
on the shaft and remove them. Pull the choke
shaft assembly out of the carburetor body.
Disassemble self-relieving parts from shaft as
needed.
6. Remove the three screws holding the passage
cover to the body. Remove the cover and gasket.
7. Remove the slow speed adjusting needle and
spring. Except for the slow jet nozzle, main jet,
and emulsion tubes, which are considered
non-serviceable, the carburetor is now completely
disassembled and ready for thorough inspection
and cleaning.
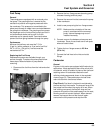
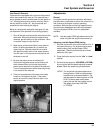
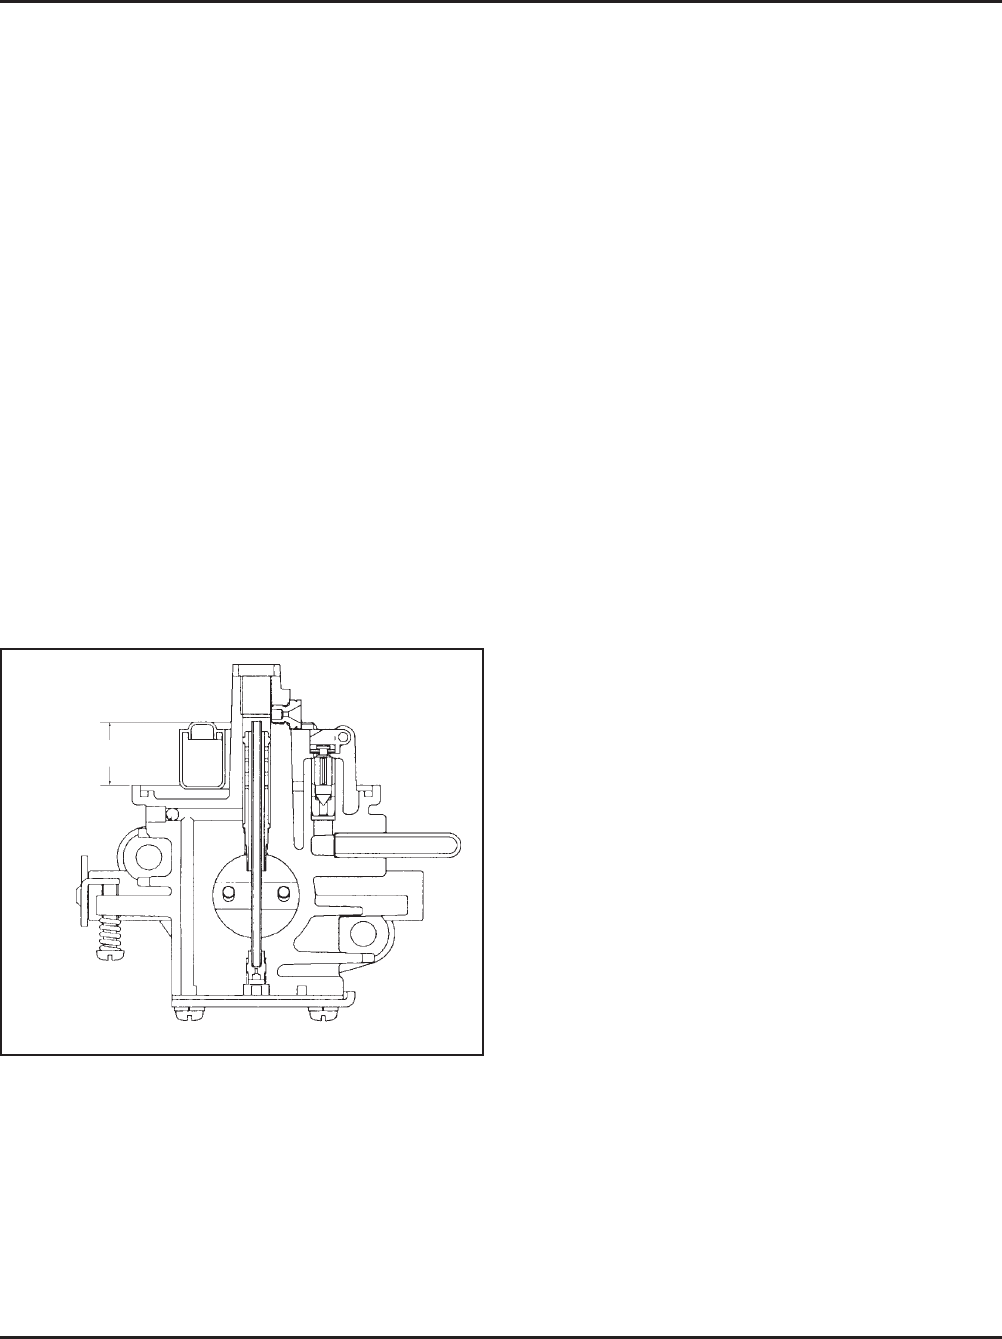
16.5 mm
(0.65 in.)
Turn
Carburetor
Upside Down
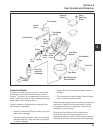
Figure 5-5. Proper Float Level.
6. Turn the carburetor upside down and check the
level of the float, as shown in Figure 5-5. With the
float needle valve fully seated, 16.5 mm (.65 in.)
should be measured from the body to the float as
indicated. Don’t attempt to adjust by bending the
tab. Install a new float if level is wrong.