


11.5
Section 11
Reassembly
11
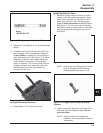
Determining Camshaft End Play
1. Install the shim removed during disassembly onto
the camshaft.
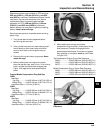
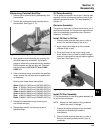
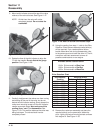
2. Position the camshaft end play checking tool on
the camshaft. See Figure 11-12.
Figure 11-12. Checking Camshaft End Play.
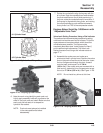
3. Apply pressure on the end play tool, pushing the
camshaft toward the crankshaft. Use a feeler
gauge to measure the camshaft end play between
the shim spacer and the end play tool. Camshaft
end play should be 0.076/0.127 mm (0.003/
0.005 in.).
4. If the camshaft end play is not within the specified
range, remove the end play tool and replace shim
as necessary.
Several color coded shims are available.
White: 0.69215/0.73025 mm (0.02725/0.02875 in.)
Blue: 0.74295/0.78105 mm (0.02925/0.03075 in.)
Red: 0.79375/0.83185 mm (0.03125/0.03275 in.)
Yellow:0.84455/0.88265 mm (0.03325/0.03475 in.)
Green:0.89535/0.99345 mm (0.03525/0.03675 in.)
Gray: 0.94615/0.98425 mm (0.03725/0.03875 in.)
Black: 0.99695/1.03505 mm (0.03925/0.04075 in.)
5. Reinstall the camshaft end play checking tool
and recheck end play.
6. Repeat steps 4 and 5 until end play is within
specified range.
Oil Pump Assembly
The oil pump is mounted in the oil pan. If service was
required, and the oil pump was removed, refer to the
assembly procedures under ‘‘Oil Pump Assembly’’ in
Section 10.
Governor Assembly
The governor assembly is located inside the oil pan. If
service was required, and the governor was removed,
refer to the assembly procedures under ‘‘Governor
Assembly’’ in Section 10.
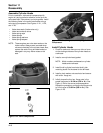
Install Oil Seal in Oil Pan
1. Check to make sure that there are no nicks or
burrs in the crankshaft bore of the oil pan.
2. Apply a light coat of engine oil to the outside
diameter of the oil seal.
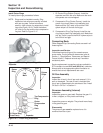
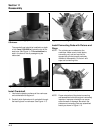
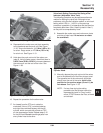
3. Drive the oil seal into the oil pan using a seal
driver. Make sure the oil seal is installed straight
and true in bore and that the tool bottoms against
the oil pan. See Figure 11-13.
Figure 11-13. Installing Oil Pan Seal.
Install Oil Pan Assembly
RTV silicone sealant is used as a gasket between the
oil pan and the crankcase.
NOTE: Always use fresh sealant. Using outdated
sealant can result in leakage.
1. Prepare the sealing surfaces of the crankcase
and oil pan as directed by the sealant
manufacturer.
2. Check to make sure that there are no nicks or
burrs on the sealing surfaces of the oil pan or
crankcase.