


39
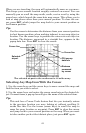
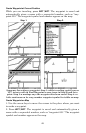
You can only change size, not switch layout, on the Map With Custom
Gauges - it's always two vertical windows. Press
EXIT to clear the four
flashing arrows.
3. To change the window size again or revert back to the original dis-
play, just follow the steps above. Most dual-window displays use half
the screen for each window by default. You can also use the Reset Op-
tions command to revert to the factory default. The following is a 12-
step quick reference for the most basic GPS operations.
Basic GPS Quick Reference
Start outdoors, with a clear view of the open sky. As you practice, try
navigating to a location at least a few blocks away. While you're learn-
ing, navigation in too small an area will constantly trigger arrival
alarms.
1. Connect the unit to electric power and the antenna module. Make
sure the MMC is in. See complete installation details beginning on
page 11.
2. To turn on the unit, press and release
PWR key.
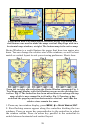
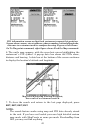
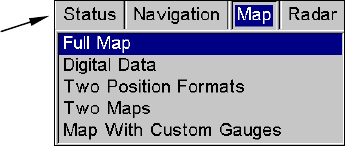
3. Opening screen displays map of North America at 4,000 mile zoom
range. Rotate through the four main Page screens (Status, Navigation,
Map and Radar) by pressing
PAGES|← or → to select Status|EXIT. This
will bring up the Satellites Status Page.
The four main Page screens are Status, Navigation, Map and Radar.
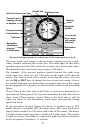
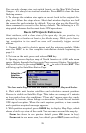
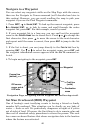
4. Wait while unit locates satellites and calculates current position.
Process is visible on Satellite Page. This takes an average of 1 minute
or less under clear sky conditions. "Clear sky" means open sky, unob-
structed by terrain, dense foliage or structures. Clouds do not restrict
GPS signal reception. When the unit acquires position, a tone sounds
and a position acquired message appears.
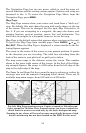
5. With position acquired, press
PAGES key to display Map Page, which
shows a bird's eye view of the earth. You can move around the map by:
Zoom in closer to see greater detail: press
ZIN (zoom in key.)
Zoom out to see more area, less detail: press
ZOUT (zoom out key.)
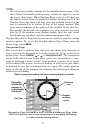
Select the
Satellites
Status page.