


2-7
2.6 Manual Acquisition
In auto acquisition mode (AUTO ACQ
ON), up to 20 targets can be manually
acquired in addition to 20 auto acquired
targets. When auto acquisition is disabled
(AUTO ACQ OFF), up to 40 targets can
be manually acquired and automatically
tracked.
To manually acquire a target:
1. Place the cursor (+) on a target of in-
terest by operating the trackball.
2. Press the ACQ key on the control
panel. The selected plot symbol is
marked at the cursor position.
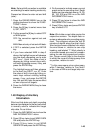
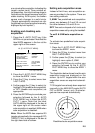
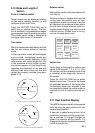
Note that the plot symbol is drawn by bro-
ken lines during the initial tracking stage.
A vector appears in about one minute af-
ter acquisition indicating the target's mo-
tion trend. If the target is consistently
detected for three minutes, the plot sym-
bol changes to a solid mark. If acquisition
fails, the target plot symbol blinks and dis-
appears shortly.
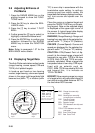
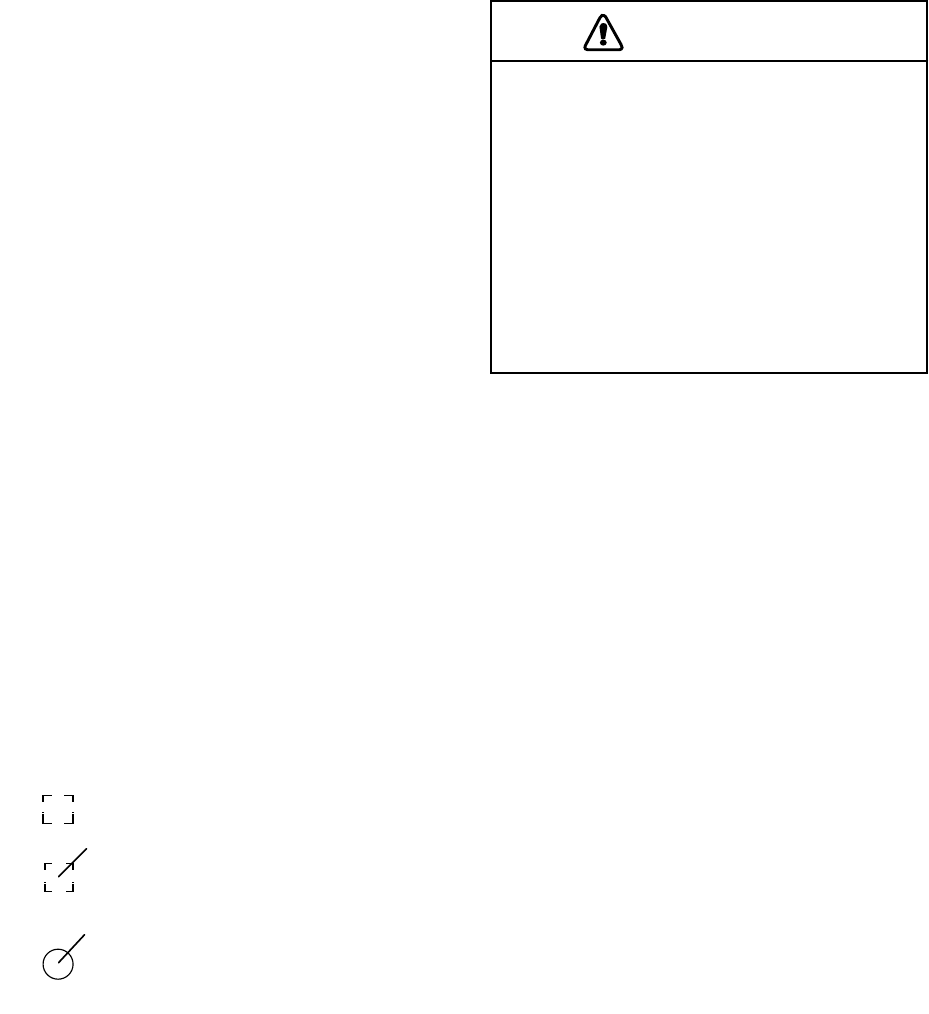
(a) Immediately after acquisition—
Plot symbol shown in broken lines.
(b) 20 scans after acquisition—
Vector appears to show a trend of
movement.
(c) 60 scans after acquisition—
Plot symbol shown in solid lines
indicating stable tracking.
Notes:
1) For successful acquisition, the target
to be acquired should be within 0.1 to
32 nm from own ship and not obscured
by sea or rain clutter.
2) When you have acquired 40 targets
manually, the message MAN TARGET
FULL is displayed at the screen bot-
tom. Cancel tracking of non-threaten-
ing targets if you wish to acquire
additional targets manually.
(See"T erminating tracking of acquired
targets" on page 2-6.)
CAUTION
Target Swap
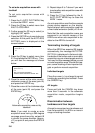
When a tracked target nears another
tracked target, the targets may be
"swapped." When two targets acquired
either auomatically or manually come
close to each other, one of the two may
become a "lost target." Should this happen
manual re-acquisition of the "lost target"
may be required after the two targets have
separated.
2.7 Changing Plot Symbol
Size
Press a desired plot symbol key, and the
symbol is enlarged for about 7 seconds.
You may also choose plot symbol size.
To choose a large or standard size for all
plot symbols:
1. Press the E, AUTO PLOT MENU key
on the plotting keypad followed by the
keys [0] to show the ARPA 2 menu.
2. Press the [3] key to select 3MARK
SIZE.
3. Further press the [3] key to select (or
highlight) STANDARD or LARGE as
appropriate.
4. Press the ENTER key to conclude your
selection followed by the E, AUTO
PLOT MENU key to close the ARPA 2
menu.