


2-5
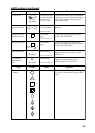
one minute after acquisition indicating the
target's motion trend. Three minutes af-
ter acquisition, the initial tracking stage is
finished and the target becomes ready for
stable tracking. At this point, the broken
square mark changes to a solid circle.
(Targets automatically acquired are dis-
tinguished from those acquired manually,
displayed by bold symbol.)
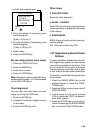
Enabling and disabling auto
acquisition
1. Press the E, AUTO PLOT key if the
ARPA is not yet activated. Note that the
label ARPA appears in the box at the
upper-right on the screen.
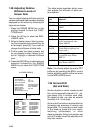
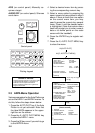
Hit [E, AUTO PLOT MENU].
1 AUTO ACQ
2 AUTO ACQ AREA
3 GUARD RING
4 GUARD RING SET
5
6 CPA, TCPA SET
7 HISTORY POINTS
8 HISTORY INTERVAL
0 [ARPA 2]
OFF/ON
6 NM/SET
OFF/ON
CPA 00.0NM
TCPA 00.0MIN
5/10/20*
30S/1/3/3/6MIN
*5/10 only on IMO-type
[ARPA1]
2. Press the E, AUTO PLOT MENU key
to show the ARPA 1 menu.
3. Press the [1] key to select menu item
1AUT O ACQ.
4. Further press the [1] key to select (or
highlight) ON (enable auto acquisition)
or OFF (disable auto acquisition) as
appropriate.
5. Press the ENTER key to conclude your
selection followed by the E, AUTO
PLOT MENU key to close the AUTO
PLOT 1 menu. Note that the label
AUTO+MAN is displayed in the box at
the upper-right on the screen when
auto acquisition is enabled; MAN when
auto acquisition is disabled.
Note: When the ARPA has acquired 20
targets automatically, the message AUTO
TARGET FULL is displayed in the box at
the right-hand side of screen.
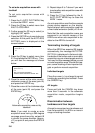
Setting auto acquisition areas
Instead of limit lines, auto acquisition ar-
eas are provided in the system. There are
two setting methods:
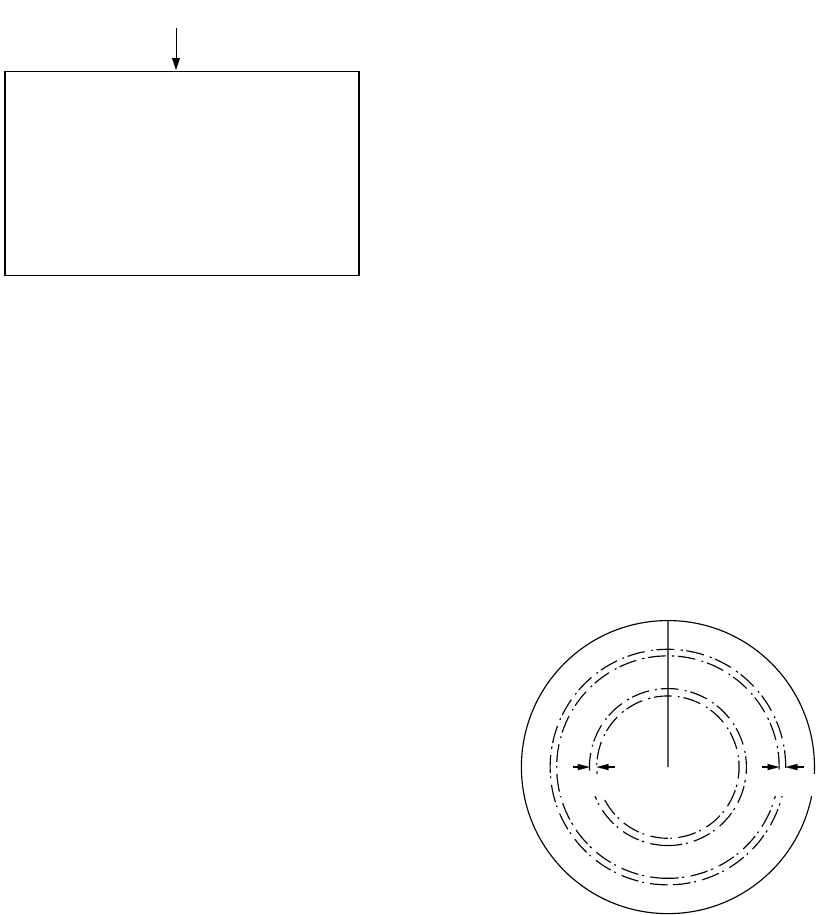
3, 6NM: Two predefined auto acquisition
areas; one between 3.0 and 3.5 nm and
the other between 5.5 and 6.0 nm.
SET: Two sector-shaped or full-circle auto
acquisition areas set by using the trackball.
To set 3 & 6 NM auto acquisition ar-
eas
To activate two predefined auto acquisi-
tion areas:
1. Press the E, AUTO PLOT MENU key
to show the ARPA 1 menu.
2. Press the [2] key to select menu item
2AUT O ACQ AREA.
3. Further press the [2] key to select (or
highlight) menu option 3, 6NM.
4. Press the ENTER key to confirm your
selection followed by the E, AUTO
PLOT MENU key to close the ARPA 1
menu.
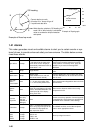
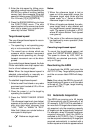
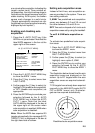
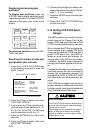
The illustration below shows how the auto
acquisition areas are displayed on the
screen. Up to 20* targets within the auto
acquisition areas are acquired automati-
cally.
*If 30 targets have already been acquired
manually in the MAN ACQ mode (AUTO
OFF on ARPA 1 menu), only 10 more tar-
gets can be acquired automatically.
5.5-6 nm3-3.5 nm
Predefined auto acquisition areas